Read reviews of Top 3 Best Hosting Companies and get the best web hosting
deals!

Learn C the Hard Way is Missing Windows Setup Instructions
A couple of readers who were inspired by my previous post, C, the Programming Language: Still Popular After All These Years, decided to give Zed Shaw’s free book Learn C the Hard Way a try. They ran into this roadblock in Exercise 0, which covers setting up your machine to do C programming:
1.3 Windows
For Windows users I’ll show you how to get a basic Ubuntu Linux system up and running in a virtual machine so that you can still do all of my exercises, but avoid all the painful Windows installation problems.
… have to figure this one out.
Learn C the Hard Way is a a work in progress, so it’s not surprising that parts of it are incomplete. That being said, it’s an amazing working in progress spanning 55 chapters, 49 of which appear to be complete. It starts your C programming journey with “Hello, world!” and then takes you to all sorts of places, including pointers, rolling your own simple prototype-based object system, Zed’s handy-dandy debug macros, Duff’s device, grand tours of data structures and debugging tools and more. Given the amount of ground that the book covers, it’s very likely that Zed put a higher priority on those parts that covered C programming in general rather than dealing with platform-specific issues. Luckily, I can help.
For those of you who are Windows users who’d like to do the exercises in Learn C the Hard Way, this walkthrough is for you. In it, I’ll cover the process of using the Windows Installer for Ubuntu Desktop, also known as Wubi (short for “Windows UBuntu Installer”). With it, you can install Ubuntu Linux on your Windows Vista, Windows 7 or Windows 8 machine and easily switch between Windows and Linux, without having to fool around with disk partitioning software or doing anything more complicated than making a couple of selections in an installer program.
Using Windows Installer for Ubuntu Desktop
You can get the installer from the Windows Installer for Ubuntu Desktop page, pictured below:

When you run the installer, you’ll be presented with the window below:

All the installer really needs to proceed is for you to provide a username and password for an administrator-level account which you’ll use to log in.
The installer automatically chooses the amount of disk space to allocate to Ubuntu, but you can change this value. I decided to be generous and give Ubuntu the most space that the installer will set aside for Ubuntu, 30GB. This may seem tiny, but the resulting Ubuntu installation will be able to access not only its files, but the files in Windows’ filesystem. Unfortunately, the reverse does not apply: you won’t be able to access files in Ubuntu’s filesystem while running Windows.
You also have the choice of desktop environment. The options are:
- Ubuntu (the default): This flavour of Ubuntu uses the Gnome desktop environment with the Unity shell interface. If you’re new to Linux (or haven’t used it in a while), start with this.
- Kubuntu: This flavour of Ubuntu uses the KDE desktop environment.
- Xubuntu: This flavour of Ubuntu uses the Xfce desktop environment.
- Mythbuntu: This flavour of Ubuntu is meant for setting up a standalone MythTV-based PVR system.
Once you’ve provided a username and password and you’re satisfied with your choices (or the defaults), click the Install button. The installation process will begin and you’ll see a window showing the installer’s progress as it downloads files, as shown below:

Once the installer has downloaded all the files it needs, it will start expanding them. The installer window should look something like this:

Once the installer has finished expanding the files it downloaded, you’ll see the Completing the Ubuntu Setup message (pictured below), which notifies you that you need to reboot your computer to complete the installation process. You’ll be given the option of rebooting immediately or doing it manually later:

When you reboot your computer, the Ubuntu installer will go through its final steps. You’ll see a screen that looks like this:

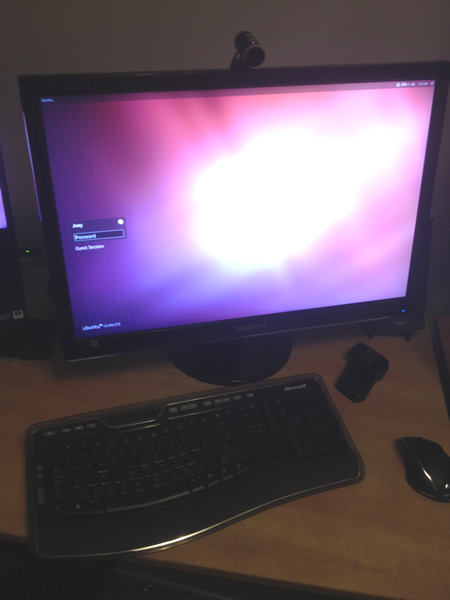
Once the installation is complete, you’ll be taken to the login screen. The username you provided should be automatically selected, so all you have to do is enter the corresponding password, which you also provided on the installer’s first screen.

Once you log in, you’ll be in your new Linux environment.
You’ll have one more step before you can start the exercises in Learn C the Hard Way: installing the required development tools. You can do this by firing up a command line and installing them with apt-get.
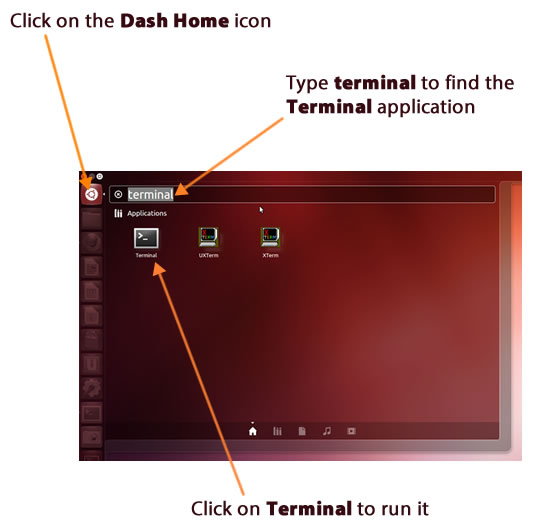
If you’re new to Ubuntu or have been using an older version, it may not be obvious how to start an application that isn’t in the Launcher (the taskbar/dock-like collection of icons on the left side of the window). The Dash Home icon is similar to the Start menu in Windows 7 and earlier, and you can use it to open a terminal window as shown in the diagram below:

Once you open a window, enter this at the command line:
sudo apt-get install build-essential
You’ll be prompted to enter your password, after which the required developer tools will be installed. You can now start the exercises in Learn C the Hard Way.
When You Restart Your Computer
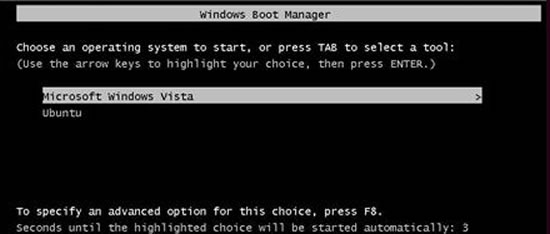
The next time you restart your computer, you’ll be presented with a menu giving you the option of booting into Windows or Linux. If your OS is Windows 7 or earlier, the menu will look like this:

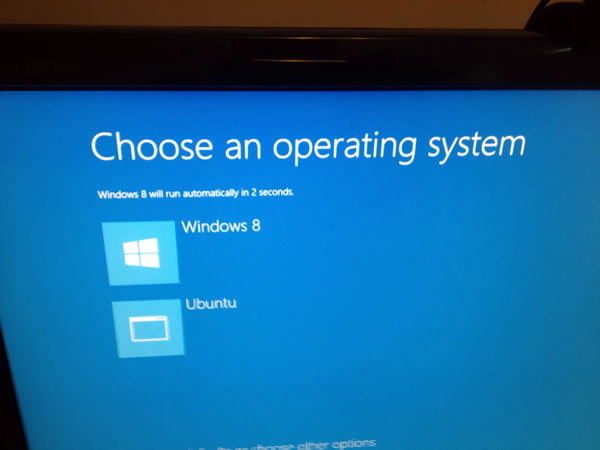
If you’re running Windows 8, the look will be more like the interface formerly known as Metro:

Have fun learning C the hard way!
4 replies on “The Easiest Way to Get Ubuntu Linux on Your Windows Computer (So You Can Learn C the Hard Way)”
Personally I would never trust Windows to coexist peacefully with another OS in a dual-boot configuration, much less Windows 8. I would recommend loading up Ubuntu in a VM (or my preference, to have Ubuntu as your main OS and load Windows in a VM). Virtualbox (http://virtualbox.org) is free and works very well for this purpose. No need to boot out of your main OS to get the second one running.
[…] The Easiest Way to Get Ubuntu Linux on Your Windows Computer (So You Can Learn C the Hard Way) (Global Nerdy) […]
I agree with Brent. I use an Ubuntu VM to run my code but I edit it on OSX through a samba share. This way, I don’t need to spend an hour making Ubuntu all pretty and stuff.
Thank you! This was so helpful!