Last night, the Tampa iOS Meetup folks gathered to learn how to code an iPhone/iPad Pomodoro Timer in Swift, a timer that helps you use the Pomodoro technique, an ingeniously simple lifehack that many people have used to help them power past distraction, stay focused on their work, and be incredibly productive.
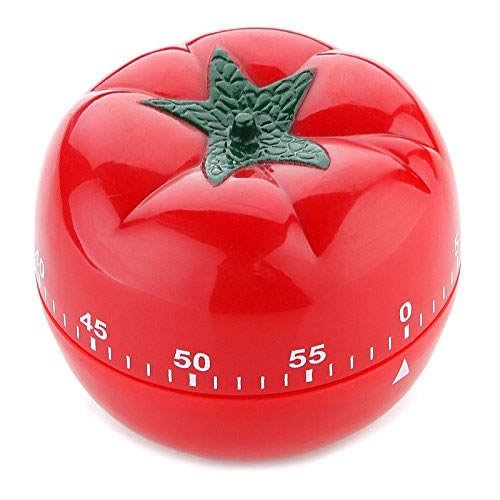
Pomodoro is the Italian word for “tomato” and refers to the tomato-shaped kitchen timer that the technique’s inventor, Francesco Cirillo, used in developing the technique. The technique itself is pretty simple:
- Pick a task that you want to tackle.
- Set a timer for 25 minutes. Because Cirillo used a tomato-shaped kitchen timer, he called this 25-minute interval a “pomodoro”.
- Work on the task — and nothing but that task — until the timer rings.
- After the timer rings, put a checkmark on a piece of paper.
- If you have fewer than four checkmarks, take a five-minute break, then start another pomodoro.
- If you have four checkmarks, take a longer break — typically 15 to 30 minutes — and reset your checkmark count back to zero. Then start a new pomodoro.
By breaking a large task or series of tasks into short, focused intervals, the Pomodoro Technique aims to have your brain to work in short sprints — which it’s evolved to do — and take regular breaks to help it recharge. The intended result is to ensure consistent productivity, motivation, and creativity.
The app we built last night is a timer for use with the Pomodoro technique that keeps track of pomodori (that’s the plural of pomodoro) and breaks.
The heart of the app
The key to writing an app like the Pomodoro timer is the Timer class. It can be used to instantiate timer objects, which:
- Wait until a certain interval of time has passed, and when that happens,
- Sends a message to a target object.
In the Pomodoro Timer app, we create a Timer object that fires every second. When it fires, it calls a method that:
- Reduces the count of time remaining by one second
- Updates a “time remaining” display
- Checks to see if time has run out on the current interval and takes the appropriate actions
Our app has an instance variable called myTimer. To start a timer, we use this method:
myTimer = Timer.scheduledTimer(timeInterval: 1,
                               target: self,
                               selector: #selector(timerTick),
                               userInfo: nil,
                               repeats: true)
Here’s a quick explanation of the scheduledTimer method’s parameters:
timeInterval: The number of seconds to wait before the timer fires. We want the timer to fire every second, so we set this parameter to 1.target: The object to send the message to when the timer fires. We want the message to be sent to the same object that this call lives in, so we set this parameter to self.selector: The message we want to send to the target object when the timer fires. We want to call the timerTick method every time the timer fires, so we do this by setting the parameter to #selector(timerTick), which says “send a call to the timerTick method”.userInfo: This is used to pass any additional information that might be needed when the timer fires. In this case, we don’t need any such additional information, so we set this parameter to nil.- repeats: If
true, the timer is a repeating timer that fires once every timeInterval seconds. If false, the timer waits timeInterval seconds, fires once, and then stops. We want the timer in our app to be a repeating one, so we set this parameter to true.
Stopping a timer is pretty simple. If the timer instance variable is myTimer, here’s how you stop it:
myTimer.invalidate()
A couple of handy utility methods
The app keeps track of time by counting down from a given total number of seconds:
- During a pomodoro, it starts a countdown timer of 25 minutes, which is 1500 seconds.
- During a rest break, it starts a countdown timer of 5 minutes, which is 300 seconds.
This works just fine for internal code, but people don’t tell time in terms of hundreds of seconds, but in terms of hours, minutes, and seconds (we have the Babylonians to thank for this). So we use a method that converts a given number of seconds into minutes and seconds…
// Given a number of seconds, return it as (minutes, seconds).
func minutesAndSeconds(from seconds: Int) -> (Int, Int) {
  return (seconds / 60, seconds % 60)
}
We also need a method to display seconds (and optionally, minutes) as a two-digit number with a leading zero. That way, the app displays “one minute and three seconds” as 01:03 (or 1:03) and not 1:3. Here’s the method:
// Given a number, return it as a string of 2 digits,
// with a leading zero if necessary.
func formatMinuteOrSecond(_ number: Int) -> String {
  return String(format: "%02d", number)
}
…and we use both these methods like so:
let (minutes, seconds) = minutesAndSeconds(from: timeRemaining)
minutesLabel.text = formatMinuteOrSecond(minutes)
secondsLabel.text = formatMinuteOrSecond(seconds)
The code
This was the simplest app we’ll cover this year, and the code for the entire app lives in the view controller. Here it is:
import UIKit

class ViewController: UIViewController {

  // This app is a timer for use with the Pomodoro Technique.
  // (See https://en.wikipedia.org/wiki/Pomodoro_Technique for details.)

  // Intervals
  // ---------
  // The Pomodoro technique has two types of time intervals:
  //   1. The pomodoro, where you focus on a specific task for 25 minutes, and
  //   2. A rest break of 5 minutes.
  // These variables make it possible to tell what interval we're currently on,
  // and whether it’s a pomodoro or a rest break.

  enum IntervalType {
    case Pomodoro
    case RestBreak
  }
  let intervals: [IntervalType] = [.Pomodoro,
                                   .RestBreak,
                                   .Pomodoro,
                                   .RestBreak,
                                   .Pomodoro,
                                   .RestBreak,
                                   .Pomodoro]
  var currentInterval = 0

  // Interval lengths and time remaining
  // -----------------------------------
  // For testing purposes, I made the lengths of the pomodoro and rest break intervals
  // 20 seconds and 5 seconds, respectively. For the actual versions, use the
  // commented lengths.
  let pomodoroIntervalTime = 20 // Actual length: 25 * 60
  let restBreakIntervalTime = 5 // Actual length:  5 * 60
  var timeRemaining = 0

  // Timer
  // -----
  // The heart of the app.
  var myTimer = Timer()

  // UI controls
  // -----------
  @IBOutlet weak var minutesLabel: UILabel!
  @IBOutlet weak var secondsLabel: UILabel!
  @IBOutlet weak var intervalLabel: UILabel!
  @IBOutlet var tomatoIcons: [UIImageView]!
  @IBOutlet weak var startPauseButton: UIButton!
  @IBOutlet weak var resetButton: UIButton!


  override func viewDidLoad() {
    super.viewDidLoad()

    resetToBeginning()
  }

  override func didReceiveMemoryWarning() {
    super.didReceiveMemoryWarning()
    // Dispose of any resources that can be recreated.
  }

  func resetToBeginning() {
    currentInterval = 0
    setTomatoMeter(to: 1)
    intervalLabel.text = "Ready to work!"
    startPauseButton.setTitle("Start", for: .normal)
    resetButton.isEnabled = false
    timeRemaining = pomodoroIntervalTime
    updateDisplay()
  }

  @IBAction func startPauseButtonPressed(_ sender: UIButton) {
    if myTimer.isValid {
      // If the timer is currently running:
      //   1. Change the button’s title to “Resume”
      //   2. Enable the rest button
      //   3. Pause the timer
      startPauseButton.setTitle("Resume", for: .normal)
      resetButton.isEnabled = true
      pauseTimer()
    } else {
      // If the timer is currently stopped:
      //   1. Change the button’s title to “Pause”
      //   2. Disable the Reset button
      startPauseButton.setTitle("Pause", for: .normal)
      resetButton.isEnabled = false
      if currentInterval == 0 && timeRemaining == pomodoroIntervalTime {
        // If we’re currently at the very start of a set of pomodori (plural for pomodoro),
        // begin the cycle of intervals.
        startNextInterval()
      } else {
        // If we're in the middle of a set of pomodori,
        // simply resume the timer.
        startTimer()
      }
    }
  }

  @IBAction func resetButtonPressed(_ sender: UIButton) {
    if myTimer.isValid {
      // The timer shouldn’t be running if the Reset button is enabled,
      // but let’s make sure it’s stopped, just in case.
      myTimer.invalidate()
    }
    resetToBeginning()
  }

  func startNextInterval() {
    if currentInterval < intervals.count {
      // If we haven’t done all the intervals yet,
      // do the next one.
      if intervals[currentInterval] == .Pomodoro {
        // Pomodoro interval
        timeRemaining = pomodoroIntervalTime
        intervalLabel.text = "Pomodoro!"
        let tomatoes = (currentInterval + 2) / 2
        print("\(tomatoes) tomatoes")
        setTomatoMeter(to: tomatoes)
      } else {
        // Rest break interval
        timeRemaining = restBreakIntervalTime
        intervalLabel.text = "Rest break."
      }
      updateDisplay()
      startTimer()
      currentInterval += 1
    } else {
      // If we’ve done all the intervals,
      // reset the app.
      resetToBeginning()
    }
  }

  func updateDisplay() {
    let (minutes, seconds) = minutesAndSeconds(from: timeRemaining)
    minutesLabel.text = formatMinuteOrSecond(minutes)
    secondsLabel.text = formatMinuteOrSecond(seconds)
  }

  // Start the timer, which will call the timerTick() method every second.
  func startTimer() {
    myTimer = Timer.scheduledTimer(timeInterval: 1,
                                   target: self,
                                   selector: #selector(timerTick),
                                   userInfo: nil,
                                   repeats: true)
  }

  func timerTick() {
    if timeRemaining > 0 {
      timeRemaining -= 1
      print("time: \(timeRemaining)")
      updateDisplay()
    } else {
      myTimer.invalidate()
      startNextInterval()
    }
  }

  func pauseTimer() {
    myTimer.invalidate()
    intervalLabel.text = "Paused."
  }

  func setTomatoMeter(to tomatoes: Int) {
    var currentTomato = 1
    for tomatoIcon in tomatoIcons {
      tomatoIcon.alpha = currentTomato <= tomatoes ? 1.0 : 0.2
      currentTomato += 1
    }
  }

  // Given a number of seconds, return it as (minutes, seconds).
  func minutesAndSeconds(from seconds: Int) -> (Int, Int) {
    return (seconds / 60, seconds % 60)
  }

  // Given a number, return it as a string of 2 digits,
  // with a leading zero if necessary.
  func formatMinuteOrSecond(_ number: Int) -> String {
    return String(format: "%02d", number)
  }

}
Click here to download the completed project.
So what’s Tampa iOS Meetup, anyway?

Tampa iOS Meetup is the Tampa Bay area’s meetup for beginning programmers and developers new to iOS development. We take a hands-on approach because it’s our answer to a question that I’ve been asked again and again, and it goes something like this:
“I’ve been studying iOS development for some time, and I’m still having a problem writing apps. I know how to program specific features in iOS, but I don’t know how to turn a bunch of features into an app.”
It’s one thing to go through tutorials that show you how to program a specific feature. It’s a completely different thing to take the knowledge from those tutorials and then write an app. My goal for Tampa iOS Meetup in 2017 is to show you how to make that leap by walking you through the process of making apps.
If you’re in the Tampa area and you’ve always wanted to learn iOS development but needed some help getting started, Tampa iOS Meetup is for you! It’s a regular gathering aimed at people new to iOS development or software development in general where we cover all sorts of programming topics as we build applications together in a casual, fun, hands-on setting. Find out more at the Tampa iOS Meetup page.