A quick recap
A couple of weeks ago, I posted an article that showed how to program an iOS text field that takes only numeric input or specific characters with a maximum length in Swift.
While that article focused on constraining what the user could enter into a text field, its example app has a couple of UI features that you’ll find in many apps:
- It dismisses the keyboard when the user taps the Return key, and
- it dismisses the keyboard when the user taps on the background.
Last week, I covered implementing the first of these two features in the article titled How to dismiss the iOS keyboard when the user taps the “Return” key in Swift. The one major takeaway from that article was that the way to dismiss the iOS keyboard after the user is editing a text field is to make the text field resign its role as first responder.
In that article, we dismissed the keyboard when the user tapped the Return key by doing the following:
- We made the view controller adopt the
UITextFieldDelegateprotocol, - We made that same view controller the delegate for all text fields contained within its view, and
- We implemented the delegate method
textFieldShouldReturn(textField: UITextField), which is called when the Return key is tapped, and provides us a reference to the text field that was being edited when user tapped it:
// Dismiss the keyboard when the user taps the "Return" key or its equivalent
// while editing a text field.
func textFieldShouldReturn(textField: UITextField) -> Bool {
  textField.resignFirstResponder()
  return true;
}
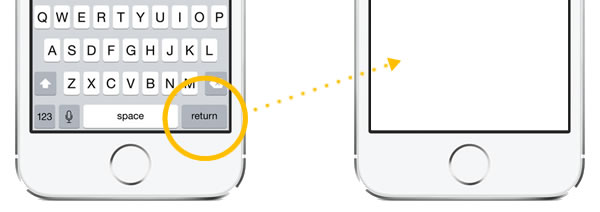
In this article, we’ll look at how to dismiss the keyboard when the user touches the view in the background while editing a text field.
Dismissing the keyboard when you don’t know which text field is the first responder, but know which view the text field is in
The textFieldShouldReturn(textField: UITextField) method can be implemented to resign the first responder for a specific text field because a reference to that specific text field is passed to it. Unfortunately, we don’t get that information when the user taps on the view, and there’s no method or property in UIView that tells us which of the text field contained within it is the first responder.
In the Apress book Beginning iPhone Development with Swift, they take the “brute force” approach and implement a method that looks like this:
@IBAction func userTappedBackground(sender: AnyObject) {
  firstTextField.resignFirstResponder()
  secondTextField.resignFirstResponder()

  // ...more of the same...

  lastTextField.resignFirstResponder()
}
It works, but you need to update the method whenever you add a text field to or remove a text field from the view.
A more flexible approach is to loop through the contents of the view’s subviews property (an array of AnyObject), calling the resignFirstResponder() method for any text fields encountered along the way. I’ve seen code similar to this:
@IBAction func userTappedBackground(sender: AnyObject) {
  for view in self.view.subviews as! [UIView] {
    if let textField = view as? UITextField {
      textField.resignFirstResponder()
    }
  }
}
It works — as long as all the text fields in your view are immediate subviews of the view. If your view hierarchy runs deeper, you’ll have to write more code to deal with subviews or subviews. I’ll leave that as an exercise for the reader.
It turns out that there’s a simple and effective way to dismiss the keyboard for a view without knowing which text field is the first responder: call the view’s endEditing(_:) method. This method scours the view’s subview hierarchy, find the text field that is currently the first responder and asks it to resign that status. If its parameter is set to true, it forgoes the pleasantry of asking the text field to resign as first responder and simply makes it resign. If we use this method, our userTappedBackground method becomes very short and sweet:
@IBAction func userTappedBackground(sender: AnyObject) {
  view.endEditing(true)
}
Now that we have a method that dismisses the keyboard no matter which text field is the first responder, we need to hook it up to an event that gets fired whenever the user taps on the view.
Responding to taps on the view
These next steps will show you how to use Interface Builder to change a view so that it can respond to events, and then connect that view to the userTappedBackground method we just created.
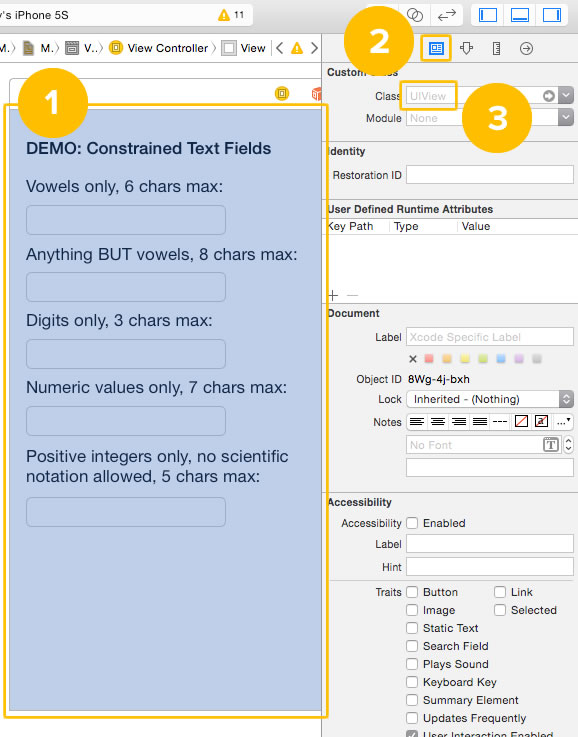
1. Go to the storyboard and select the view.
2. Switch to the Identity Inspector. You can do this by either:
- Clicking on the Identity Inspector icon (shown beside the number 2 in the screenshot above; I think the icon is meant to look like photo ID) in the Inspector Bar at the top of Xcode’s Utilities Area, or
- Pressing command-option-3 on your keyboard.
3. In the Identity Inspector’s Custom Class section, you’ll find the Class drop-down menu. It indicates the underlying class of any object in the storyboard, and it also lets you change it. If you have the view selected, the Class drop-down menu will display UIView. We’ll change this in a moment, but let’s take a quick detour first.
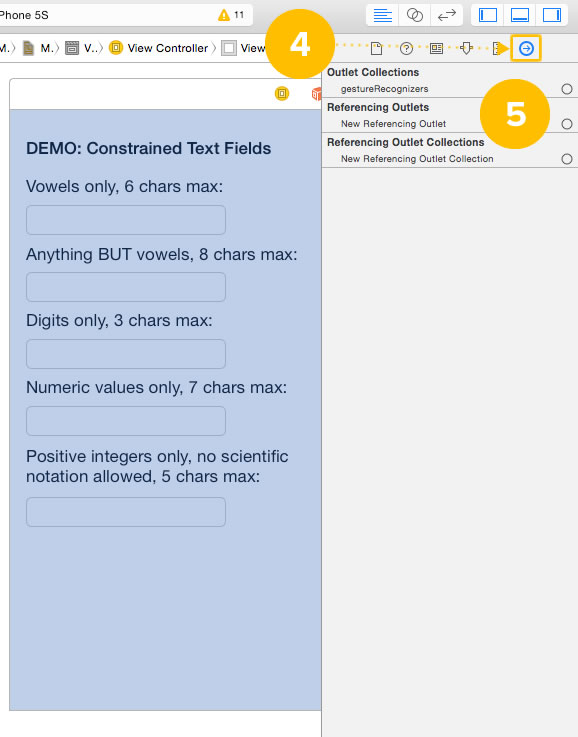
4. With the view still selected, switch to the Connections Inspector. You can do this by either:
- Clicking on the Connections Inspector icon (indicated by the number 4 in the screenshot above) in the Inspector Bar at the top of Xcode’s Utilities Area, or
- Pressing command-option-6 on your keyboard.
5. Take a look at the available connections for the view. You can make a couple of different of kinds of connections, but none of them are for events. We need to make event connections available to the view, which we’ll do in the next few steps.
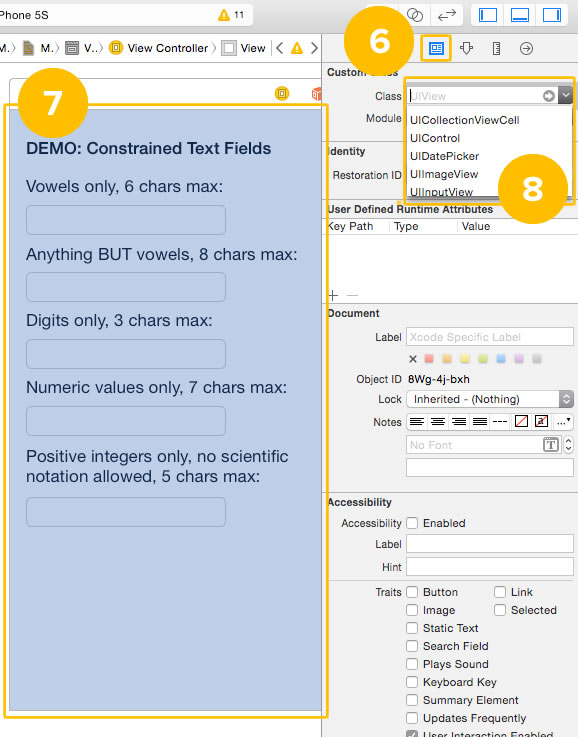
6. Switch back to the Identity Inspector.
7. Make sure that the view is still selected.
8. Change the value in the Class drop-down from UIView to UIControl. This changes the view’s underlying class, as you may have guessed, from UIView to UIControl. We’ll see the effect of this change in a moment…
9. With the view still selected, switch to the Connections Inspector.
10. Make a note of the available connections for the view. Since the underlying class for the view is now UIControl, it has UIControl‘s connections available to it, which include events.
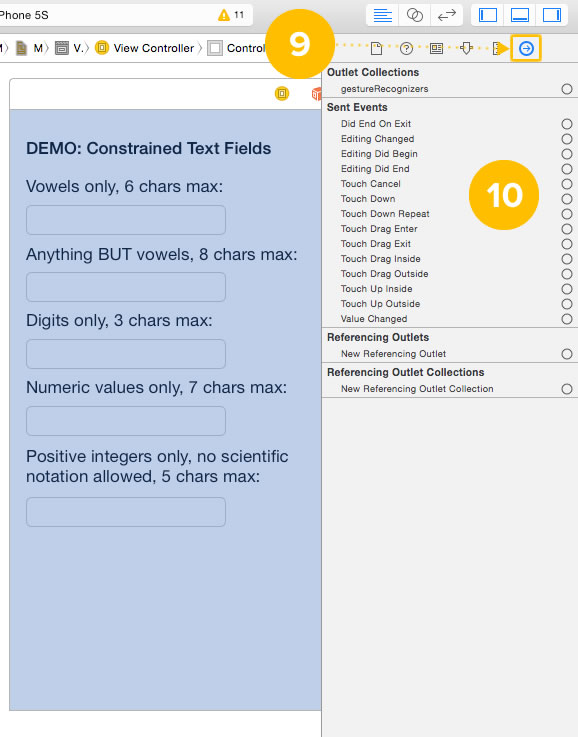
We want to dismiss the keyboard as soon as the view gets a Touch Down event. We use this event rather than Touch Up Inside (the one we typically use for buttons) because we want to dismiss the keyboard as soon as the user taps the view without first waiting for him/her to release or move his/her finger.
11. Drag from the Touch Down event to the View Controller icon above the view.
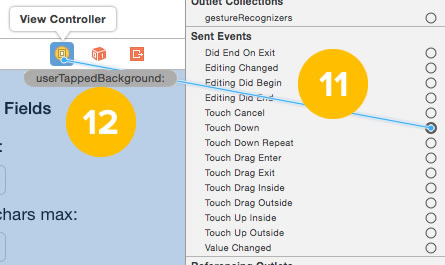
12. A list of action methods in the view controller (any method prefaced with @IBAction is an action method) will appear. Select userTappedBackground:.
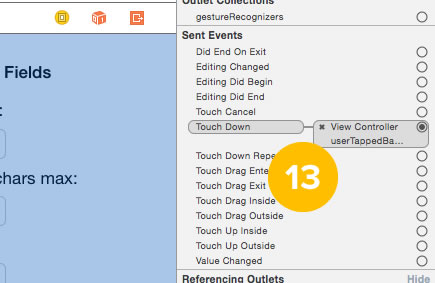
13. If you look at the Identity Inspector now, you’ll see that the Touch Down event is now connected to the view controller’s userTappedBackground method, and when you run the app, tapping on the view dismisses the keyboard.
Bonus: Dismissing the keyboard when you don’t even know which view the text field is in
There may come a time when you need to dismiss the keyboard from code that:
- doesn’t have a reference to the text field that’s currently the first responder and
- doesn’t even have a reference to the view that contains that text field.
In such a case, use this line of code:
UIApplication.sharedApplication().sendAction(
  "resignFirstResponder", to:nil, from:nil, forEvent:nil)
Here’s what happens in this line:
UIApplication.sharedApplication()gets a reference to the instance of the app itself.sendAction(_:to:from:forEvent:)sends an action message to a target object within the app. If the target (theto:parameter) isnil, the message —resignFirstResponderin this case — gets sent to whatever object in the app is currently the first responder.
My guess is that this approach is more computationally heavy that calling a view’s endEditing(_:) method, so use that if you have a reference to the view, and use the approach above when you don’t.
Resources
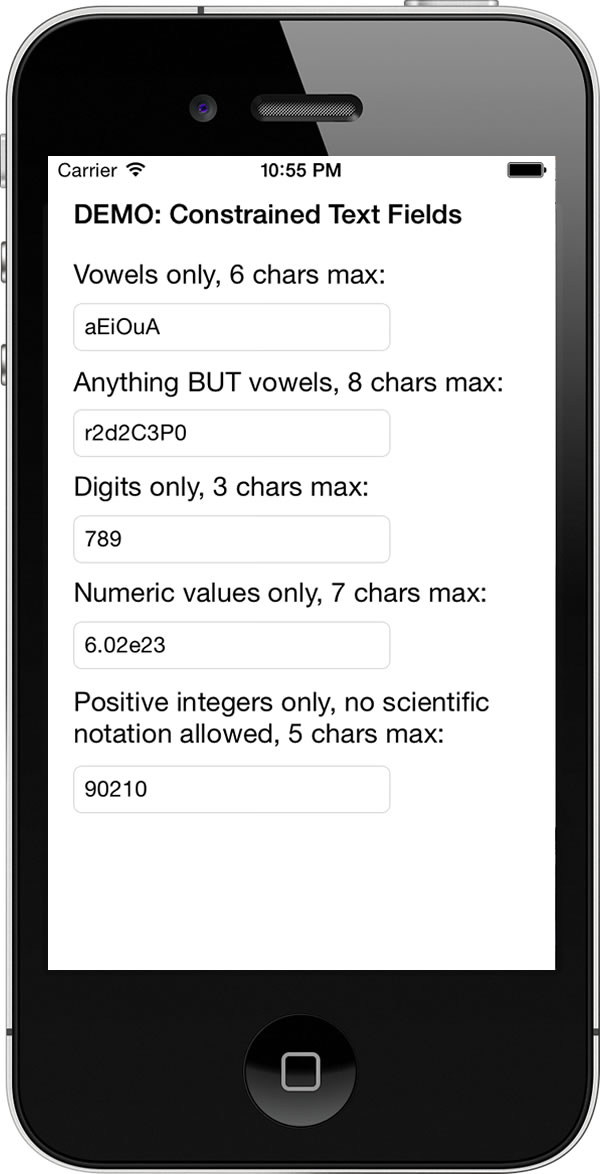
![]() You can see this code in action by downloading the zipped project files for the demo project, ConstrainedTextFieldDemo [83K Xcode project and associated files, zipped].
You can see this code in action by downloading the zipped project files for the demo project, ConstrainedTextFieldDemo [83K Xcode project and associated files, zipped].