What happened at the first Programmers of Portables meetup?
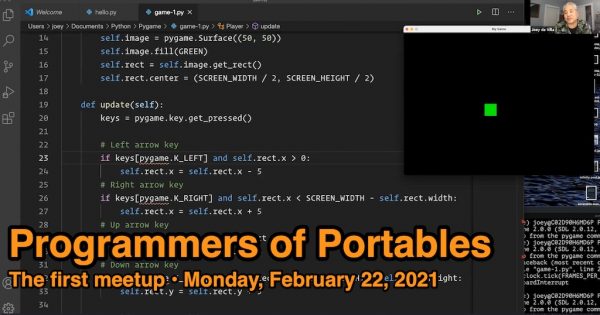
 The first Programmers of Portables meetup took place last night, and we made our first steps towards making our first videogame. We met over Zoom, where I shared my screen and led the group in a “code along with me” exercise as we started writing a simple videogame from scratch.
This article covers what we did last night, complete with the code that we wrote. If you were there, you can use this for review. If you weren’t, you should still be able to look at what we did and follow along.
This article is primarily a collection of the code we wrote and the recording of the session. In later articles, I’ll go over Pygame programming in more detail. In the meantime, if you’ve like to learn more about Pygame, here are a couple of resources:
- The Tutorials page on the Pygame wiki
- Real Python: PyGame: A Primer on Game Programming in Python
- Edureka: PyGame Tutorial – Game Development Using PyGame In Python
Prerequisites
The first part of the session was devoted to downloading and installing the prerequisites for writing videogames with Python.
A code editor (such as Visual Studio Code)

Any application that calls itself a code editor will do.
I tend to use Visual Studio Code these days, because I’ve already done my time using earlier versions of vim (in the late ’80s, I used a variant called ivi, short for “improved vi”) and Emacs (back when the joke name was “Eight megs and constant swapping”). VS Code is pretty much the same across all the platforms I use — macOS, Windows, Linux, and Raspberry Pi OS — and it feels like a present-day app, and not leftovers from the 1970s.
You can download Visual Studio Code here.
A distribution of Python 3 (such as Anaconda Python)
![]() We’re programming in Python (preferably Python 3.7 or later), so any reasonably recent Python distribution will do.
We’re programming in Python (preferably Python 3.7 or later), so any reasonably recent Python distribution will do.
I like the Anaconda Python distribution because iy includes a lot of useful libraries and other tools that you’ll need when using Python for things such as data science, and the experience is pretty much the same across macOS, Windows, and Linux.
You can download Anaconda Python here.
Pygame 2
 The final prerequisite is Pygame, a cross-platform set of packages that supports game development in Python. It’s been around for 20 years (its was first release in the fall of 2000), and it’s a fun, fantastic 2D game programming platform.
To install it, you’ll need to go to the command line:
- macOS and Linux users: Open a terminal and enter the command
pip install pygame - Windows users using Anaconda Python: Open the Start Menu, select the Anaconda Python folder, and run Anaconda Command Prompt, where you’ll enter the command
pip install pygame
The first version: A blank black screen
With the prerequisites gathered and installed on our computers, it was time to start working on the game. We worked on it in steps, each time producing an improved version of the game.
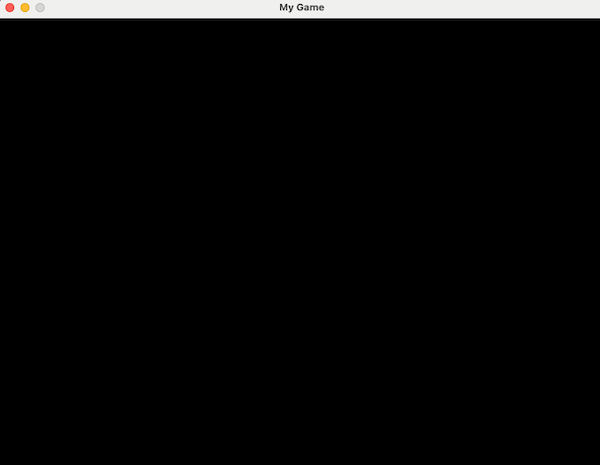
The first version of the game wasn’t terribly impressive, as it ended up being a blank black window that did nothing. Still, it was a working program, and the code we wrote would function as a framework on which we’d eventually build the rest of the game:
Here’s its code:
# The first version of the game:
# An 800-by-600 black window
# (Don’t worry; it gets better)

import pygame

# Constants
# =========

# Screen dimensions and refresh rate
SCREEN_WIDTH = 800
SCREEN_HEIGHT = 600
FRAMES_PER_SECOND = 60

# Colors
BLACK = (0, 0, 0)
GREEN = (0, 255, 0)


# Initialization
# ==============
pygame.init()
screen = pygame.display.set_mode((SCREEN_WIDTH, SCREEN_HEIGHT))
pygame.display.set_caption("My Game")
clock = pygame.time.Clock()


# Game loop
# =========
running = True

while running:
    # This method should be called once per frame.
    # It calculates the number of milliseconds since the last
    # call to clock.tick() in order to limit the game’s framerate
    # to a maximum of FRAMES_PER_SECOND.
    clock.tick(FRAMES_PER_SECOND)

    # Handle events
    for event in pygame.event.get():
        # Check to see if the user has closed the window
        # or hit control-c on the command line
        # (i.e. Has the user quit the program?)
        if event.type == pygame.QUIT:
            running = False

    # Draw game objects to the screen surface
    screen.fill(BLACK)

    # Update the screen with the contents of the screen surface
    pygame.display.flip()

# Exit the game
pygame.quit()
The second version: A rightward-moving green square
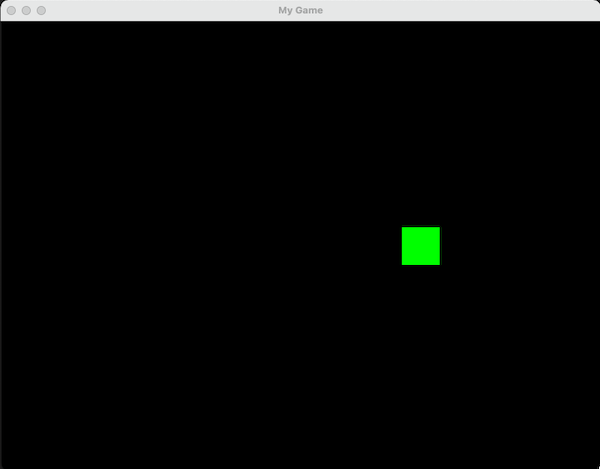
The second version of the game built upon the code from the first, and was slightly more impressive. It featured an actual image on the screen, complete with animation: a green square, travelling from left to right across the screen, and “wrapping around” back to the left side after it disappears from the right side of the screen.
Here’s its code:
# The second version of the game:
# An 800-by-600 black window,
# now with a rightward-moving green square!

import pygame

# Constants
# =========

# Screen dimensions and refresh rate
SCREEN_WIDTH = 800
SCREEN_HEIGHT = 600
FRAMES_PER_SECOND = 60

# Colors
BLACK = (0, 0, 0)
GREEN = (0, 255, 0)


# Sprites
# =======

class Player(pygame.sprite.Sprite):
    def __init__(self):
        pygame.sprite.Sprite.__init__(self)
        self.image = pygame.Surface((50, 50))
        self.image.fill(GREEN)
        self.rect = self.image.get_rect()
        self.rect.center = (SCREEN_WIDTH / 2, SCREEN_HEIGHT / 2)

    def update(self):
        self.rect.x = self.rect.x + 5
        if self.rect.left > SCREEN_WIDTH:
            self.rect.right = 0


# Initialization
# ==============

# Initialize screen and framerate
pygame.init()
screen = pygame.display.set_mode((SCREEN_WIDTH, SCREEN_HEIGHT))
pygame.display.set_caption("My Game")
clock = pygame.time.Clock()

# Create sprites and sprite groups
all_sprites = pygame.sprite.Group()
player = Player()
all_sprites.add(player)


# Game loop
# =========
running = True

while running:
    # This method should be called once per frame.
    # It calculates the number of milliseconds since the last
    # call to clock.tick() in order to limit the game’s framerate
    # to a maximum of FRAMES_PER_SECOND.
    clock.tick(FRAMES_PER_SECOND)

    # Handle events
    for event in pygame.event.get():
        # Check to see if the user has closed the window
        # or hit control-c on the command line
        # (i.e. Has the user quit the program?)
        if event.type == pygame.QUIT:
            running = False

    # Update the game state
    all_sprites.update()

    # Draw game objects to the screen surface
    screen.fill(BLACK)
    all_sprites.draw(screen)

    # Update the screen with the contents of the screen surface
    pygame.display.flip()

# Exit the game
pygame.quit()
The third version: The green square, now under user control!
![]()
The final version of the game was one where we made the green square interactive. Instead of continuously travelling from left to right on the screen, the square stays put until the user presses one of the arrow keys. When that happens, the square moves in the appropriate direction. The square is constrained so that it can’t go offscreen.
Here’s its code:
# The third version of the game:
# The green square, now under user control!

import pygame

# Constants
# =========

# Screen dimensions and refresh rate
SCREEN_WIDTH = 800
SCREEN_HEIGHT = 600
FRAMES_PER_SECOND = 60

# Colors
BLACK = (0, 0, 0)
GREEN = (0, 255, 0)


# Sprites
# =======

class Player(pygame.sprite.Sprite):
    def __init__(self):
        pygame.sprite.Sprite.__init__(self)
        self.image = pygame.Surface((50, 50))
        self.image.fill(GREEN)
        self.rect = self.image.get_rect()
        self.rect.center = (SCREEN_WIDTH / 2, SCREEN_HEIGHT / 2)

    def update(self):
        # Get the state of all the keys
        keys = pygame.key.get_pressed()

        # Check the retrieved state to see if any
        # arrow keys have been pressed
        # =======================================

        # Is the user pressing the left-arrow key,
        # and is the sprite’s left edge NOT flush
        # with the screen’s left edge?
        if keys[pygame.K_LEFT] and self.rect.x > 0:
            self.rect.x = self.rect.x - 5

        # Is the user pressing the right-arrow key,
        # and is the sprite’s right edge NOT FLUSH
        # with the screen’s right edge?
        if keys[pygame.K_RIGHT] and self.rect.x < SCREEN_WIDTH - self.rect.width:
            self.rect.x = self.rect.x + 5

        # Is the user pressing the up-arrow key,
        # and is the sprite’s top edge NOT FLUSH
        # with the screen’s top edge?
        if keys[pygame.K_UP] and self.rect.y > 0:
            self.rect.y = self.rect.y - 5

        # Is the user pressing the down-arrow key,
        # and is the sprite’s bottom edge NOT FLUSH
        # with the screen’s bottom edge?
        if keys[pygame.K_DOWN] and self.rect.y < SCREEN_HEIGHT - self.rect.height:
            self.rect.y = self.rect.y + 5


# Initialization
# ==============

# Initialize screen and framerate
pygame.init()
screen = pygame.display.set_mode((SCREEN_WIDTH, SCREEN_HEIGHT))
pygame.display.set_caption("My Game")
clock = pygame.time.Clock()

# Create sprites and sprite groups
all_sprites = pygame.sprite.Group()
player = Player()
all_sprites.add(player)


# Game loop
# =========
running = True

while running:
    # This method should be called once per frame.
    # It calculates the number of milliseconds since the last
    # call to clock.tick() in order to limit the game’s framerate
    # to a maximum of FRAMES_PER_SECOND.
    clock.tick(FRAMES_PER_SECOND)

    # Handle events
    for event in pygame.event.get():
        # Check to see if the user has closed the window
        # or hit control-c on the command line
        # (i.e. Has the user quit the program?)
        if event.type == pygame.QUIT:
            running = False

    # Update the game state
    all_sprites.update()

    # Draw game objects to the screen surface
    screen.fill(BLACK)
    all_sprites.draw(screen)

    # Update the screen with the contents of the screen surface
    pygame.display.flip()

# Exit the game
pygame.quit()
The recording
Here’s the recording of the session: