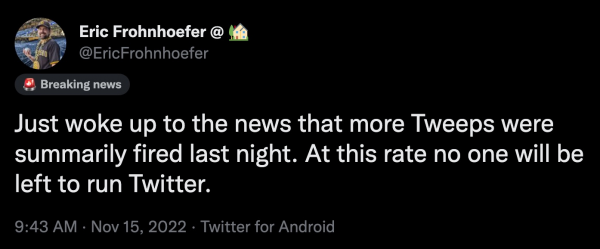
The whole mess started with this Tweet:
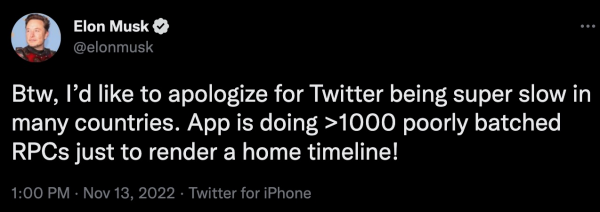
This should have been something like “We’re working on Android performance issues, and you should see improvements in the coming weeks/months,” but that’s not Elon’s style. This was a combination of management by shame and a little red meat for his fanboys.
I myself have delivered working software that was later know-nothingly criticized by a pointy-haired boss, so I understand former Twitter developer Eric Frohnhoefer’s response…
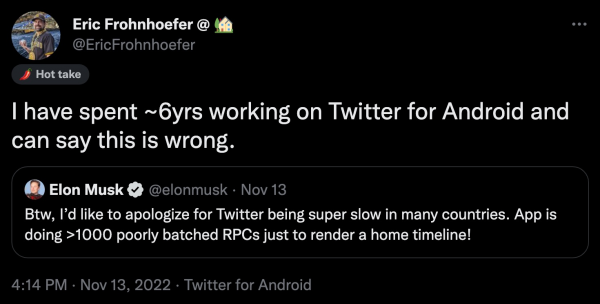
…which led to this Twitter exchange, where Eric defends the team and points out the work they’ve done to improve the Android client. It’s an even-tempered response…

One of Elon’s fanboys — or at least a fanboy-adjacent person — decided to re-ask a question that Elon asked earlier and which wasn’t answered in Eric’s series of tweets, and again, Eric responded matter-of-factly:
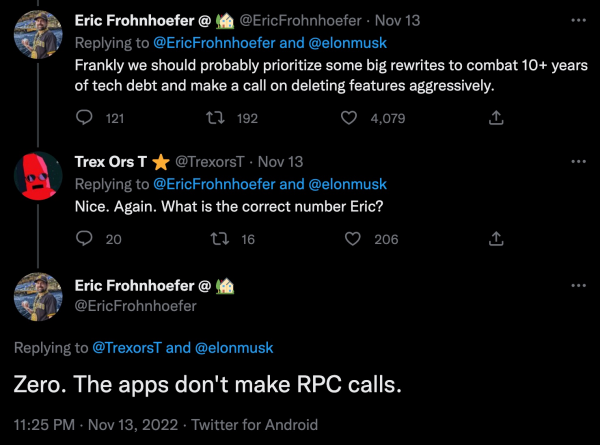
Adn that’s when we got our fanboy moment:
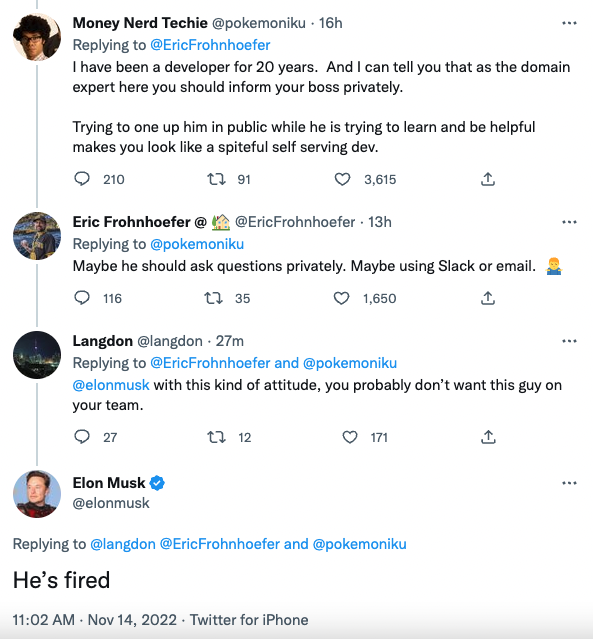
On the urging of users, without any apparent managerial or HR review, Eric Frohnhoefer was fired.
We’ve gone from this…
…to this:
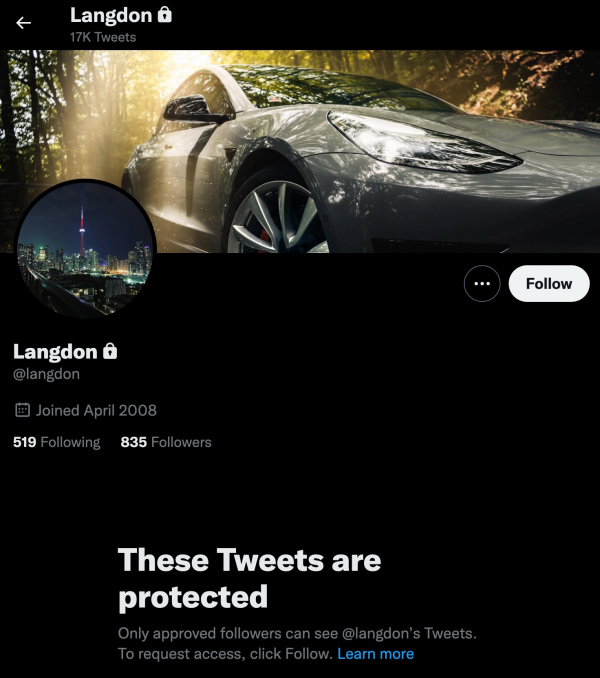
You’ve probably already guessed that @Langdon’s Twitter account now looks like this:
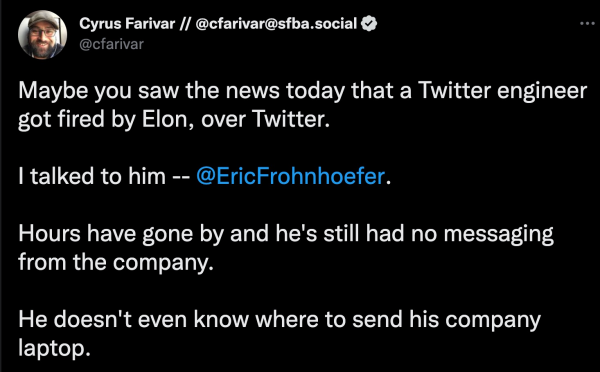
Reporter Cyrus Farivar (an online friend) talked to Eric, and the firing had all the characteristics of current Twitter:
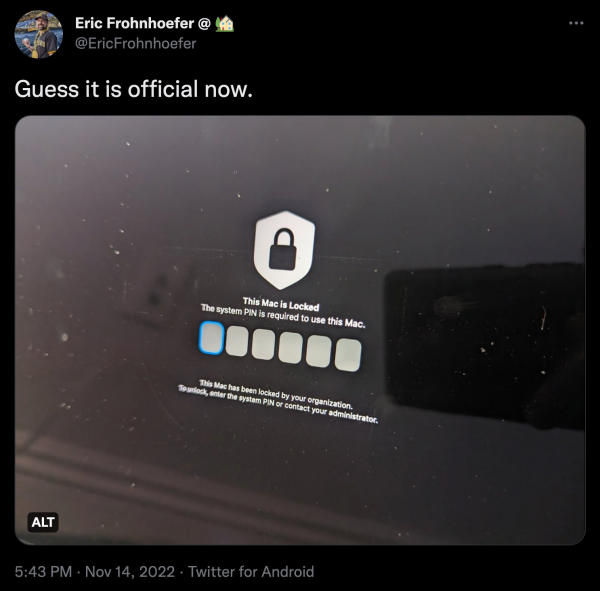
In fact, Eric’s confirmation of his dismissal came in the form of being locked out of his company laptop:
Now about that brilliant move I mentioned in this post’s title…
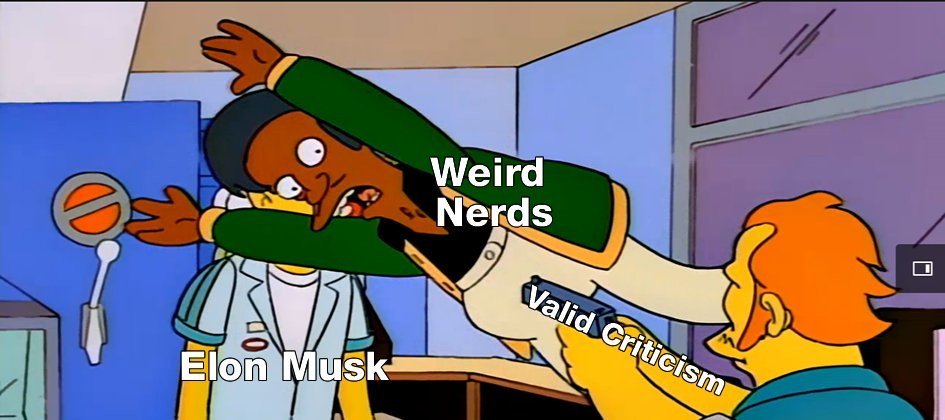
Under normal circumstances, contradicting the boss in a public forum is a bad idea. But these are not normal circumstances.
This is a boss who’s happy to grind his employees with overwork (I have friends who’ve worked at his companies), treat them like 19th century factory workers, and fire people for working from home during the 2020 pandemic. He’s taken over Twitter without a real plan, slashed the workforce with more thought about cost-cutting than actually running the place, and is telling people close to the code that he knows more than them.
We’ve seen this kind of unearned intellectual overconfidence before:
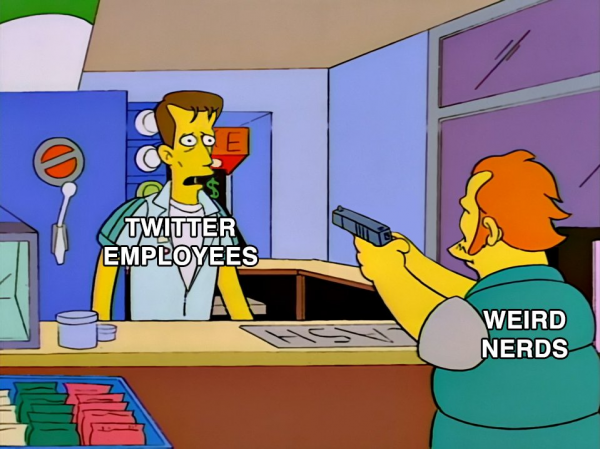
This is not a workplace you want to be in. It is toxic. And it’s not worth the effort. As a Twitter employee, you really have just two options:
- Quit.
- Be fired.
Under normal circumstances, option 1 is the preferable one. But these are not normal circumstances.
Getting fired by Elon under these circumstances, given what is publicly known (and who know what we don’t know yet, but the smart money says it’s much worse) is a badge of honor. You get:
- Points for courage for standing up to the world’s biggest and richest pointy-haired boss.
- Points for integrity for standing up for the Android development team, and defending them in an even-tempered manner.
- Sympathy points for taking on a no-win David vs. Goliath battle.
Someone from the Reddit team has already reached out to Eric about a senior Android development position, and I’m certain that it’s just one of many communications about an open position that he’s received.
Godspeed and good luck in your job search, Eric.
In the meantime…