TampaCC, Tampa’s FREE annual code camp, where you can sharpen your software development skills, is happening this Saturday, October 8th in Tampa at Keiser University. This is your chance to learn something new and get to know the Tampa tech community!
Keiser University is a great venue with lots of space for several simultaneous sessions and has been the gracious host of so many Tampa Bay tech events.
And of course, credit has to go to TampaCC’s long-time organizers, Kate and Greg Leonardo — thanks so much for putting this together! I’m looking forward to returning to TampaCC (and presenting, too!)
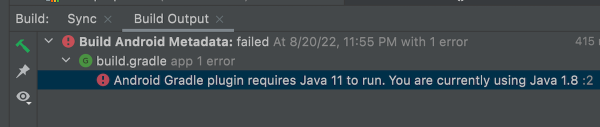
Maybe you’ve run into this Android Studio problem lately. You’ve created a brand new project, and when you run it — even if you haven’t made any changes — you get the dreaded Android Gradle plugin requires Java 11 to run error:
Here’s the “quick and dirty” fix. It assumes that you already have JDK 11 installed.
On Linux and Windows, open the File menu and select Settings… to get to the Settings window (you can also use the keyboard shortcut Ctrl + Alt + s).
On macOS, open the Android Studio menu and select Preferences… to get to the Preferences window (you can also use the keyboard shortcut ⌘ + , ).
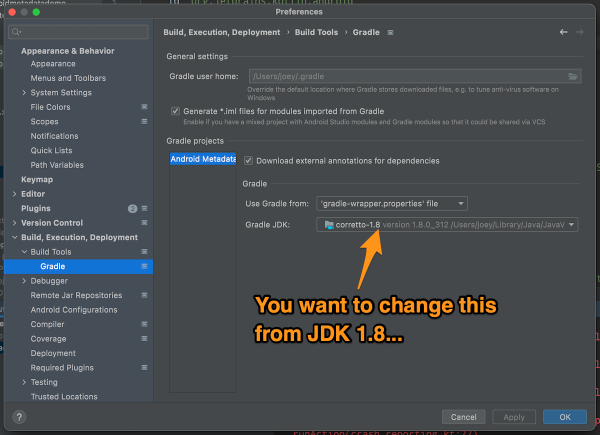
Once the Settings or Preferences window is open, select Build, Execution, Deployment → Build Tools → Gradle from the menu on the left side.
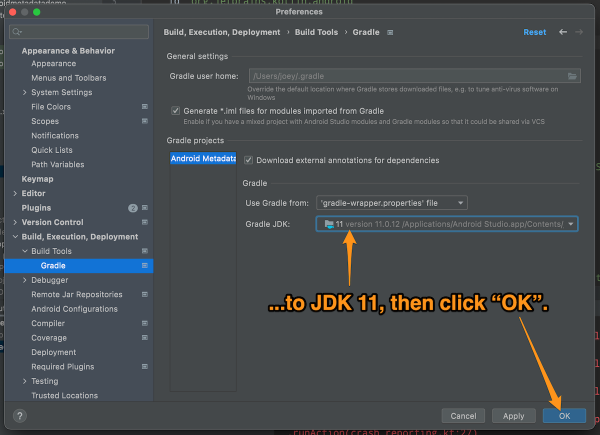
You can change the JDK that Gradle uses in the Gradle projects section’s Gradle JDK menu. Changing the current selection from JDK 1.8 to JDK 11 works for me:
The Android Studio on my Windows machine already defaults Gradle to JDK 11, but on my Mac, it’s still insisting on JDK 1.8. I’m sure there’s some config file floating around somewhere that I need to edit — does anyone know which one? — but in the meantime, I’m using the quick and dirty fix.
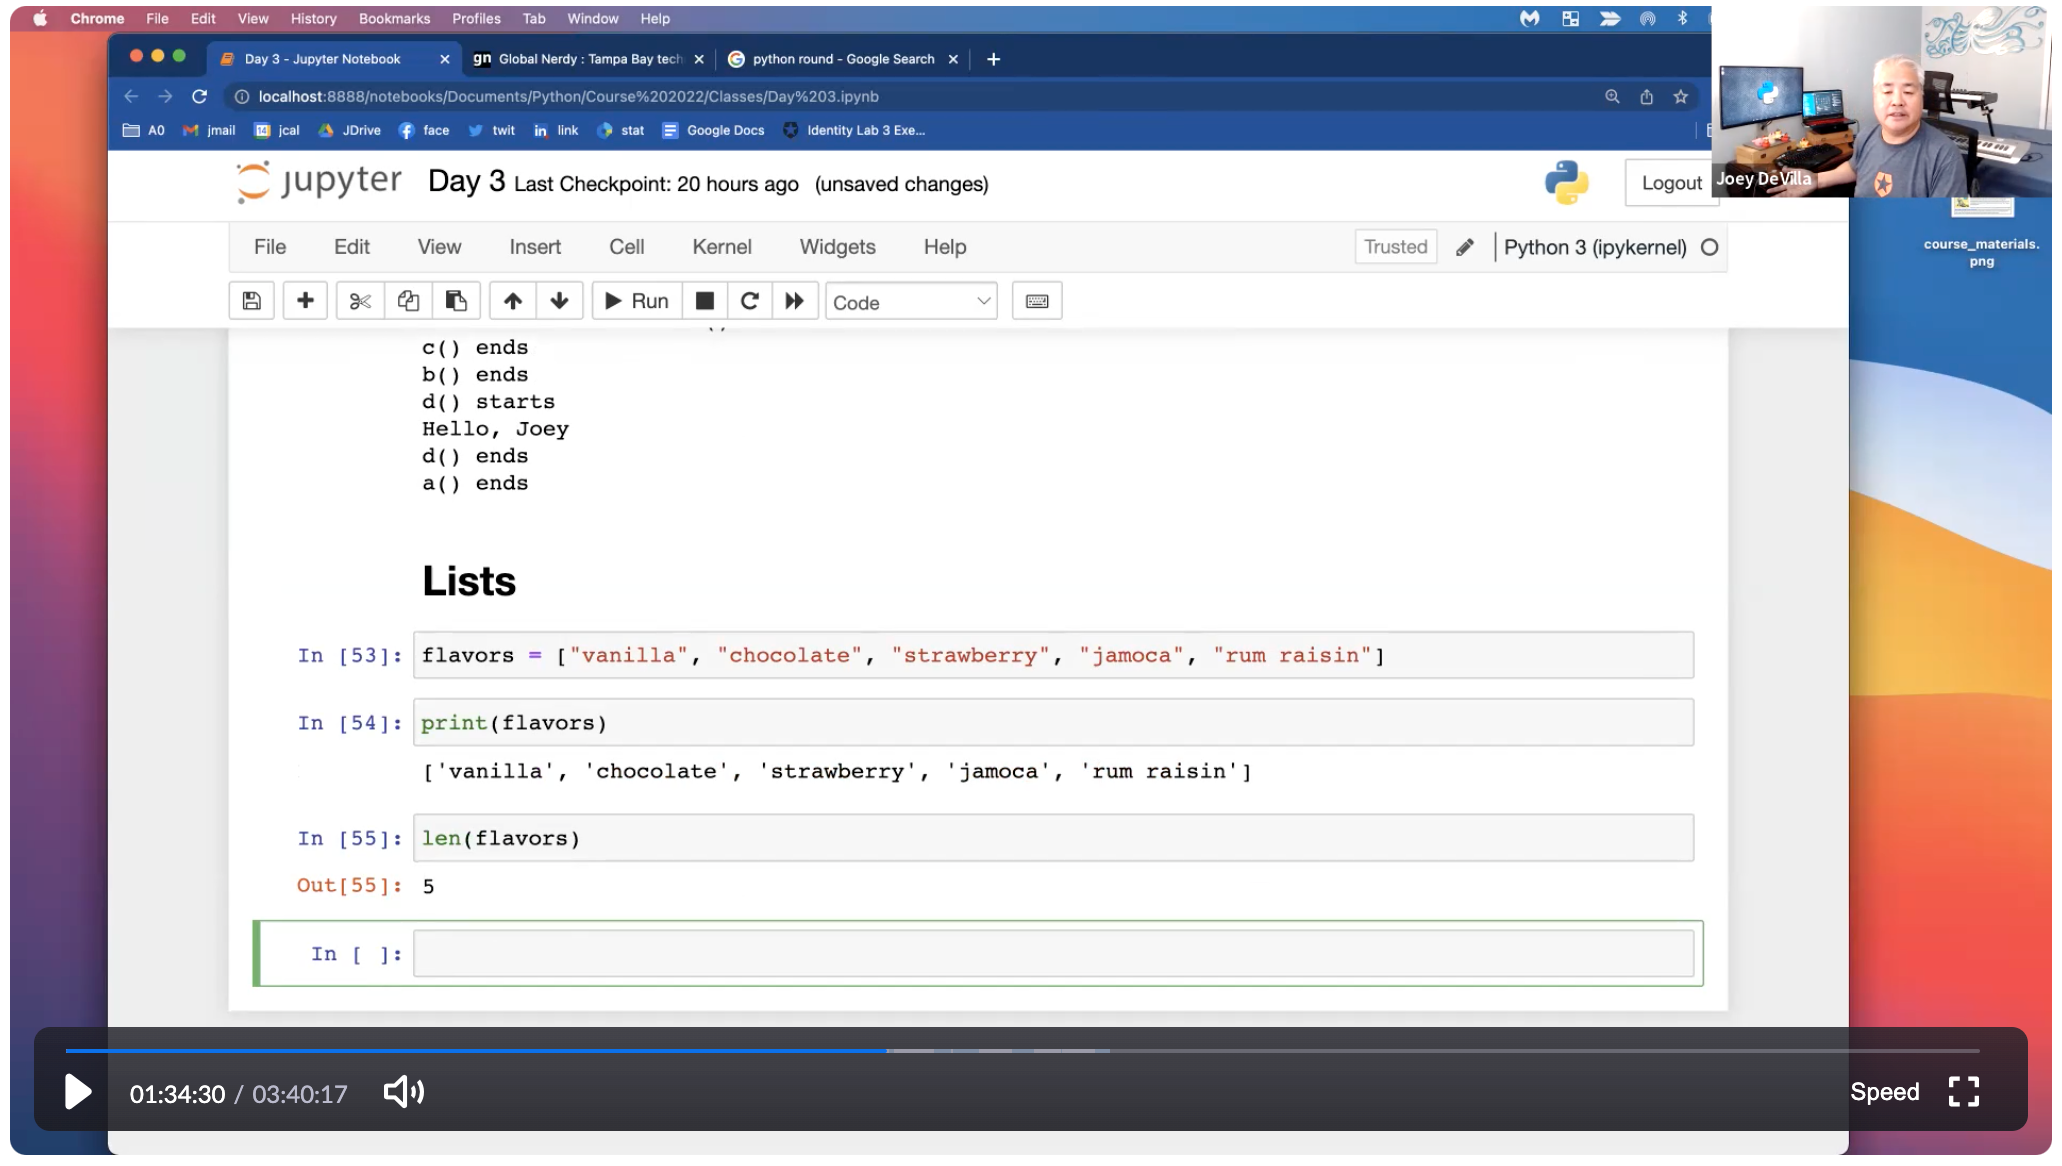
A still from the recording of last night’s class. Tap to view at full size.
Yesterday was Evening 3 of the 10-evening “Learn Python” class that I’m teaching on behalf of Computer Coach, a tech training center here in Tampa. It started last Wednesday and takes place online every Monday and Wednesday from 6:00 p.m. to 10:00 p.m.. There are 15 students in the class.
So far, the class is going well. In fact, I’m rather impressed. Even though some of them have only a little programming experience and others have none, they’re learning at a great pace, and better still, they’re cleverly applying what they’re learning, and they’re not afraid to ask questions and experiment.
For example, there’s the Fizzbuzz exercise. It’s where the challenge is to a program that counts from 1 to 100 and prints out the current number as it does this, while following these rules:
If the current number is divisible by 3, don’t print the number. Print “fizz” instead.
If the current number is divisible by 5, don’t print the number. Print “buzz” instead.
If the current number is divisible by both 3 and 5, don’t print the number. Print “fizzbuzz” instead.
Not only did they figure out how to make it work — not bad for evening 2! — but some of them started add their own ideas to the application. One said “I’m tweaking the program so that you can enter what numbers get turned into ‘fizz’ and ‘buzz’ instead of just 3 and 5.” And those modifications worked.
While covering if for comparing numbers, another student asked “Is there some way where I can compare a number to see if it’s part of a group of different numbers?” This led me to introduce lists and the in operator a little early, but it was a sign that one of them was already trying to come up with ways to apply a concept they’d just learned minutes before.
Last night, while I was demonstrating some list methods, yet another student asked “How do I pop an item from one list and then add it to another?” Again, that’s something someone does only when they grasp a new concept and start thinking up applications for it.
I just have to say this: I’m very impressed with this Python class.
What:An introductory Python course! I’m teaching it on behalf of Computer Coach, a Tampa-based training company and friends of mine.
Where: Online, via Zoom.
When: Monday and Wednesday evenings, from 6 p.m. to 10 p.m., starting this Wednesday, September 7th.
How to enroll or find out more: Contact Computer Coach’s Kasandra Perez at kasandra@computercoach.com or (813)-254-6459 to find out more about the course or register.
You’ll need the following to participate in the course:
Zoom and an internet connection. I’ll be teaching the course via Zoom — this is an online course — and we’ll also visit some web sites and download some software during the course.
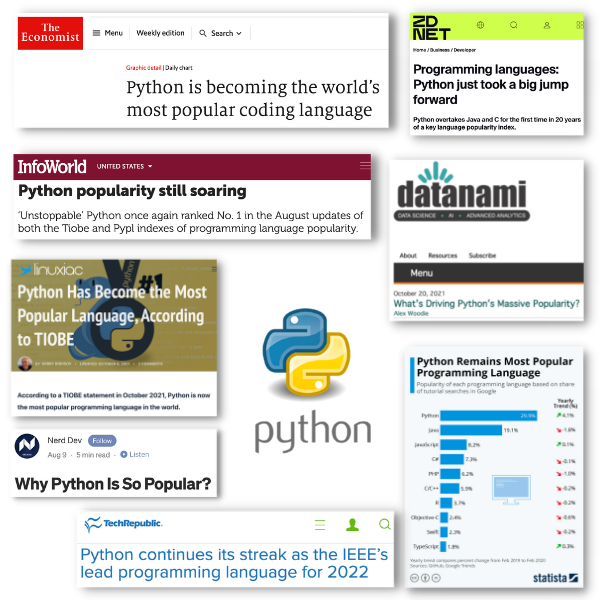
The state of Python
All you have to do is look at the current developer surveys and tech news headlines to know that right now, Python is having its “moment”:
Developer research company Slashdata’s 22nd State of the Developer Nation report puts Python as the second-most popular programming language behind JavaScript, having added 3.3 million net new developers in late 2021/early 2022.
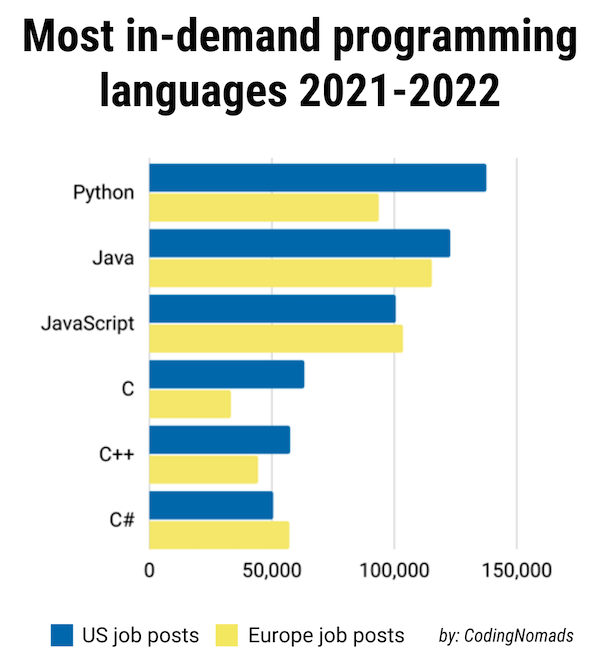
CodingNomads, a coding school in California, looked at thousands of job postings in North America and Europe and declared Python as the most in-demand coding language for 2022.
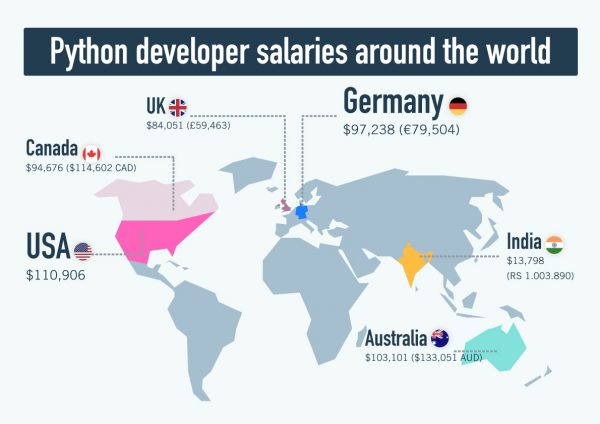
As for salaries…
These are salaries from 2020, found at CareerFoundry.
…you can say that the pay is decent. Pair Python with another tech skill (for instance, JavaScript) or a people skill (say, managing developers), and you can make even more.
The schedule
This is the course schedule for Learn Python. It’s flexible — if there’s a need spend more time on a specific topic, we’ll do that. The point isn’t to cover every topic on the list; it’s to give you the necessary grounding in Python and programming to continue after the course is over!
Sessions will take place via Zoom, which means that you can take the course from wherever you happen to be. There will be ten sessions, and each will run from 6:00 p.m. to 10:00 p.m., with ten-minute breaks at the end of the first, second, and third hour.
Day 1 : Hello, Python! Wednesday, September 7, 6:00 p.m. – 10 p.m.
Setting up the programming environment
Introducing Jupyter Notebook
Variables and simple data types
Programming in sequence
Day 2: Algorithms aren’t just for Facebook Monday, September 12, 6:00 p.m. – 10 p.m.
Branching (a.k.a. “If” / “elif” / “else”)
Lists
Looping
Day 3: Organizing data and code, and listening to the user Wednesday, September 14, 6:00 p.m. – 10 p.m.
Dictionaries
Functions
Getting input from the user
Day 4: Getting serious Monday, September 19, 6:00 p.m. – 10 p.m.
Object-oriented programming
Working with files
Handling exceptions
Day 5: When the going gets weird, the weird turn pro Wednesday, September 21, 6:00 p.m. – 10 p.m.
Running Python programs from the command line
Importing Python modules
Organizing files
Day 6: The web and data Monday, September 26, 6:00 p.m. – 10 p.m.
Web programming with Flask
SQLite: The database built into Python
Day 7: Just enough data science to be dangerous Wednesday, September 28, 6:00 p.m. – 10 p.m.
Introduction to data science and Python’s data science libraries
Days 8 – 9: Using your Python powers for good Monday, October 3, 6:00 p.m. – 10 p.m. Wednesday, October 5, 6:00 p.m. – 10 p.m.
Using Python to handle all sorts of programming tasks, which could include:
Building the scripts that generate the Tampa Bay Tech Events list
Automating email and spreadsheets
Building a weather app
Day 10: Just the beginning Monday, October 10, 6:00 p.m. – 10 p.m.
Review of everything covered
What you should cover next
Programming interview questions
What happens in the course?
This is not a passive course! This isn’t the kind of course where the instructor lectures over slides while you take notes (or pretend to take notes while surfing the web or checking your social media feeds). In this course, you’ll follow along as I write code on my screen. You’ll actively take part in the learning process, entering code, experimenting, making mistakes, correcting those mistakes, and producing working applications. You will learn by doing. At the end of each session, you’ll have a collection of little Python programs that you wrote, and which you can use as the basis for your own work.
The course will start at the most basic level by walking you through the process of downloading and installing the necessary tools to start Python programming. From there, you’ll learn the building blocks of the Python programming language:
Control structures that determine what your programs do,
Data structures to store the information that your programs act on,
Functions and objects to organize your code, and
Using libraries as building blocks for your applications.
Better still, you’ll learn how to think like a programmer. You’ll learn how to look at a goal and learn how you could write a program to meet it, and how that program could be improved or enhanced. You’ll learn skills that will serve you well as you take up other programming languages, and even learn a little bit about the inner workings of computers, operating systems, and the internet.
What kind of apps will you build?
We’ll build as many applications as we can, based on your suggestions or needs. These include (and aren’t limited to):
CoverTron: My generator for cover letters for job applications. I actually used it in my last job search!
Tampa Bay Tech Events Transmogrifier: Every week, I put together a list of tech events for Tampa Bay, culled from Eventbrite and Meetup. It would take me hours to do it by hand, but it’s so much quicker with the automated help of a couple of Python scripts.
Find out when and where a digital photo was taken: When you take a picture with your phone or a present-day digital camera, that picture has EXIF data embedded in it, with the date, time, and location where the photo was taken. I’ll show you how to extract that info!
Editing photos: If you were assigned the task of shrinking a set of 100 photos by 25% (or any other similar basic photo editing task), you could do it manually, or you could make Python do it.
Creating interactive documents with Jupyter Notebook: It’s more than just a Python tool used by data scientists, Nobel Prize winners, and Netflix, but a useful programming environment and operations platform for everyday tasks!
Writing web applications with Flask: Just as Python makes programming much easier, the Python-powered Flask framework makes programming web applications much easier.
Passing interview coding tests: Learn how to deal with the most dreaded part of the interview for a programming job, and why Python is a key part of my coding interview strategy.
Using databases: Using databases is a key part of programming, and luckily, Python comes with a built-in database!
Data science: This is a giant topic and could easily take up the time to do this course three times, but I’d be happy to go over the basics.
Interactive storytelling and games: Python’s quite good at this, and I can walk you through the PyGame framework and Ren’Py interactive story system.
Mobile app development: Yes, there are ways to do mobile app development in Python.
How do you sign up for the course or find out more?
Once again, you’ll want to contact Computer Coach’s Kasandra Perez at Contact Kasandra Perez at kasandra@computercoach.com or (813)-254-6459 to find out more about the course or register.
The attendees at ng-conf 2019, which was also held in Salt Lake City.
ng-conf 2022, the annual conference dedicated to all things Angular, gets into full swing tomorrow and continues on Thursday and Friday! I’m in Salt Lake City to take care of the Auth0 booth — if you’re there, please drop by!
Hopefully, you’ve made plans to see my coworkers’ talks: Alisa Duncan’sThere’s Safety in Angular, which is scheduled for Wednesday, August 31 at 10:32 a.m. MDT, and then RXWut? and scheduled for Wednesday, August 31 at 2:36 p.m. MDT, presented by my coworker Sam Julien and Cloudinary’s Kim Maida.
But have you planned out how you’re going to work the room?
What is “working the room?”
It’s been my experience that some of the most important things I’ve learned and all the connections I’ve made at conferences didn’t happen at the presentations. Instead, they happened between presentations — in the hallways, lounges, lunches, and social gatherings, where I had the chance to chat with the speakers, organizers, and the other attendees. This observation is so common that it’s given rise to “unconferences” like BarCamp, whose purpose is to invert the order of things so that the conference is more “hallway” than “lecture theatre”.
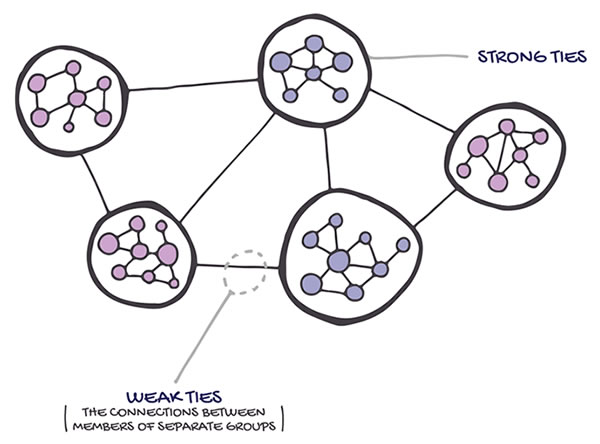
It’s especially important to talk to people you don’t know or who are outside your usual circle. Books like The Tipping Point classify acquaintances with such people as “weak ties”. Don’t let the word “weak” make you think they’re unimportant. As people outside your usual circle, they have access to a lot of information, people, and opportunities that you don’t. That’s why most people get jobs through someone they know, and of those cases, most of the references came from a weak tie. The sorts of opportunities that come about because of this sort of relationship led sociologist Mark Granovetter to coin the phrase “the strength of weak ties”.
The best way to make weak ties at a conference is to work the room. If the phrase sounds like sleazy marketing-speak and fills your head with images of popped collars and wearing too much body spray, relax. Working the room means being an active participant in a social event and contributing to it so that it’s better for both you and everyone else. Think of it as good social citizenship.
If you’re unsure of how to work the room, I’ve got some tips that you might find handy…
Have a one-line self-introduction
A one-line self-introduction is simply a single-sentence way of introducing yourself to people you meet at a conference. It’s more than likely that you won’t know more than a handful of attendees and introducing yourself over and over again, during the conference, as well as its post-session party events. It’s a trick that Susan RoAne, room-working expert and author of How to Work a Room: The Ultimate Guide to Making Lasting Connections In-Person and Online teaches, and it works. It’s pretty simple:
Keep it short — no longer than 10 seconds, and shorter if possible. It’s not your life story, but a pleasantry that also gives people just a little bit about who you are.
Make it fit. It should give people a hint of the cool stuff that you do (or, if you’re slogging it out in the hopes of doing cool stuff someday, the cool stuff that you intend to do.)
Show your benefits. Rather than simply give them your job title, tell them about a benefit that your work provides in a way that invites people to find out more. Susan RoAne likes to tell a story about someone she met whose one-liner was “I help rich people sleep at night”. That’s more interesting than “I’m a financial analyst”.
My intro will be something along the lines of “I’m a rock and roll accordion player, but in my side gig, I’m a developer advocate for an incredibly cool company that helps make logins happen.”
How to join a conversation
At ng-conf, you’ll probably see a group of people already engaged in a conversation. If this is your nightmare…
Click to read the Onion article.
…here’s how you handle it:
Pick a lively group of people you’d like to join in conversation. As people who are already in a conversation, they’ve already done some of the work for you. They’re lively, which makes it more likely that they’re open to people joining in. They’ve also picked a topic, which saves you the effort of having to come up with one. It also lets you decide whether or not it interests you. If they’re lively and their topic of conversation interests you, proceed to step 2. If not, go find another group!
Stand on the periphery and look interested. Just do it. This is a conference, and one of the attendees’ goals is to meet people. Smile. Pipe in if you have something to contribute; people here are pretty cool about that.
When acknowledged, step into the group. You’re in like Flynn! Step in confidently and introduce yourself. If you’ve got that one-line summary of who you are that I talked about earlier, now’s the time to use it.
Don’t force a change of subject. You’ve just joined the convo, and you’re not campaigning. Contribute, and let the subject changes come naturally.
Feel free to join me in at any conversational circle I’m in! I always keep an eye on the periphery for people who want to join in, and I’ll invite them.
More tips
Here’s more advice on how to work the room:
Be more of a host and less of a guest. No, you don’t have to worry about scheduling or if the coffee urns are full. By “being a host”, I mean doing some of things that hosts do, such as introducing people, saying “hello” to wallflowers and generally making people feel more comfortable. Being graceful to everyone is not only good karma, but it’s a good way to promote yourself. It worked out really well for me; for example, I came to the first DemoCamp (a regular Toronto tech event back in the 2000s) as a guest, but by the third one, I was one of the people officially hosting the event.
Beware of “rock piles”. Rock piles are groups of people huddled together in a closed formation. It sends the signal “go away”. If you find yourself in one, try to position yourself to open up the formation.
Beware of “hotboxing”. I’ve heard this term used in counter-culture settings, but in this case “hotboxing” means to square your shoulders front-and-center to the person you’re talking to. It’s a one-on-one version of the rock pile, and it excludes others from joining in. Once again, the cure for hotboxing is to change where you’re standing to allow more people to join in.
Put your bag down. Carrying them is a non-verbal cue that you’re about to leave. If you’re going to stay and chat, put them down. When you’re about to leave, take your coat and bag and start saying your goodbyes.
Show and tell. We’re geeks, and nothing attracts our eyes like shiny, interesting pieces of tech and machinery. It’s why I carry my accordion around; I think of it as a device that converts curiosity into opportunity (and music as well). I’ll be doing the same with my iPhone and Android apps as well! Got a particularly funky laptop, netbook, smartphone or new device you just got from ThinkGeek? Got a neat project that you’ve been working on? Whatever it is, park yourself someplace comfortable in the hallway, show it off and start a conversation!
Save the email, tweets and texts for later, unless they’re important. They’ll draw your attention away from the room and also send the message “go away”.
Mentor. If you’ve got skills in a specific area, share your knowledge. Larry Chiang from GigaOm says that “It transitions nicely from the what-do-you-do-for-work question. It also adds some substance to party conversations and clearly brands you as a person.”
Be mentored. You came to ng-conf to learn, and as I said earlier, learning goes beyond the sessions. One bit of advice is to try and learn three new things at every event.
Play “conversation bingo”. If there are certain topics that you’d like to learn about at mg-conf, put them in a list (mental, electronic or paper) of “bingo” words. As you converse at the conference, cross off any of those topics that you cover off the list. This trick forces you to become a more active listener and will help you towards your learning goals. Yelling “BINGO!” when you’ve crossed the last item on the list can be done at your discretion.
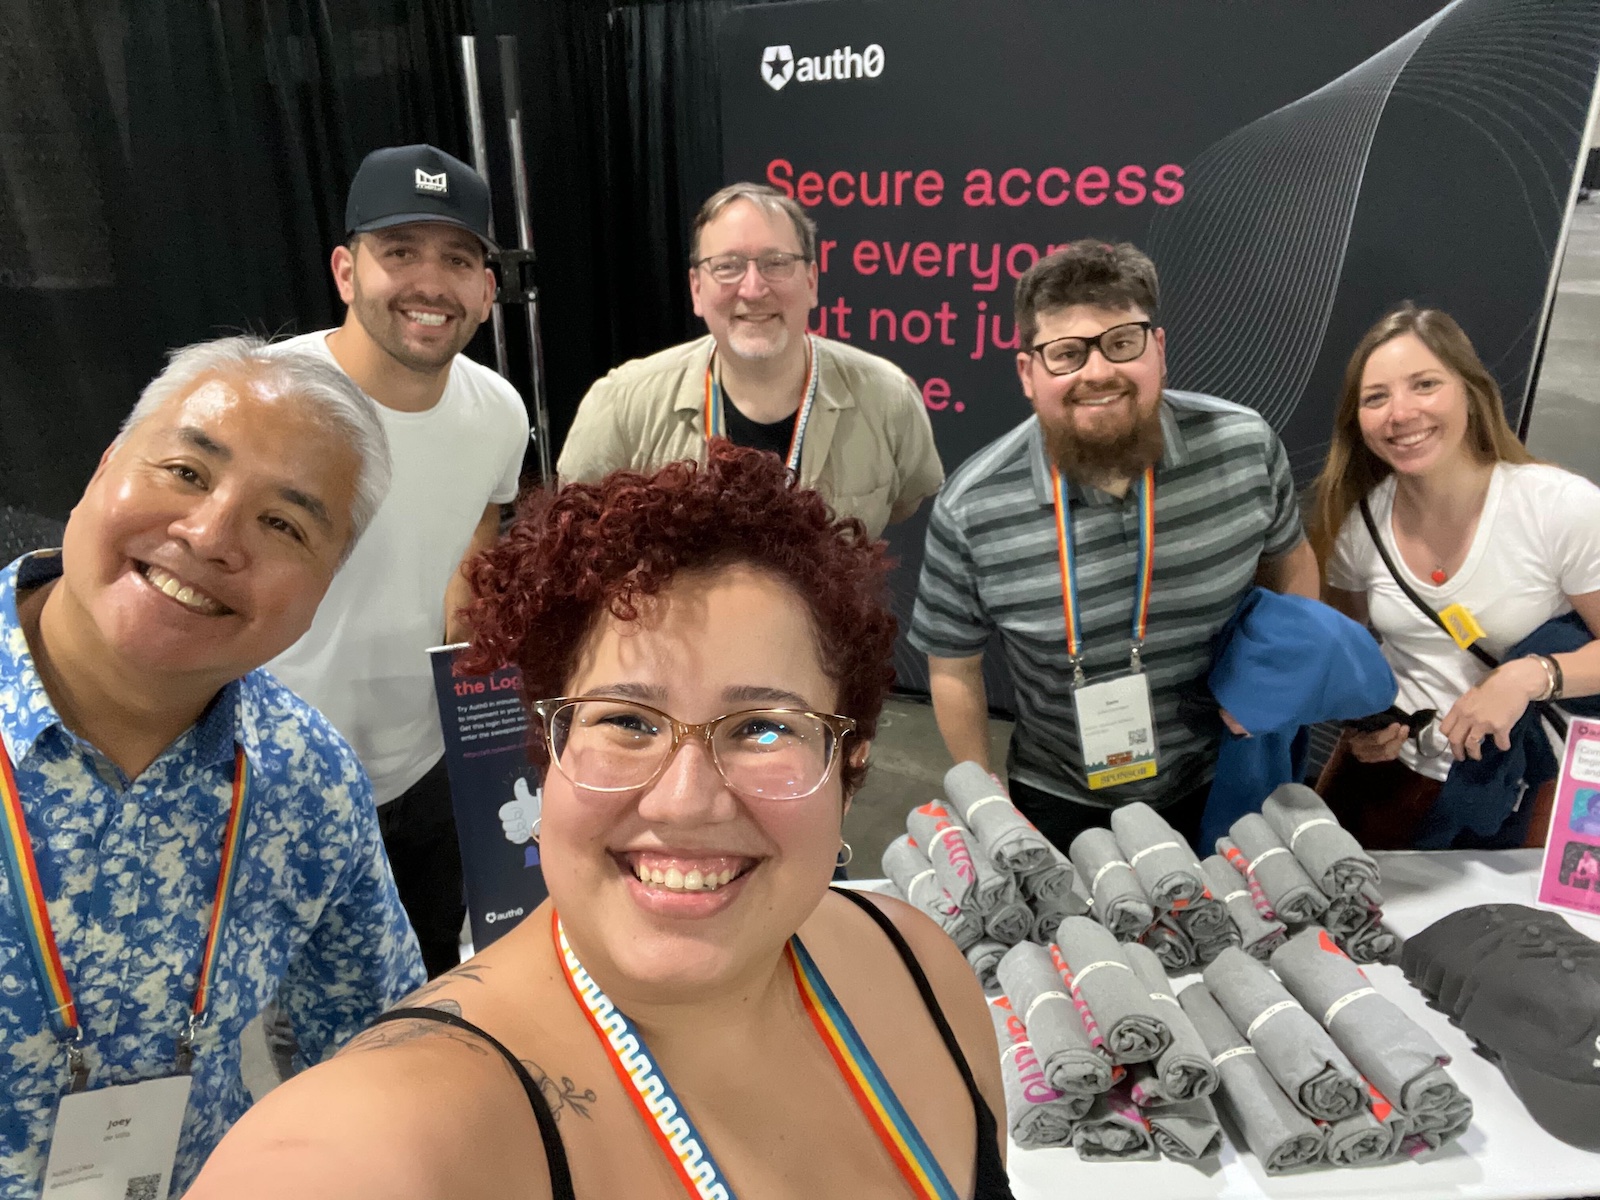
The Auth0 crew at Pycon 2022, which also happened in Salt Lake City.
I’ll see you at ng-conf, whether at the Auth0 booth, or just wandering around. Please say “hi” — we would love to meet you!
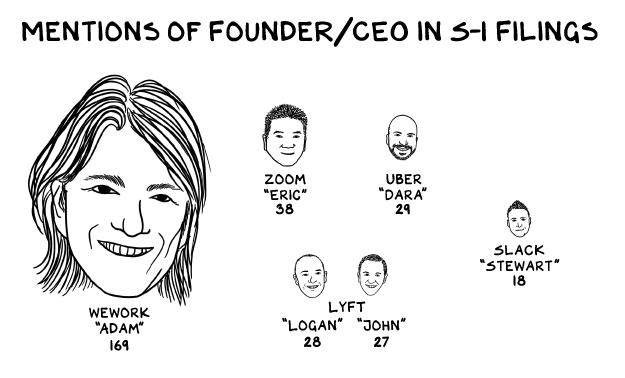
One of the more ridiculous aspects of the S-1 Form that WeWork filed during their first attempt at an IPO was the fact that the name “Adam” (WeWork’s founder / personality behind the cult Adam Neumann) gets mentioned in it a ludicrous number of times. It’s not unusual for an S-1 Form to mention the founder’s name a couple dozen times, but nowhere near as many times as WeWork’s original S-1 did.
You could go through WeWork’s S-1 and count the number of times “Adam” appears in its text. You could load WeWork’s S-1 into a text editor and have it give you that number. But what if you had to do that for a dozen, or a hundred, or a thousand companies and create a list of the number of times each company’s founder was mentioned in its S-1? You will write a Python script to do just that in my upcoming course.
I’ll guide you through the process of writing that script and running it on not just the text of WeWork’s S-1, but also for other hot tech companies, such as Zoom, Uber, Lyft, and Slack.
It’s just one of the practical things I’ll cover in the Learn Python online course being offered by Computer Coach. Here are the quick details:
What: An introductory Python course!
Where: Online, via Zoom.
When: Monday and Wednesday evenings, from 6 p.m. to 10 p.m., starting Wednesday, September 7th.
How to enroll or find out more: Contact Computer Coach’s Kasandra Perez at kasandra@computercoach.com or (813)-254-6459 to find out more about the course or register.