Categories
Uncategorized

Staying Sharp: Maintaining Your Development Skills

saw

Ours is a field where change is just one of those things you have to live with. The constant evolution of computers – from mainframes to the computing devices in our pockets that just happen to also be phones – along with the almost-daily introduction of new technology stacks, requires us to be constantly learning new things. Here are some tips that should help you on your ever-going learning journey in software development…

Choose Your Reading Material

programming books

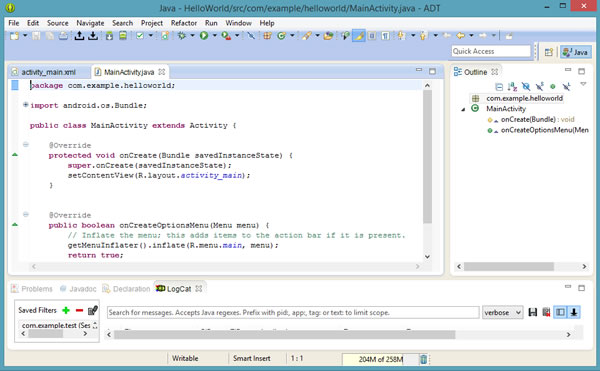
With developer technologies changing so quickly – especially in hot, rapidly-evolving areas such as this blog’s focus, mobile – finding reading material can be tricky. My two pieces of advice:

  • Take advantage of websites that focus on the material you’re trying to learn. For instance, in my studies of iOS development, I follow sites like RayWenderlich.com and iOSDeveloperTips.com, which feature regular and frequent updates.
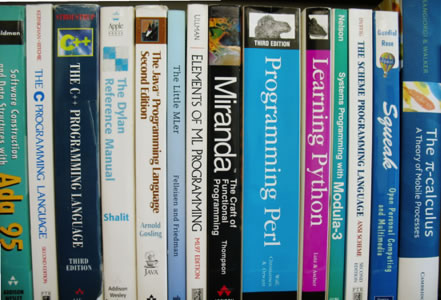
  • If you’re going for books, favour ebooks over paper books. Programming is a subject that changes so quickly that all but the most timeless of books on the subject – books like Knuth’s Art of Computer Programming –  go out of date in a matter of months. I just recycled a copy of Core Java 2, which dates from 2003.

Pick a Project

pair programming desk

Remember this mantra: “I hear, I forget; I see, I remember; I do, I understand”.

Reading is helpful, but to truly learn a programming language, library, or technology, there’s no substitute for getting your hands dirty and actually working on a project that uses that programming language, library, or technology. “Finish project X with this list of features and functionality” is a more concrete, more measurable goal than “Learn programming language X”, “Learn library Y”, or “Learn technology Z”; it also gives you a better idea of your progress, gives you valuable experience, and even gives you something to add to your portfolio. If you can, learn by building a full project rather than just following code examples from your reading.

Most people understand the need the practical experience that comes from learning by building a project. The hard part, they say, is coming up with an idea for that project. Some suggestions:

  • Do you have a friend or someone in your family who could use an application that makes use of the language, library, or technology that you’d like to learn? I’ve got a couple of young nephews, and I’ve found writing games for them has been a great way to learn frameworks like XNA and Cocos2D; I’m hoping to write a Sprite Kit-based game for them soon.
  • Is there an open source project that makes use of the language, library, or technology that you’d like to learn? You may find that contributing to it or forking it is a great way to learn. You may also find that working with an existing project is easier than starting from scratch.
  • Do you know of a business or charity that could use an application that makes use of the language, library, or technology that you’d like to learn? Here’s a chance for you not only to learn and have a new application in your portfolio, but also to have a user base who can give you a lot of feedback.

Learn by Teaching

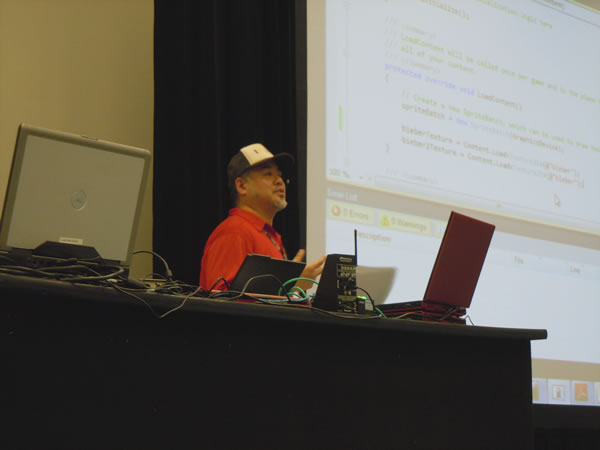
Yours Truly, teaching basic game development for Windows Phone, 2010.

During my time as a developer evangelist at Microsoft, I did tutorial presentations and wrote online tutorials regularly. Sometimes I’d cover material that I knew well, but since Microsoft has such a wide array of tools and technologies and are coming up with new ones all the time, I often found myself having to learn the material that I would end up teaching.

This turned out to be a great way to learn new things. Having to teach the material you’re learning is a good motivator, and the need to make your understanding of the material comprehensible to others help to guide your own learning. As Floor Drees, a tech reporter and developer evangelist in Austria puts it, “I genuinely believe that teaching skyrockets your own learning curve and would encourage everyone to start coaching beginners, even if you feel you are still a beginner.”

If you’re given decent study and teaching material – and luckily, at Microsoft, that’s usually easy to find – and enough time and tools to experiment with mini-projects to get a better understanding, and if you’re comfortable in the role of teacher, whether one-on-one, in front of a crowd, or as an author, you may want to try learning by teaching.

Deal With Speed Bumps

speed bumps

As you brush up on your development skills, you’ll hit the occasional “speed bump”: some kind of problem that you can’t figure out or that leaves you stuck without any idea of how to solve it.

This is a good thing.

Really, it is. If you’re ever learning something new and you find that absolutely everything is coming to you without even the slightest bit of difficulty, it means that you’re not actually doing any real learning. The best and most valuable learning experiences are those in which you struggle with a problem, try all sorts of things, and then finally find the solution. You learn a lot during those times when it feels like you’re fumbling in the dark, trying to piece together a way to make something work, and it tends to stick with you afterwards.

During these times, there are a few things you can try:

  • See if there’s a project that you’ve already successfully done that has a solution similar to the one you’re trying to implement.
  • See if there’s a project that someone else has done and posted online that has a solution similar to the one you’re trying to implement.
  • Make use of online developer forums. Stack Overflow is your friend, and it’s saved me a lot of headaches over the years. Many developer communities also maintain their own forums; be sure to check those out as well.

Take Some Classes

classroom

I’m one of those developers who learns through a combination of building my own projects, looking at the code of other people’s projects and learning through teaching. However, that’s not everyone’s style; some people prefer the structure provided by a classroom environment. Luckily, there are a number of options for those of you who prefer this style of learning:

  • Many schools and community colleges offer programming courses that are available not only to fully-enrolled students, but the general public.
  • If you live in a city with a tech-centric coworking space or a “hackerspace”, you may find that they offer some programming instruction for groups, sometimes for free.
  • A number of cities now offer “boot camp” style instruction, in which you can learn a programming language or whole technology stack through intensive classes and hands-on sessions that span days or even weeks.
  • If you’ve got a business whose developers need training for enterprise tools and technologies, such as Microsoft’s, Oracle’s, Java, or in areas ranging from SOA and cloud to agile development and business analysis, consider courses from training organizations such as Web Age Solutions.
Categories
Uncategorized

The Mysterious “Hooray for Big Brother” Billboards in Silicon Valley are BitTorrent’s Awareness Campaign

VentureBeat writes that these “Hooray for Big Brother” billboards have been appearing in and around San Francsico and Silicon Valley:

your data should belong to the nsa

artists need to play by the rules

the internet should be regulated

…and they seemed to be part of some “to be continued…” campaign in which the full message would be revealed later.

Well, later is now, and as expected, the billboards are there to promote the exact opposite message. The sponsor: BitTorrent!

Here’s what the signs look like now:

your data should belong to you

artists need options

the internet should be people-powered

In the most recent post on their blog, the people at BitTorrent write:

These statements represent an assault on freedom. They also, for the most part, represent attitudes Internet culture has accepted. Chips we’ve traded for convenience. Part of the allegiance we’ve sworn to the web’s big platforms and server farms. That’s what you get for going online.

We put these billboards up last week in New York, Los Angeles and San Francisco. Because we wanted to remind the world what’s at stake on the world wide web.

As a society, we’ve chosen to accept data centralization: personal information as property of a powerful few. We’ve chosen to accept walled gardens of creativity: a lifetime of work (our life’s work) locked into digital stores that take 30% of the revenue and streaming services that pay pennies in royalties. We’ve chosen to accept surveillance culture: the right of security agencies to violate the Fourth Amendment; to see and store data as they see fit.

But these things are just that. They’re choices.

And these choices belong to us.

There’s more — go read their blog entry!

Categories
Uncategorized

Lenovo X201 Tablet for Sale – $450

lenovo x201 for sale

I’ve got a friend in the Toronto area who’s looking to sell his Lenovo X201 tablet-style laptop with the following features:

  • Core i7 processor
  • 4GB RAM
  • 128 GB SSD drive (fast!)
  • Touchscreen w/ stylus
  • The 64-bit version of Windows 7 Pro

It’s yours if you want it for $450. Contact me at joey@joeydevilla.com and I’ll arrange an email intro.

This article also appears in The Adventures of Accordion Guy in the 21st Century.

Categories
Uncategorized

If the Trend in Smartphone Size Continues…

the next samsung galaxy

Categories
Uncategorized

iOS Developer Roundup: Storyboards vs. Nibs vs. Code, Space Invaders and Sprite Kit, Key-Value Observing, and ZXingObjC

Debating Storyboards vs. Nibs vs. Code

storyboard vs. code

In Storyboards vs. NIBs vs. Code: The Great Debate!, you can watch a debate that took place in a Google+ hangout on October 1 between three developers over which way is the optimal way to build user interfaces. Cesare Rocchi argues for code, Tammy Coron takes the pro-nib argument, and Felipe Laso Marsetti sides with Storyboards, which Apple seems to be pushing hard. It’s interesting lunchtime viewing:

Building a Space Invaders-like Game with Sprite Kit, Part 1

space invaders

Here’s part one of a Ray Wenderlich tutorial that walks you through the process of building a classic arcade game (all the way back from 1978) in iOS 7 using the new Sprite Kit library. They recommend that you go through their Sprite Kit Tutorial for Beginners before you tackle this tutorial, which walks you through controlling player and enemy ship movements.

Key-Value Observing

keyKey-value observing is handy. It’s also a pain in the ass. Or, as NSHipster Mattt Thompson puts it:

“Ask anyone who’s been around the NSBlock a few times: Key-Value Observing has the worst API in all of Cocoa. It’s awkward, verbose, and confusing. And worst of all, its terrible API belies one of the most compelling features of the framework.”

Key-value observing is one of those “let me know when something happens” systems that you can use in Objective-C, along with NSNotifications, delegates, and callbacks. Thompson says that of the four, key-value observing is the least understood. He aims to fix that by sharing some observations and techniques that have worked for him.

The ZXingObjC Barcode Library

barcode
ZXing is short for “Zebra Crossing”, which is a pretty clever name for an Android/Java barcode encoding/decoding library. ZXingObjC is a full Objective-C port of ZXing, and it’s available on GitHub. If you need to encode or decode any of the following barcode formats on an iOS device or Mac:

…then you’ll want to get your paws on ZXingObjC. The library comes with example apps, including a basic barcode scanner/decoder app and another app that accepts user input and turns it into a QR code. Keep in mind that…

Categories
Uncategorized

How I Set Up My Windows 8 System for Android Development [Updated]

samsung galaxy s3

I may have given the impression that I’m only about iOS development, but Android development is also in my sights as well. One of the reasons I picked up a Samsung Galaxy S III last year was to get learn how to write Android apps, an undertaking that’s been delayed by life, work, and all sorts of nonsense from which I expect to free myself really soon.

I recently got around to setting up my systems for Android development, with a Lenovo laptop computer running Windows 8 as the development machine, and my S III as the testing device. I took screenshots along the way, and have put together this little bit of documentation in the hope that someone out there will find it useful.

Part 1: Install Samsung’s Android USB Drivers for Windows

If you’re using Windows to develop Android apps and plan to use Samsung devices while developing, the first thing you should do is get the installer for Samsung’s Android USB drivers for Windows. Point your browser at the charmingly misspelled Samsung “Andorid” USB Driver for Windows page:

samsung developers

Download the SAMSUNG_USB_Driver_for_Mobile_Phones.zip and unzip it. Run the enclosed installer; you should see this:

samsung 1

Click Next:

samsung 2

Choose the appropriate language and country for you. I went with the plain and simple “US English / United States of America”, then click Next. You’ll see this:

samsung 3

In most cases, the default installation location of C:\Program Files\SAMSUNG\USB Drivers should work. Click Install to start the installation process, where you’ll see…

samsung 4

…which will then be followed by…

samsung 5

Click Exit, and the first part of the Android development setup will be done.

To confirm that the driver works, connect your device to your computer via USB…

Android phone sitting on ThinkPad laptop

…then get a look at File Explorer to see if your device appears as another location on “My Computer” on Windows 7 and earlier systems, or on Windows 8 and later systems, “This PC”. Here’s what my Galaxy S III looks like in File Explorer:

galaxy s iii in file explorer

Part 2: Turn on Developer Options on Your Device

In order to push apps to your device during development, you need to turn on developer options on your device, which you do by going to Settings. Once you’re in Settings, scroll down toward the bottom until you see the Developer options item:

developer options

Tap Developer options. You’ll be taken to the Developer options screen:

usb debugging

Move the Developer options switch to the on position, then check the USB debugging option. You might also want to check Allow mock locations; see this article for more details.

Part 3: Install Oracle’s Java SE Development Kit

Now that the drivers have been installed and your device is set up, it’s time to install a JDK. Go to the Java SE Development Kit Downloads page:

java se development kit 7 downloads

Scroll down to the Java SE Development Kit 7u40 table, where the JDKs for supported platforms are listed:

download table 1

In order download the Java SE Development Kit, you have to sell your soul to Oracle and accept Larry Ellison as your Dark Master. Do this by clicking the Accept License Agreement radio button. The table’s appearance will change slightly…

download table 2

…after which you can choose the JDK to download. I’m running the 64-bit version of Windows 8.1 RC (I like to live a little dangerously), so I downloaded the Windows x64 installer.

Once the installer is downloaded, run it. You should see this window:

jdk installer 1

Click Next:

jdk installer 2

The default setting, which installs all the development tools and source code, is good one. Just go with it and click Next. Installation will begin you’ll see this:

jdk installer 3

After which you’ll see this:

jdk installer 4

The installation process is now complete; click the Close button.

Java is now installed on your system, but your system doesn’t necessarily know where to find Java. It’s time to edit the Path environment variable. Go to explorer and right-click on the This PC icon (on pre-8.1 Windows systems, it’s called Computer, and on Windows 7 and earlier, it’s My Computer), and select the Properties item from the menu that appears:

properties

This window (or one similar to it) will appear:

windows 8

In the list of items along the left side of the window, click on Advanced system settings. You’ll be shown the System Properties dialog box:

system properties

Click the Environment Variables… button, and you’ll be shown the Environment Variables dialog box:

environment variables

We want to edit your system’s Path variable, so select the Path item in the System variables list and click the Edit… button

edit system variable

We want to add C:\Program Files\Java\jre7\bin to Path. Do this by adding the following to the end of the contents of the Variable value text field:

;C:\Program Files\Java\jre7\bin

Click OK, which will take you back to the Environment Variables window:

environment variables

At this point, you can dismiss all the other windows that you opened in the process of setting the Path variable.

There’s only one more application to retrieve…

Part 4: Install ADT — Android Developer Tools

Go to the Get the Android SDK page:

android sdk page

Click on the Download the SDK button, which will take you to this page:

android sdk 2

Check the I have read and agree with the above terms and conditions checkbox, which declares your soul the property of Larry and Sergei forever, and then:

  • If you downloaded and installed the 32-bit (x86) version of the Java development kit, choose the 32-bit version of ADT.
  • If you downloaded and installed the 64-bit (x64) version of the Java development kit, choose the 64-bit version of ADT.

Make sure you’ve chosen the correct version of ADT; the 32-bit ADT will not work with 64-bit Java, and the 64-bit version of ADT will not work with 32-bit Java!

Click the Download the SDK ADT Bundle for Windows button, which will start the download process of a .zip file. The .zip file I got had the filename adt-bundle-windows-x86_64-20130917.zip; yours should have a similar one. The .zip file will contain a single folder with the same name as the .zip file, minus the .zip filename extension:

adt 1

Unlike most Windows applications, ADT doesn’t have to be installed using an installer. You simply unzip it, and it’s ready to run. I renamed my ADT folder to simply just ADT and put it into the Program Files directory. You don’t have to do this, but it keeps things consistent.

Part 5: Confirm Everything Works By Building “Hello World”

You’ll be using the Eclipse IDE to write and compile Android apps. Eclipse is in the ADT folder’s eclipse directory:

adt 2

Open the eclipse directory and double-click eclipse.exe to start Eclipse:

adt 3

You’ll see this splash screen:

android developer tools

Followed by this dialog box, asking where your Android projects should be stored. I went with the default, which is typically \Users\your login name\workspace:

workspace launcher

I checked Use this as the default and do not ask again and then clicked OK, after which this was displayed:

splash 2

Once ADT has fully loaded, you should see a window that looks like this:

welcome

Let’s build a quick and dirty application. Click the New Android Application… button that appears below the “Welcome!” message. This will open the New Android Application dialog box:

new android app 1

Enter Hello World into the Application Name text box. The Project Name and Package Name text boxes will fill themselves in appropriately as you type. Then click the Next button. You’ll be taken to the next step:

new android app 2

The defaults work for what we want to do, so just click the Next button. You’ll be taken to this window:

new android app 3

This window lets you define the icon for your app. The default “Android” icon works just fine, so click Next. You’ll be taken to this window:

new android app 4

The simplest way to describe an Android activity is “a ‘screen’ presented to the user”. Android developers who are a little more pedantic might disagree, but for now, it’s a good enough explanation. Make sure that Create Activity is checked and that Blank Activity is selected in the list, then click the Next button. You’ll be led to one more setup window:

new android app 5

For the purposes of this quick-and-dirty app, the defaults are fine. Click the Finish button to conclude this setting-up phase, and you’ll be taken to the ADT IDE’s main window:

run 1

If you haven’t done so already, connect your Android mobile device to the computer with a USB cable.

Let’s run our newly-created app to see if it works. from the menu bar, open the Run menu and choose the Run item:

run 2

You’ll be shown this window:

run 3

Make sure Android Application is selected, then click the OK button. You’ll be taken to the Android Device Chooser:

run 4

With my Samsung Galaxy S III plugged in, it showed up in the Choose a running Android device list as samsung-sgh_i747m-4908d022. If you successfully installed the drivers for your device, it should appear in the list. Select your device and click the OK button. If everything’s working, you should see the following on your device’s screen after a moment or two:

hello world

Success! You’ve now got a working Android developer setup.

Categories
Uncategorized

A Developer Tip from “Adventure Time” [Updated]

sucking at something is the first step

Jake speaks the truth.

Update

Got the video clip!