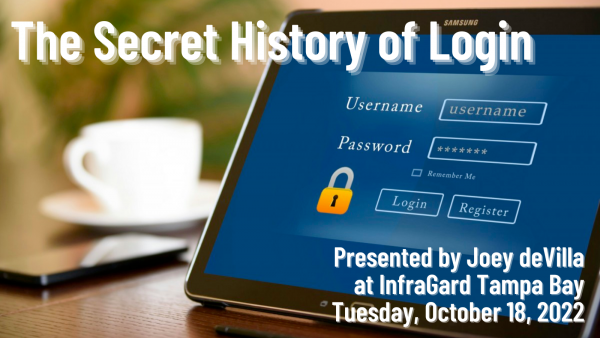
Categories
What I’m Up To

Supplementary UC Baseline notes #3: Videos to prep for this week’s Linux program

Logo: UC BaselineWeek 3 of The Undercroft’s UC Baseline cybersecurity program is about to begin, and it’s all about operating systems! From Monday to Wednesday, it’s Linux from a cybersecurity point of view, and we’ll close out the week with Windows.

Not all of us are programmers, and not all of us live in the command line. I’m also not so smug that I can’t benefit from a review of T3H LUN1X!!1!!1, and unlike my normal Linux use case, where I use a desktop installation (I run Mint, Peppermint, and Raspberry Pi OS), we’ll be booting into a server setup.

For the benefit of my fellow classmates — and hey, it’d do me some good as well — here are some videos that will come in handy over the next couple of days.

Linux Terminal Introduction (ExplainingComputers, Jan. 2020)

In the Windows world, it’s called the Command Line. In the Unix world — which includes Linux and macOS — it’s the terminal, and it’s where we’ll be living for the next three days. Here’s a tour.

Beginner’s Guide to the bash Terminal (Joe Collins, Mar. 2017)

Ready for a longer intro to the Linux command line? Here’s a good one:

Linux File System/Structure Explained! (DorianDotSlash, May 2018)

You’re no longer in Windows’ C:, Program Files, and Documents folders any more! You’re in Linux, where the directories are cryptic, with names like /bin, /sbin, /etc, /dev, /usr, /var, and more! This will give you a quick intro to what they are and what they’re for.


Linux File System | Complete Overview (Chris Titus Tech, Sept. 2019)

Also worth checking out.

Vim Basics in 8 Minutes (tutoriaLinux, Oct. 2018)

We’re going GUIless, so all text editing will be done on some command-line editor — most likely Vim. If you’re new to Vim, you’ll find its modes maddening, as it’s a direct descendant of a program that traces its roots back to 1970s computer terminals. You’ll definitely want to watch this video.

Introduction to Linux for Cybersecurity Crash Course 2020 (Grant Collins, Jan. 2020)

Here’s a more in-depth introduction to Linux from a cybersecurity point of view.

Linux for Ethical Hackers (FreeCodeCamp, Jul. 2019)

Here’s another course on Linux as seen from a cybersecurity point of view. This one focuses on Kali Linux, a distribution specifically made for the purposes of ethical hacking, penetration testing, and general cybersecurity-related stuff.

The mind behind Linux (2016)

This won’t be covered in the course, but it doesn’t hurt to find out more about Linux’s creator, Linus Torvalds. This TED conversation from 2016 is a pretty good introduction.

Categories
Tampa Bay What I’m Up To

Next week’s “UC Baseline” courses cover Windows and Linux, and I’m ready!

Photo: Joey deVilla and Steve Ballmer, who is wearing a Canadian flag hat
Me and Microsoft’s then-CEO Steve Ballmer at the Canadian Windows 7 launch in Toronto, 2009.

Logo: UC BaselineToday marks the end of the second week of The Undercroft’s 5-week cybersecurity training program, UC Baseline. This week was a quick but in-depth (we each had a Cisco switch to configure) introduction to networking. Next week, we look at Windows and Linux from a security perspective.

I have some familiarity with the operating systems in question.

Photo: Joey deVilla, with his accordion, poses with Linus Torvalds, who is holding a pool cue.
Me and Linux creator Linus Torvalds at LinuxWorld Expo NYC 2000.
Photo: Richard M. Stallman and Joey deVilla onstage.
GNU/Free Software Foundation founder Richard M. Stallman and me at the CUSEC Conference in Montreal, 2009.

If you’re bored: When I was a Microsoft developer evangelist (they hired me from the open source/free software world), I won Stallman’s auction for a plush GNU gnu — and paid for it with my Microsoft corporate card. Here’s the story, titled Winning the GNU.

Categories
Process Tampa Bay What I’m Up To

Scenes from UC Baseline’s “Networking 101” class

Here’s my daily view for seven hours a day for the next little while, as I’m part of the inaugural cohort of UC Baseline, the 5-week cybersecurity training program from Tampa bay’s security guild, The Undercroft:

Tap to see at full size.

Last week was devoted entirely to the “Hardware 101” part of the program. Here’s a video summary of what happened that week, and Yours Truly’s in a fair bit of it:

This week is “Networking 101”, which is all about how the bits gets transferred across wires and air to our hardware.

One of the exercises is making our own Ethernet cables. I can do it — just, very, very slowly…

Tap to see at full size.

We spent a good chunk of time setting up virtual LANs on our individually-assigned Cisco Catalyst 3750 programmable 48-port switches (alas, we don’t get to keep them), hooking up our Raspberry Pi 4 boxes (which we do get to keep) to them, and wiring our VLANs together via trunks:

Tap to see at full size.

It’s a strange world, where IOS doesn’t Apple’s refer to “iPhone Operating System” — part of my usual stomping grounds as a developer — but in the world of network administration, it’s Cisco’s Internetwork Operating System:

Tap to see at full size.

This is way outside my normal experience with networking, which I do at the application level, where I deal with data structures like arrays, dictionaries, base64-encoded data, and maybe the occasional data stream. This is the world of packets, frames, switching, and routing. I would still probably ruin a server room if left in charge of it, but after this course, I’d ruin it less.

do have a refreshed generalized concept of what happens at the lower levels of the network, and that’s the important thing for me and the sort of work that I do.

Tap to see at full size.
Categories
Process Tampa Bay What I’m Up To

The UC Baseline cybersecurity course at The Undercroft — Begin week 2: Networking 101!

It’s Monday, July 27th, which means that I’ve completed the Hardware 101 portion of the 5-week UC Baseline cybersecurity training program offered by Tampa Bay’s security guild, The Undercroft! Here’s a quick rundown of what I’ve posted so far about my experiences…

We’re now on week 2, which means it’s time to move to the next module…

It’s time for Networking 101, which takes up the next five days! This should be fun.

In anticipation of this week’s lectures, I thought I’d repost these two “cats and networking” pics…

Photo: A stack of seven interlocking baskets, each with a cat. From top to bottom, the cats are labeled: Application, presentation, session, transport, network, data link, and phyiscal.
The OSI network model, illustrated with cats.
Photo: A stack of four boxes, each with a cat in it. The cats are labeled, from top to bottom: Application, transport, internet, and network interface.
The TCP/IP layers.
Categories
Hardware Process Tampa Bay What I’m Up To

Scenes from Days 4 and 5 of the “UC Baseline” cybersecurity program at The Undercroft

Day 4 of the Hardware 101 component of the UC Baseline cybersecurity program was all about security for the enterprise, which naturally included topics such as servers. Not everyone in the class has had the opportunity to tour a server room or data center, and this was their chance to see these machines up close.

Unlike the previous days, we did not attempt to dismantle and then reassemble the servers — this was a “look, but don’t touch” sort of lesson.

We also had a guest lecturer who gave us a pretty thorough walkthrough of the sorts of things involved in an enterprise server/data center setup, some of which went way over my head. I don’t see a sysadmin/system architect role in my future, but it might not hurt for me to do some supplementary reading on this topic.

Day 5 was the final day of Hardware 101 and started with something that I’ve always been terrible at: Making networking cables.

Arrrrgh.

We also spent some time looking over all sorts of intrusion devices, such as the incredibly cute “Pwnagotchi”, a Raspberry Pi Zero-based device that “listens” to wifi chatter to feed its machine learning program in order to figure out wifi passwords.

It uses an e-paper screen, which is quite legible and consumes little power.

It’s incredibly small:

Here’s a Pwnagotchi beside a U.S. quarter for size reference:

A great way to steal information to gain access to people’s accounts and systems is to set up a fake wifi hotspot at a place that offers free wifi, such as Starbucks. That’s what the Wifi Pineapple is for — people connect to it, thinking they’re connecting to Starbucks wifi. You route their signals through to the real Starbucks wifi, but you’re the go-between, and can “see” everything that your marks are sending on the internet: the data they’re passing back and forth, including stuff like user IDs and passwords:

Here’s the actual unit:

Here’s a wrist-mounted device for performing wifi de-authentication attacks:

It sends out a signal that causes devices currently connected to wifi to disconnect. You could use it in tandem with a Wifi Pineapple to force people to disconnect from the real wifi and then connect to the Pineapple instead, enabling you to read their internet communications.

If you really want to “sniff” all the wifi traffic in the room, you’ll want one of these — a high-gain antenna system hooked to a network interface controller (NIC) that reads signals in “promiscuous mode”, a capability that’s disabled in most NICs. In promiscuous mode, you can capture all wifi traffic instead of the bits of data that you’re authorized to receive. It’s a good network diagnostics tool — and it’s also useful for getting up to no good:

And finally, the Shark Jack. Plug it into someone’s network, either via the ethernet jack or USB, and it will execute scripts to get a map of the network or even deliver a payload somewhere onto the system:

It’s basically a real-world version of the device that Tony Stark slipped onto the command console of the SHIELD helicarrier in the first Avengers movie (it’s at the 0:44 mark):

I may have to invest in one of those bad boys. For research purposes, you understand.

We also had a guest lecturer who delivered a very thorough and informative presentation on getting started in cybersecurity. I’ll have to post notes on it later:

And at the end of the day, we were each issued our very own Raspberry Pi 4 Model B’s!

These were the Labists versions, and I have to say, I prefer their offering over Canakit’s.

Here’s what the board looks like:

It has some pretty impressive specs, especially when you consider that it retails for under $100:

  • Processor: Quad core Cortex-A72 (ARM v8) 64-bit SoC, running at 1.5GHz
  • RAM: 4 GB
  • “Hard drive”: Micro-SD card slot. This model comes with a 32 GB card
  • Networking:
    • 2.4 GHz and 5.0 GHz IEEE 802.11ac wifi
    • Bluetooth and Bluetooth LE (low energy)
    • Gigabit ethernet
  • USB ports: 2 USB 2 ports, 2 USB 3 ports
  • Video: 2 micro-HDMI ports, with support for 4Kp60 video
  • Other ports:
    • Raspberry Pi 40-pin GPIO (general purpose input/output)
    • 2-lane MIPI DSI display port
    • 2-lane MIPI CSI camera port
    • 4-pole stereo audio/composite video port

It also comes with a pretty nice case…

…a power supply with an actual on/off switch on the cord, and not one, but two micro-HDMI to full-size HDMI cables…

…heatsinks and a fan, plus a screwdriver…

…and a micro-SD card and USB adapter so that you can use your standard computer to download an OS…

I spent some time over the weekend noodling with it, and wow, is it a fun computer to play with!

We’re expected to use it for this week’s classes, which make up the “Networking 101” portion of the UC Baseline program. I’m looking forward to it!

Categories
Hardware Process Tampa Bay What I’m Up To

Scenes from Day 3 of the “UC Baseline” cybersecurity program at The Undercroft

Wednesday: Day 3 continued the heavy hands-on portion of Hardware 101, the first segment of my five weeks at UC Baseline, the cybersecurity training program offered by Tampa Bay’s security guild, The Undercroft.

After taking apart and reassembling a desktop, it was time to up the ante and do the same with at least one laptop. I started with a Dell Latitude E5500, a bulky beast by today’s laptop standards, but one that’s more user-serviceable — and more easily taken apart — than most.

First step: Removing the battery.

The bottom panel was easy to pop open. It was held in place by nothing fancier than standard Phillips screws, which provided easy access to the RAM.

Next on the removal list: The optical drive. Once again, pretty straightforward — remove some anchoring screws, and then use a flathead screwdriver tip to push the the drive casing out.

The fan was quite easy to remove, as was the CPU heat sink.

Unlike the previous day’s desktop machines’ CPUs, which were in ZIF (zero insertion force) slots, laptop CPUs aren’t typically swappable, as they’re generally soldered onto the motherboard. This machine had a notebook-grade Core 2 Duo, which was typical for a mid-level laptop in the Windows 7 era.

It was also pretty easy to remove the keyboard…

…and once that was done, detaching the screen was a simple process.

With the disassembly complete, I laid out and labeled the parts that I’d extracted:

“All right, next challenge,” said Tremere, our instructor for the Hardware 101 portion of the course. “Disassemble, then reassemble the small one…”

I flipped it over, pleasantly surprised to see standard Phillips screws that were easy to access:

At this size, a laptop’s battery-to-actual-computer ratio jumps significantly:

This machine was still intended to be somewhat user-serviceable, so the battery and RAM were still easy to remove:

The drive didn’t take much effort to liberate, either:

The fan/heat sink combo didn’t put up much of a fight:

This is a machine made specifically for writing TPS reports and not much else, judging from its CPU. Still, I’m sure it could still do a serviceable job running a modern lightweight Linux — assuming it survives my disassembly and subsequent attempt to put it back together again.

Here are both patients, spread out across the operating table…

Re-assembly took a little longer, and I didn’t bother with photos of that process. I did manage to get it back together again, and with no extra parts!

I even the screen reattached! Later, I found a power adapter, and the machine managed start and get up to the BIOS screen, although the screen looked a little dim. Since I’m not trying out for a CompTIA hardware certificate, I’ll simply declare the procedure a success and not get too bogged down with fussy minutae such as “functioning” and “usable”.

Categories
Hardware Process Tampa Bay What I’m Up To

Scenes from Day 2 of the “UC Baseline” cybersecurity program at The Undercroft

Photo: A red brick building with a wrought iron balcony in a neighborhood of early 1900s brick buildings.
The Undercroft’s building, as seen from its parking lot. Tap to see at full size.

Tuesday was Day 2 of the UC Baseline cybersecurity training program offered by Tampa Bay’s security guild, The Undercroft. I lucked out and got into the inaugural cohort, which means that I’ll spend 8 hours each business day in the classroom (masked and distanced, of course) for the next four weeks.

UC Baseline is made up of a number of separate units, which The Undercroft also provides individually. Week 1 is taken up by the Hardware 101 course, which is all about hardware and providing the class — some of whom have a deep technical background, while others don’t — a baseline knowledge of how the machines that make up the systems that we’re trying to secure.

I suspect that there’s an additional goal of removing any fear of tinkering.

Day 1 of Hardware 101 was mostly lectures about hardware, starting with logic gates and working all the way up to CPUs and SOCs, and Days 2 and 3 were the “tear down/rebuild” days. Day 2 focused on taking apart and then rebuilding desktops, and Day 3 took it up a notch by doing the same thing with laptops.

One of the goodies that we got (and get to keep) is the toolkit pictured below:

The first exercise was a teardown-only one. We could choose from a selection of old computers at the back of the room to tear apart, and I thought it might be fun to try and take apart this old Power Mac G5 from the mid-2000s. These machines are notoriously opaque, and I thought it might be fun to try to dig through its guts:

The Power Mac G5 was aimed at Apple’s “power use” customer — typically creatives who need serious computing horsepower. This particular machine was used by an advertising agency to do 3D rendering. As such, it’s one of the few Macs that’s easy to open, at least superficially. Take a look at this beautiful Jony Ive-designed latch:

Opening the latch reveals the machine’s aesthetically-pleasing innards, which were covered by a plastic shield. I popped off the shield and got to work.

By the way, that yellow clip in the photo above is connected to my anti-static wrist harness (another goodie we got as part of the course fee). Nobody expected these machines to survive the teardown process, but it never hurts to consistently follow standard safe electronics practices!

The fans slid out surprisingly easily. I was surprised that the machine had a reasonable number of fans, given Steve Jobs’ famous dislike of fan noise, but this computer’s twin G5 processors gave off ridiculous amounts of heat. There’s a reason that Apple switched to Intel processors.

I then removed the cards from the two expansion slots. One was a high-speed network card; the other was pretty nice 2005-era graphics card:

Next up: The RAM!

After that came the Airport Extreme wireless NIC, freeing it from both the PCIe slot and its antenna wire:

That took care of the easy part. Time for a photo op:

Here’s what I yanked out so far. Note my screw management technique!

And now the hard part: getting to the processors. They’re encased in a pretty anodized aluminum box, and it turned out that the only way into it was to break the “warranty pin” — a plastic pin that acts as proof that a non-Apple-authorized person took a peek inside:

Behind the G5 door were the twin processors and their twin heat sinks:

I finished the teardown by identifying the components I’d extracted.

It was then time to move onto the next patient, a “TPS Reports”-writing desktop computer that we would have to disassemble and reassemble:

These are machines whose innards would need to be accessed by a mid-size office IT department, so it opens easily:

Modern computers largely fit together like Lego pieces. Even so, I kept notes on which cables went where.

Here, I’ve relieved the machine of its power supply and optical drive. It was missing a hard drive, so I retrieved one of the spare from the back of the room:

The final part of the assignment: Identify and retrieve the processor. It’s fairly obvious:

Here’s the processor, without the heat sink obscuring it. It’s an AMD Athlon II, which dates from around 2009 / 2010, when Windows 7 was a new thing:

The processor sat in a ZIF (zero insertion force) socket, which makes it easy to remove and then re-seat:

Look at all those pins. We’re a long way from my first processor, the 6502, which had only 40 pins.

Rebuild time! The machine had no RAM, so I grabbed two sticks from the back of the room and inserted into the primary slots, then put the rest of the machine back together again:

The final test — does it power up?

Success! A quick attachment to a monitor and keyboard showed an old Windows screen. Not bad for my first teardown/reassembly.