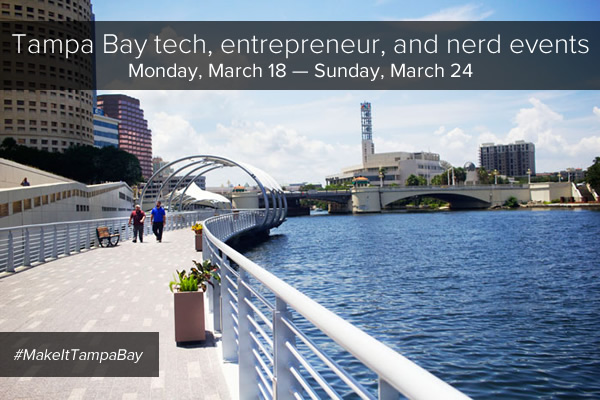
Every week, I compile a list of events for developers, technologists, tech entrepreneurs, and nerds in and around the Tampa Bay area. We’ve got a lot of events going on this week, and here they are!
This weekly list is posted as a voluntary service to the Tampa tech community. With the notable exception of Tampa iOS Meetup, which I run, most of this information comes from Meetup.com, EventBrite, and other local event announcement sites. I can’t guarantee the accuracy of the dates and times listed here; if you want to be absolutely sure that the event you’re interested in is actually taking place, please contact the organizers!
Monday, March 18
- Young Professionals of Tampa Bay Networking Group — SOHO Networking at 717 South @ 717 South, 11:30 AM to 1:00 PM
- Tampa Bay Business Networking Happy Hour- Meet Up — 3rd Tuesday Happy Hour Mixer and Mingle Wesley Chapel @ Irish 31 Pub House & Eatery, 4:00 PM to 6:00 PM
- Florida Center for Creative Photography — FREE Lightroom Class at Ross Norton Community Center — Class 7 of 8 @ Ross Norton Recreation Complex, 6:30 PM to 8:30 PM
- Cool ‘n Confident Toastmasters @ SPC – St. Petersburg/Gibbs Campus, 6:30 PM to 8:00 PM
- Tampa Bay Professionals (IT, Sales, HR & more) — Time Management: Become a Time Lord @ WebEx Live-Online Session, 7:00 PM to 7:30 PM
- Toastmasters Division E — Lakeland Club ~ 2262 @ YMCA – South, 7:00 PM to 9:00 PM
- Pen Turning Class (Day 1 of 2) @ Tampa Hackerspace West, 7:00 PM to 9:00 PM
- South Tampa Toastmasters @ Unity of Tampa, 7:00 PM to 8:15 PM
Tuesday, March 19
- Westshore Toastmasters @ FIVE Labs, 12:00 PM to 1:00 PM
- Brandon Boardgamers — Tuesday Night Gaming @ Cool Stuff Games, 5:00 PM to 8:00 PM
- Tampa SQL User Groups — Pinellas – Monthly Meeting @ St Pete College – EpiCenter, 6:00 PM to 9:00 PM
- Tampa Bay Women In Agile (WIA): Happy Hour @ Brick House Tavern + Tap, 6:00 PM to 7:30 PM
- Weekly Open Make Night @ Tampa Hackerspace, 6:00 PM to 10:00 PM
- Defcon813 — OSCP Exam NW-Tampa Study Group @ 6:00 PM to 9:00 PM
- WordPress St. Petersburg — Build Anything with Pods! A Hands On Workshop on Using the Pods Framework @ Suncoast Developers Guild, 6:30 PM to 8:30 PM
- Game Club Tampa Meetup — Tuesday Nite Roleplayers (RPGs) [Full] @ Grand Arena of Mind Expansion, 6:30 PM to 10:30 PM
- IPAs and APIs — Reboot 3.0 @ Reboot, 6:30 PM to 8:30 PM
- West Pasco Toastmasters Club #2824 — Weekly Meeting @ West Pasco Board of Realtors, 6:30 PM to 8:00 PM
- Spirited Toastmasters @ St Stephens Catholic School, 6:30 PM to 8:00 PM
- Wordier Than Thou Meetup for Writers and Book Lovers — St. Pete Storytelling & Prose Open Mic with Nathan Van Coops @ Studio@620, 7:00 PM to 9:00 PM
- Machine Shop Safety and Cleanup (Members Only) @ Tampa Hackerspace, 7:00 PM to 8:30 PM
- Clearwater Writers Meet-Up @ 7:00 PM to 10:00 PM
- Pen Turning Class (Day 2) @ Tampa Hackerspace West, 7:00 PM to 8:30 PM
- Anime, Nerds & Geeks — BLACK BUTLER – THE BOOK OF ATLANTIC @ 7:00 PM to 10:00 PM
- Florida Center for Creative Photography — Photo 101 – Ask Me Anything Related to Photography, Computers and Software @ O’Keefe’s Family Restaurant, 7:00 PM to 9:00 PM
- Woodshop Safety (Members Only) @ Tampa Hackerspace, 7:00 PM to 9:00 PM
Wednesday, March 20
- Young Professionals of Tampa Bay Networking Group — Downtown St Pete Networking at the Hanger~ Wednesday Mornings @ The Hangar Restaurant & Flight Lounge, 7:30 AM to 9:00 AM
- OPEN/FREE Coworking for Veteran Entrepreneurs @ FirstWaVE Venture Center, 9:00 AM to 6:00 PM
- Young Professionals of Tampa Bay Networking Group — Bernini of Ybor Lunch Networking @ Bernini (innovative italian cuisine), 11:30 AM to 1:00 PM
- Tampa Bay Blockchain Developers Meetup — Open code @ Tampa Bay Wave, 5:00 PM to 8:00 PM
- Clearwater Digital Photography Meetup — “Meet and Greet” @ 5:30 PM to 7:30 PM
- Tampa Bay Agile — Empower Agile Teams:GAMES & PUZZLES-Build,Improve and Grow Teams Testing Skills! @ Kforce, 6:00 PM to 8:00 PM
- Tampa Bay UAS and Drone University — St. Petersburg College UAS Meetup- March Meeting @ St. Petersburg College EpiCenter, 6:00 PM to 8:00 PM
- The Suncoast Linux Users Group — SLUG – Pinellas @ Pinellas Park Public Library, 6:00 PM to 8:00 PM
- ReactJS Tampa Bay — Sharing Code @ Exzeo, 6:00 PM to 8:00 PM
- IIBA Tampa Bay Q1 2019 Happy Hour! @ Coppertail Brewing Co, 6:00 PM to 8:00 PM
- Tampa Bay Data Science Group — Teaching Data Science to Undergraduates: An R vs. Python Discussion @ Alessi/Vigo Foods Bacardi Memorial Tasting Room, 6:30 PM to 9:30 PM
- Tech Ladies Tampa: Nailing That Interview! @ Suncoast Developers Guild, 6:30 PM to 8:30 PM
- Learn to Code | Thinkful Tampa — Intro to Python: Fundamentals @ Tampa Bay Wave, 6:30 PM to 8:00 PM
- St Pete SEO and Content Enthusiasts — Let’s Get Enthused: Beyond the Keyboard – The Kickoff @ The Symphony Agency, 6:30 PM to 8:30 PM
- Women in Linux — Meet Jamesha “Jam” Fisher @ 7:00 PM to 9:00 PM
- Central Florida CitySec — CigarCitySec Meetup @ Cigar City Brewing, 7:00 PM to 10:00 PM
- Entrepreneur’s Guild Meeting @ Tampa Hackerspace, 7:00 PM to 9:00 PM
- Woodshop Tool Sign Off-Jointer, Planer, & Bandsaw (Members Only) @ Tampa Hackerspace, 7:00 PM to 9:00 PM
- Carrollwood Toastmasters @ Jimmie B. Keel Regional Library, 7:00 PM to 8:30 PM
- Nerdbrew Events — Games & Grog @ Peabody’s Billiards and Games, 7:00 PM to 11:00 PM
- Tampa Bay Blockchain Group — Bitcoin Cash @ Tampa Bay Wave, 7:00 PM to 9:00 PM
Thursday, March 21
- Women In Linux — Meet Jamesha “Jam” Fisher @ 7:00 PM to 9:00 PM
- Tampa Professional Networking Meetup — Happy Hour Networking – Cigars, Fine Wines and Brews @ Long Ash Cigar Bar, 5:00 PM to 8:00 PM
- Lean Beer for All Things Agile (Tampa) @ The Pub (at Bay Street in Int’l. Plaza), 6:00 PM to 7:30 PM
- High Tech Connect — Tech Fest at Vology @ Vology, 6:00 PM to 8:00 PM
- Local Newbies, Local Brewskis — Meet & Mingle Happy Hour @ Coppertail Brewing Co, 6:00 PM to 9:00 PM
- Tampa SEO and Internet Marketing Monthly Meetup with Steve Scott @ In The Loop, 6:00 PM to 8:00 PM
- Suncoast Developers Guild — Meet our Part-time Instructors! @ Suncoast Developers Guild, 6:00 PM to 8:00 PM
- Lean Beer for All Things Agile (Lakeland) — Swan Brewing, 6:30 PM to 8:00 PM
- Dunedin Beers & Board Games — Beers and Board Games at Cueni Brewing in Dunedin (Every Thursday) @ Cueni Brewing Co., 6:30 PM to 10:00 PM
- Tampa.rb: Mystery Meetup! @ Suncoast Developers Guild, 7:00 PM to 10:00 PM
- Dialogue Society Meetup: Cultivating Tolerance @ College of Public Health, 7:00 PM to 9:00 PM
- Sketch – Tampa Bay — Sketch Basics Kickoff @ AgileThought, 7:00 PM to 9:00 PM
- 3D Printer Orientation @ Tampa Hackerspace, 7:00 PM to 8:15 PM
- Bradenton JPI Photo Group — Fire and Light – Light Painting Workshop @ Coquina Beach, 8:00 PM to 10:00 PM
Friday, March 22
- Lean Coffee for All Things Agile (Westshore) @ Panera Bread, 7:30 AM to 8:30 AM
- Young Professionals of Tampa Bay Networking Group — Friday Business Introductions JOIN us All Welcome @ Cafe Delanie, 12:30 PM to 2:00 PM
- Networking After Hours — Black Dress Social @ Franklin Manor, 7:00 PM to 10:00 PM
- Tampa Bay Young Professionals Group — Dinner at “Flames” Indian Restaurant in South Tampa @ 7:30 PM to 10:00 PM
- Geekocracy! — Big Lebowski Bowling at Pinchaser Veterans @ 8:00 PM to 11:00 PM
Saturday, March 23
- THS Woodworkers Guild Volunteer to Build the Maslow CNC (Members Only) @ Tampa Hackerspace, 8:00 AM to 12:00 PM
- Tampa SQL User Groups — SQL Saturday Tampa #859 @ 9:00 AM to 6:00 PM
- Geekocracy! — Bark in the Park for Geek-dog-cracy day! @ Curtis Hixon Waterfront Park, Saturday 11:00 AM to Sunday 3:00 PM
- Game Club Tampa Meetup — Learn how to role-play (RPG) @ Grand Arena of Mind Expansion, 12:00 PM to 4:00 PM
- Kakkoii-Otaku Clan — “US” Movie – AMC Veterans @ 7:15 PM to 9:15 PM
- Tampa Bay Young Professionals Group — Karaoke, Billiards, Drinks, and Socializing! @ 9:30 PM to 2:30 AM
- Geekocracy! — Endless Night: Tampa Vampire Ball 2019 @ The Castle, 10:00 PM to 3:00 AM
Sunday, March 24
- St. Petersburg Photography Group — CAR SHOW @ 9:00 AM to 2:00 PM
- Game Club Tampa Meetup — D&D 5E campaign (FULL), bi-weekly @ Grand Arena of Mind Expansion, 11:00 AM to 5:00 PM
- Geekocracy! — USF Botanical Gardens with Mr. Dunderbacks After @ USF Botanical Gardens, 12:00 PM to 2:00 PM
- Geekocracy! — Play Dungeons & Dragons! @ 1:00 PM to 5:00 PM
- Advanced Laser Cutter Skills (Members Only) @ Tampa Hackerspace, 2:00 PM to 4:00 PM
- Sew What? (Textile Arts & Crafts) @ Tampa Hackerspace, 5:30 PM to 8:30 PM
- Cards Against Humanity – Tampa Bay and Lakeland — Cards Against Tampa – Irish You Were Beer @ 6:00 PM to 9:00 PM

 …which makes all but a very fortunate few below average.