
This one goes out to all the front-end and interface designers and developers out there.
This one goes out to all the front-end and interface designers and developers out there.

On the most recent Amazon Prime Day — an annual trick that Amazon pulls in order to boost sales in the same vein as Cyber Monday, but in the summer — I managed to limit myself to buying just one sale-priced thing that I didn’t really need: the CanaKit Raspberry Pi 3 Complete Starter Kit. It normally sells on Amazon for US$75, but it was on sale that day for US$60.
The Raspberry Pi 3 is the current version of a series of single-board computers about the size of a deck of playing cards, and are:
I plan to use the Raspberry Pi to make some initial delving into IoT (Internet of Things) development, and as part of my journey into developing for that category of computer that I call “tiny and shiny” — smartphones, tablets, and now Raspberry Pi / Arduino-type boards.
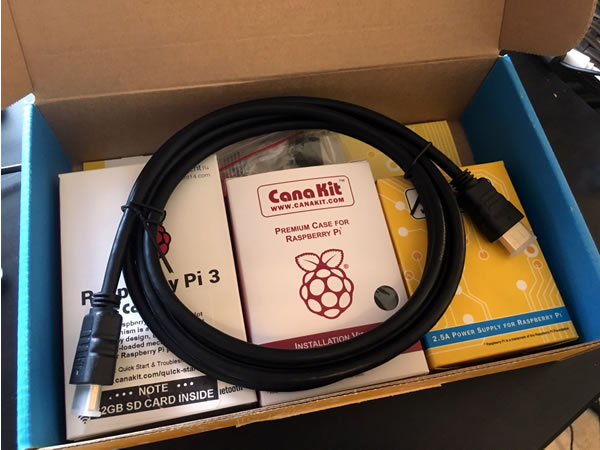
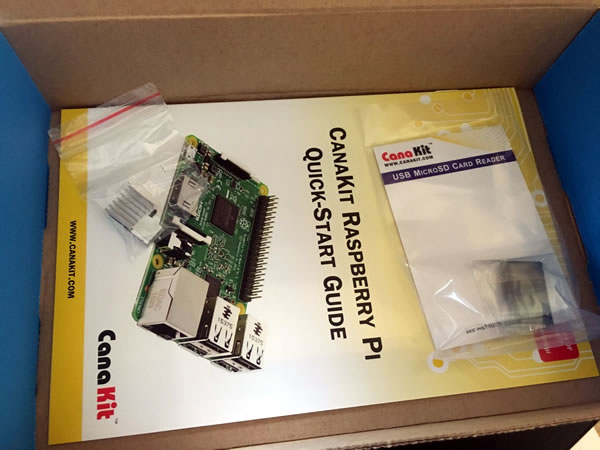
Here’s the CanaKit Raspberry Pi 3 Complete Start Kit box:

When I opened it, I saw this:

The first thing you should see is a greeting card that also provides an email address for assistance, should you need it. The other side of the card has a diagram explain what each of the GPIO interface pins on the Raspberry Pi 3 board is for.
Below the card was an HDMI cable:
And below that were three boxes:
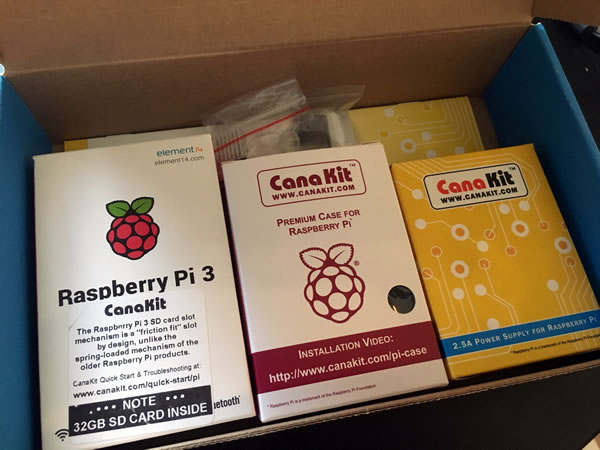
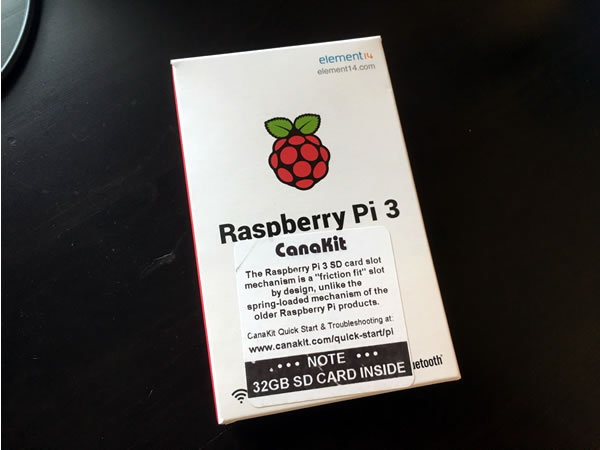
From largest to smallest, the three boxes contained the Raspberry Pi 3 board and SD card (which functions as its “hard drive”)…
…a case for the board…

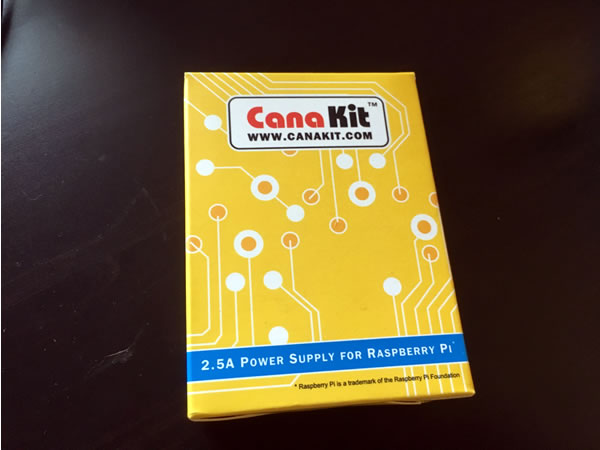
…and a power supply for the board:
Below the boxes were these items:
One bag contained a USB microSD card reader. It allows you to use your regular computer to download updated or different versions of the Raspberry Pi OS or software and transfer them onto the microSD card:

The other bag contained two heatsinks for its chips. They already have heatsink adhesive attacked to them; you just have to peel off the backing and stick them onto their respective chips:

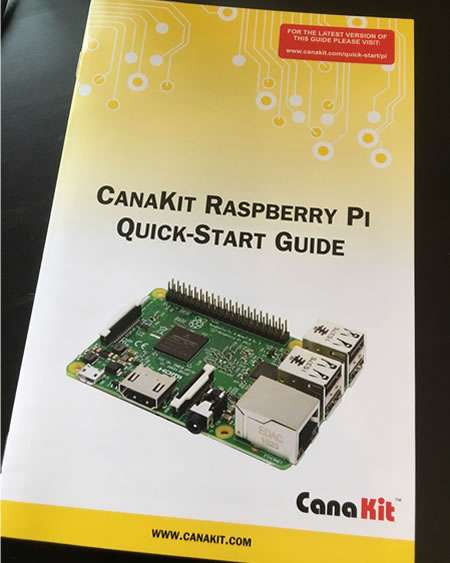
At the bottom of the box was the “quick start” guide:
Here’s the board mounted in the lower tray portion of the case:

And here’s the board with the middle section of the case attached:

And here’s what the Pi looks like once the case is assembled:

Assembling the case is pretty easy, as no tools are required. It simply snaps together.
Here’s the case on my desk, placed beside a $20 bill for size comparison:

The Pi case is smaller than the hard drive that I connected to it (you can see it below the Pi):

I decided to take the beginner route and start up the system using NOOBS, short for “New out of the box software”. It came pre-loaded onto the SD card that came with the board, and it installed Raspbian, the official supportedRaspberry Pi OS, and based on Debian. Once the OS is installed, here’s what you see when you boot up the Pi:

Once it finishes booting up, you’re taken to a GNOME desktop:

I used to have a stack of USB keyboards, but I’d given most of them away to friends and family, and my last couple are still back in Toronto. Figuring that I’d end up taking the Pi to meetups, BarCamps, and other demo sessions, or perhaps use it as a living room media center / internet device, I went with the Logitech K400 all-in-one keyboard, shown below. It’s currently on sale at Walmart for US$20:

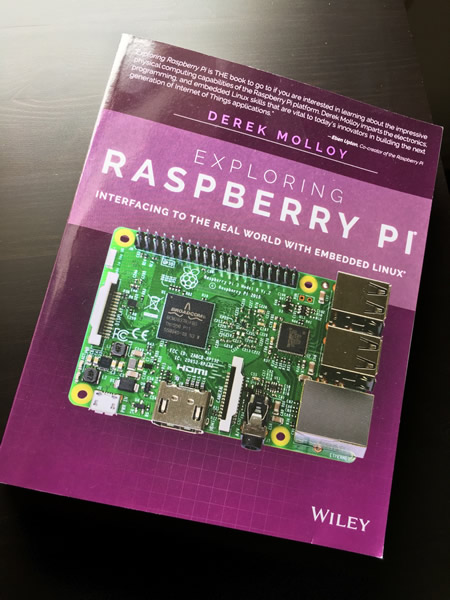
And thanks to Anastasia Sistevaris, an intern at Wiley, I got hooked up with a set of Raspberry Pi books, the first of which arrived recently: Exploring Raspberry Pi by Derek Molloy. I’ll do a writeup of this book in a later article:
Watch this space for more Raspberry Pi articles as I start noodling with my new toy!

Click the photo to see it at full size.
Last night, I had the pleasure of meeting inventor Ron Klein and his wife Arlene, at the Next Money TPA meetup. If you’re a reader of this blog, it’s likely that you’ve used at least one of his innovations:
…and then there’s the innovation you’ve most likely used — automated validation of credit cards through the use of a magnetic stripe:
He was also an artillery forward observer in the Korean War, where he went on 58 missions. He got hurt during the last one, resulting in a spinal injury, and earning him a Purple Heart. The injury caused him painful spinal stenosis, where the bones in his spine put pressure the spinal cord and related nerves leading from it. He took up exercise, which he found was pain-relieving, and does it so often that he’s participated and won medals in the Florida Senior Games.

In the bad old days, credit card validation was done manually. Any merchant that accepted payments via credit card was given a long paper list of “bad” credit card numbers, and would have to “eyeball” the list in order to valid a credit card. I remember when this sort of thing was still done in the early 1970s, and it was slow even under the best of circumstances, never mind during big sales or something like Black Friday.
Klein, then director of engineering for Ultronics Systems Corporation — which would later become part of GT&E Financial — developed a “validity-checking system”, which allowed merchants to enter credit card numbers into a “desk-mountable interrogation unit” that could check against a central store of credit card numbers which would be stored in drum memory. If the account number on the card wasn’t on the “bad” list, the desk unit would show a “credit good” light; otherwise, it would display an error signal.
According to CreditCards.com, Klein’s original design for the verifier was such that a bad credit card would be held by the device. “If the credit wasn’t good,” he said, “it locked up the card so that the person didn’t get the card back, because the merchant got credit for capturing negative-account cards.”
At the age of 81, Ron could simply enjoy a quiet retirement, but that’s not his style. “I took three months off, but I got bored,” he said. “I’d rather keep busy, taking on new challenges. I’m not empty yet!”
He spoke to the group for about 90 minutes, regaling us with stories about his childhood, the business world, and his drive to find solutions to problems.
One theme he kept repeating to the meetup group was to simplify. “There’s a fix for everything, a solution for every challenge. The trick is to simplify. Identify the problem, simplify, then be smart, daring, and different.”
Another bit of advice he gave to the group was to “Be a smiling cobra, and never point an unloaded gun,” which I took to mean be nice as much as you can, but be tough when you have to — and mean it. I found him to be quite affable, but if he managed to operate in the world of Wall Street, I can he his need to be a cobra from time to time.

His last bit of advice to the group was to “sell the benefit, not the idea”. This is a good reminded for anyone who’s inventing a product or service — nobody cares about inventions for their own sake, but the benefits they provide. This may seem obvious to some, but as I like to say, there’s great power in stating the obvious.
Ron lives in Sarasota, about an hour and a quarter south of my place. I may have to drive down there sometime, take him and Arlene out to lunch, just so I can hear more stories about the things he created — and is still creating. My thanks to Ron and Arlene for appearing at the Next Money TPA meetup!

Next Money TPA is the Tampa chapter of Next Money, an international group of fintech communities, and the meetup group that brought Ron Klein to speak. Next Money TPA brings together people from the Tampa Bay area to discuss the intersection of finance, technology, design, and creative spaces. Organized by Bruce Burke, the meetup invites “casual, entrepreneurial, inquisitive minds” to gather, share ideas, and meet each other.

If you’re an iOS developer in the Tampa Bay area and looking for something to do this Thursday evening, you’ll want to check out the Suncoast iOS Meetup. This session is called Core Location In depth: Get your location even if your app gets killed!
Here’s the abstract for the meetup:
In this session, I will explain in depth how the iPhone gets your location and which APIs are available in the latest version of iOS.
- Do you know that the iPhone combines three different radio signals to obtain your location?
- Do you know how to track the location even when your app is not running?
- Do you want to get an alert when the user arrives to one specific location?
- Even if your app is killed or is not active?
- Do you know how to debug your location code with the iOS simulator?
Come to the session and you’ll get the answers.
This session will be a presentation with some slides and some short demos with Xcode. No prior knowledge is necessary. Everyone is welcomed.
 Suncoast iOS Meetup is organized by Craig Clayton and Juan Catalan, both of whom write apps for a living. I’m going to catch this one, partly because it’s been too long since I last attended a Suncoast iOS Meetup, partly because I’ve never seen Juan present, and partly because I can’t answer “yes” with complete certainty to all the questions in the abstract.
This meetup will take place this Thursday, July 28th at 7:00 p.m. at Tampa Bay Wave, located in downtown Tampa (500 East Kennedy Boulevard, 3rd floor). Attendance is free, but you should register to attend!

[via Polygon] On Friday, Apple confirmed that Pokémon Go got more downloads in its first week than any other app in the history of the App Store, which opened just over eight years ago on July 10, 2008. Apple won’t get any more specific than that, Nintendo are referring all inquiries about download statistics to The Pokémon Company, and nobody’s heard anything from them. The “mium” part of “freemium” means that Pokémon Go still makes money — anywhere from $1 million daily (according to Business Insider, or whomever they’ve semi-plagiarized) to $2.3 million daily (according to Superdata Research).

At the time of writing, Pokémon Go holds the number one position on the “Free” and “Top Grossing” charts of both the App Store and Google Play. Nicolas Beraudo, the EMEA managing director for the mobile analytics firm App Annie says that “I can easily envision a run-rate of over $1 billion per year with less server issues, a worldwide presence, and more social and [player vs. player] features.”

As I write this, the number 3 free app on the App Store is a third-party Pokémon Go utility app called Poké Radar. It’s a crowdsourced Pokémon location database that lets players find or submit Pokémon encounter locations worldwide. The image above is a screenshot from Poké Radar that shows user-submitted Pokémon encounters in my stomping grounds, the Tampa Bay area.
This likely won’t be the last third-party Pokémon Go utility; the current Pokémon craze and potential $1 billion pie means that even a small slice of the business is too big an opportunity to pass up. If you’ve got the time and the resources, you should try developing a Pokémon Go helper app.

Not surprisingly, a number of online resources for developers interested in building Pokémon Go tools have appeared online. This is a hot new topic, and you should expect to see new resources spring up quite often for the next few weeks, but here are the three best starting points that I’m aware of:
A word of warning: Some of the code pointed to by these resources appears to use not-necessarily-approved access to data streams between devices and Pokémon Go servers. All the standard “I am not a lawyer” and “Caveat implementor” warnings apply.

I had the opening presentation in the “Miscellaneous and Open Source” track of Tampa Code Camp 2016, which took place on July 16th. My presentation was titled Just enough React to get you into trouble, and was designed to be an introduction to building user interfaces using React.
In 50 minutes, I introduced React to the audience mostly by live-coding a simple React application in a JSFiddle playground. For those of you who missed it (or saw it and wanted to review it), this article walks you through my presentation. Enjoy!
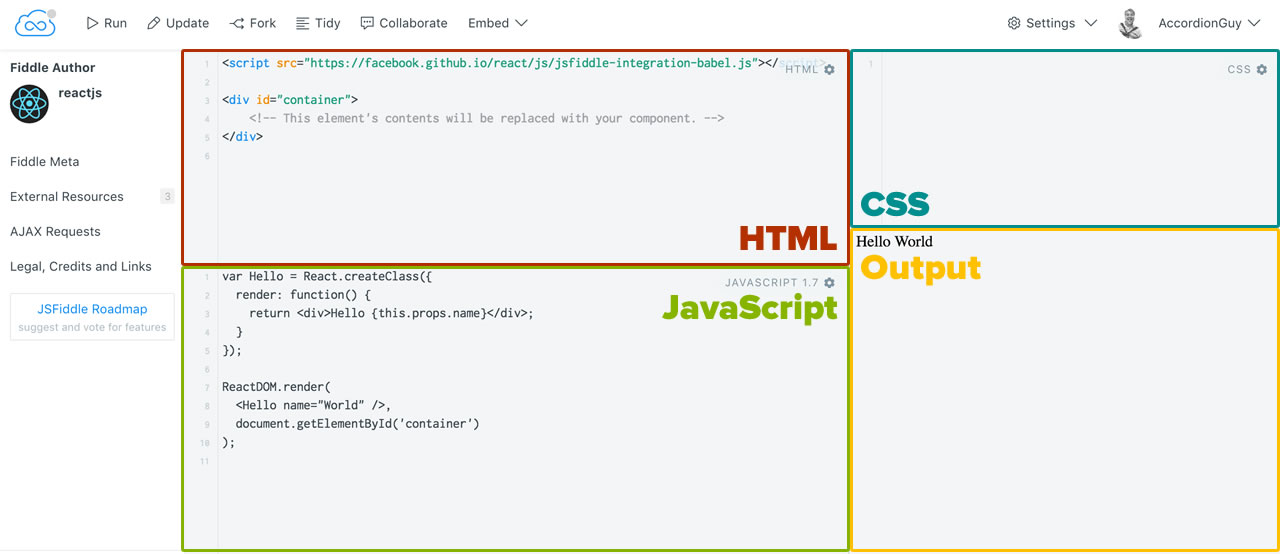
I spent most of my presentation live-coding some a simple React application in JSFiddle, a “playground” that lets you quickly try out web development ideas in your browser and save them for later use. A saved “playground” is called a fiddle, and you can fork other people’s public fiddles for your own experimentation.
JSFiddle has four key areas — HTML, CSS, JavaScript, and output, as shown below:
Click the screenshot to see it at full size.
JSFiddle lets you enter the HTML, CSS, and JavaScript into the corresponding areas and then see the result in the output area by clicking on the Run button located near the upper left-hand corner of the page. It even lets you import a number of JavaScript and CSS libraries.
In this exercise, we’ll work using a base fiddle that imports the libraries necessary for a React application, and we’ll do all of our coding in the JavaScript area.
Let’s start by navigating to the fiddle that I set up as the starting point for the presentation. I forked it from the React base fiddle, and if you set up your own JSFiddle account, you should fork it for yourself.
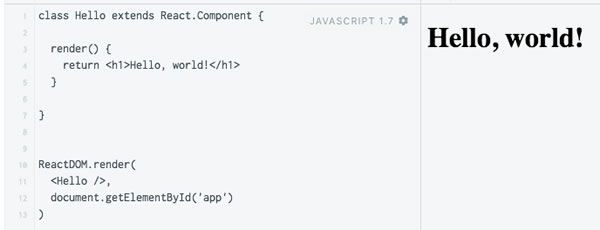
The fiddle features one of the simplest React applications that you can write: “Hello, world” for React. Here’s the JavaScript:
class Hello extends React.Component {

  render() {
    return <h1>Hello, world!</h1>
  }

}


ReactDOM.render(
  <Hello />,
  document.getElementById('app')
)
And here’s a screenshot showing the output:
Let’s take a closer look at what’s going on in the JavaScript code…
Hello.React is all about creating user interfaces by assembling modular, composable components. For this first example, we want to create a component named Hello, which is made up of a single <h1> heading. We do this by creating a class named Hello, which subclasses React’s React.Component class:
class Hello extends React.Component {

  render() {
    return <h1>Hello, world!</h1>
  }

}
Our Hello class has a single method, render. React component classes can implement many methods, but must implement a method called render, which returns a value that shows how the component should be drawn onscreen. The value returned by render depends on the kind of React app we’re working on:
render method returns a single HTML element. This single HTML element is allowed to contain other HTML elements.render method returns a single view. This single view is represented in a dialect of XML whose elements represent native mobile UI elements. This view is allowed to contain other views.(For now, we’ll stick to React web applications. I’ll look at React native applications in a later article.)
Here’s the value returned by the render method:
<h1>Hello, world!</h1>
You’ve probably noticed that it’s not in quotes as you might have expected. That’s because render‘s return value isn’t a string that contains HTML.
Instead, its return value is JSX, a dialect of XML whose name is short for “JavaScript XML”. It looks like HTML, and it’s meant to — it’s a shorthand for the value that the render method actually returns, which is a React element — a JavaScript object. This fiddle — and many React applications — includes a extension that preprocesses JSX into JavaScript that generates a React element.
Here’s what render really returns, once the JSX has been processed into JavaScript:
React.createElement("h1", null, "Hello, world!")
In fact, you can have render directly return a React element. Try changing the render method so that it looks like this, then click the Run button to run the app:
render() {
  return React.createElement("h1", null, "Hello, world -- the hard way!")
}
The output should look like this:

Click the screenshot to see it at full size.
Generally, React developers prefer to work with JSX. It’s preprocessed, so using it doesn’t affect your application’s efficiency, and it’s much easier to read, especially as you work on more complex React projects.
Hello component onto the page.Here’s the line that renders the Hello component onto the page:
ReactDOM.render(
  <Hello />,
  document.getElementById('app')
)
The ReactDOM.render method takes two arguments:
Hello‘s render method, which we request by using the JSX tag <Hello />.id is app. If you look in the HTML area of the fiddle, you’ll see it at the very end:<div id="app">
<!--
This element's contents will be filled by our React code's output.
-->
</div>
This is one of the two things you should take away from this tutorial: At its core, building user interfaces in React is about defining components and then rendering them onto the screen. Everything else builds on this basic principle.
Let’s continue. If you changed the render method in Hello to use JavaScript instead of JSX, change it back. The code in the JavaScript area of the page should look like this:
class Hello extends React.Component {

  render() {
    return <h1>Hello, world!</h1>
  }

}


ReactDOM.render(
  <Hello />,
  document.getElementById('app')
)
Suppose we want our application to be a little more flexible in who it says “Hello” to. Let’s change the component so that it can be passed a name parameter, and then says “Hello,” followed by that name.
Update the code in the JavaScript area so that it looks like this:
class Hello extends React.Component {

  render() {
    const name = this.props.name
    return <h1>Hello, {name}!</h1>
  }

}


ReactDOM.render(
  <Hello name="Kate" />,
  document.getElementById('app')
)
Let’s first look at the ReactDOM.render line. Note that we’ve added an attribute to the Hello element:
<Hello name="Kate" />
The use of XML attributes in React elements allows us to pass values to the corresponding components. In the Hello element, we’re using an attribute called name to pass the string “Kate” to our Hello component.
Within the Hello component’s render method, we access that value by using the component’s props (short for properties) object and assign its value to a variable…
const name = this.props.name
…and then we use that variable within the JSX returned by the render method. Note that the variable is delimited by { }:
return <h1>Hello, {name}!</h1>
When you click on the Run button in JSFiddle, here’s what you should see:
Click the screenshot to see it at full size.
For components, props are read-only — they can take in props and use their values, but they can’t change them. They’re meant to be used to set up components.
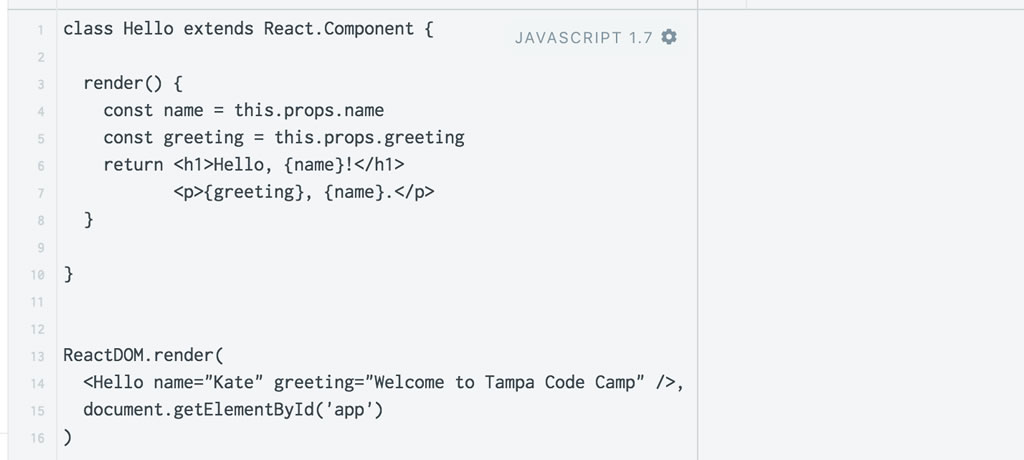
Let’s change our app so that it says “Hello, Kate!” followed by a greeting:
class Hello extends React.Component {

  render() {
    const name = this.props.name
    const greeting = this.props.greeting
    return <h1>Hello, {name}!</h1>
           <p>{greeting}, {name}.</p>
  }

}


ReactDOM.render(
  <Hello name="Kate" greeting="Welcome to Tampa Code Camp" />,
  document.getElementById('app')
)
If you click the Run button right now, the output area will contain…nothing:
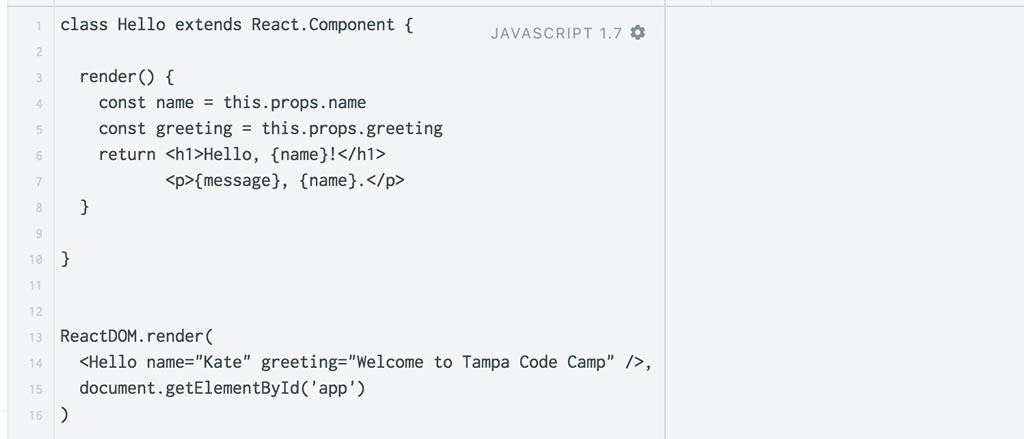
Click the screenshot to see it at full size.
In many cases, when the output area is blank when you don’t expect it to be, it means that there’s an error in your code. In this case, it’s the fact that the render method is supposed to return only one HTML element, but our returns two:
<h1>Hello, {name}!</h1>
<p>{greeting}, {name}.</p>
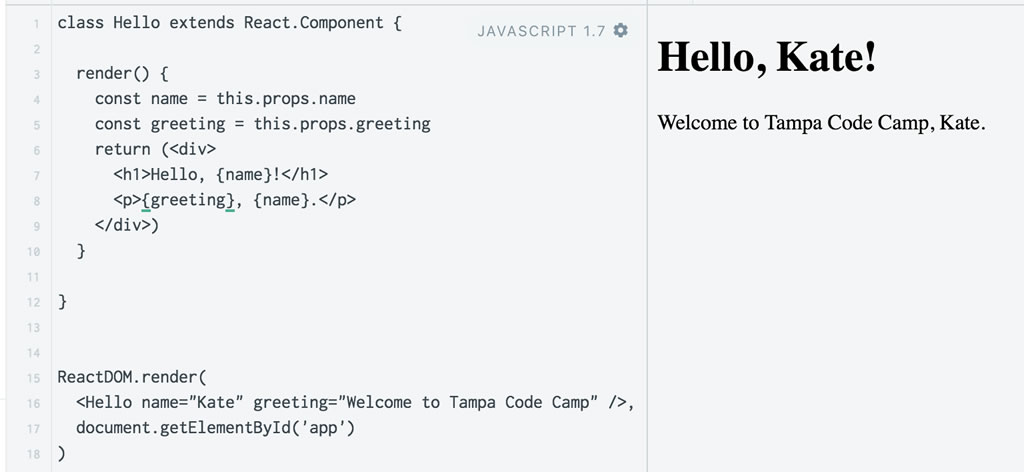
While render is supposed to return a single HTML element, that single element is allowed to contain other elements. The fix is to take our two elements and enclose them in a <div> like so:
<div>
  <h1>Hello, {name}!</h1>
  <p>{greeting}, {name}.</p>
</div>
Here’s what your code should look like now…
class Hello extends React.Component {

  render() {
    const name = this.props.name
    const greeting = this.props.greeting
    return (<div>
      <h1>Hello, {name}!</h1>
      <p>{greeting}, {name}.</p>
    </div>)
  }

}


ReactDOM.render(
  <Hello name="Kate" greeting="Welcome to Tampa Code Camp" />,
  document.getElementById('app')
)
…and here’s what things should look like when you hit the Run button:
Click the screenshot to see it at full size.
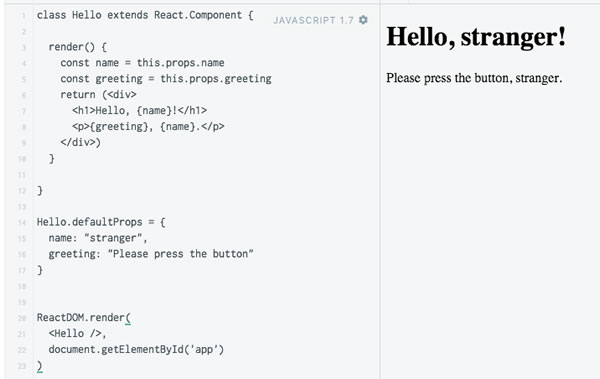
In addition to passing values to React components using props, we can also create default values through the use of default props. Change the code in the JavaScript area of the fiddle so that it looks like this:
class Hello extends React.Component {

  render() {
    const name = this.props.name
    const greeting = this.props.greeting
    return (<div>
      <h1>Hello, {name}!</h1>
      <p>{greeting}, {name}.</p>
    </div>)
  }

}

Hello.defaultProps = {
  name: "stranger",
  greeting: "Please press the button"
}


ReactDOM.render(
  <Hello />,
  document.getElementById('app')
)
Note that the <Hello> tag in the ReactDOM.render call doesn’t contain any attributes. This means that we’re not passing any props to it, which in turn means that our Hello component will use the default props defined in this line of code:
Hello.defaultProps = {
  name: "stranger",
  greeting: "Please press the button"
}
If you run the application, you’ll see that the Hello component uses the default props, addressing the user as “stranger” and using the greeting “Please press the button”:
Click the screenshot to see it at full size.
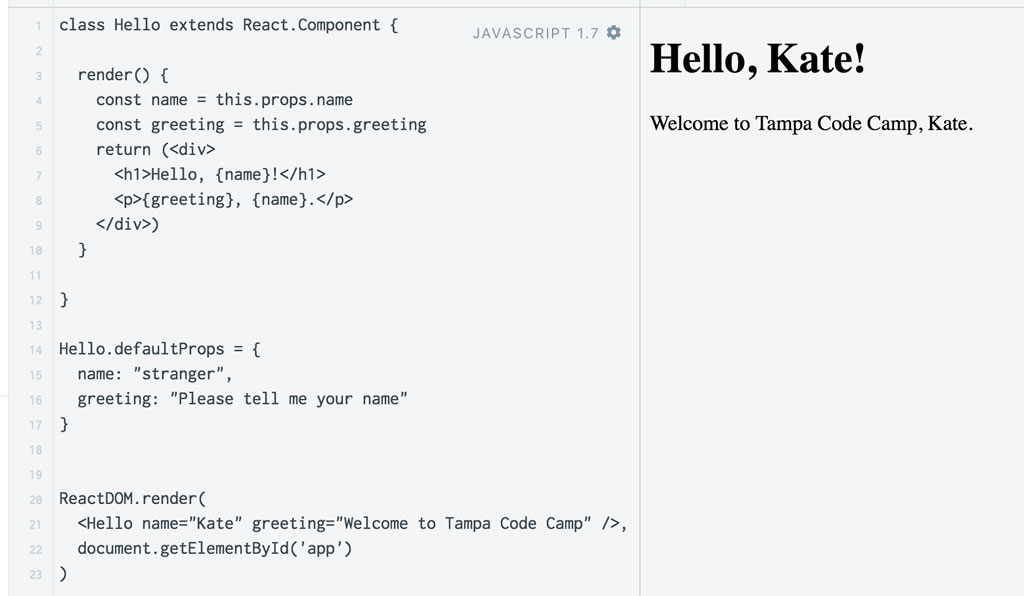
However, if we change the <Hello> tag in the ReactDOM.render call so that it has name and greeting attributes, as shown in the code below…
class Hello extends React.Component {

  render() {
    const name = this.props.name
    const greeting = this.props.greeting
    return (<div>
      <h1>Hello, {name}!</h1>
      <p>{greeting}, {name}.</p>
    </div>)
  }

}

Hello.defaultProps = {
  name: "stranger",
  greeting: "Please tell me your name"
}


ReactDOM.render(
  <Hello name="Kate" greeting="Welcome to Tampa Code Camp" />,
  document.getElementById('app')
)
…when you run the application, the Hello component uses the given props, addressing the user as “Kate” and using the greeting “Welcome to Tampa Code Camp”:
Click the screenshot to see it at full size.
As I mentioned earlier, as far as components are concerned, props are read-only. They can only be set by attributes in the tags that invoke them and in the statement that sets their default values. With only read-only data like props, components themselves would also be read-only. What we need is data that components can change in response to user input or events, and that’s what state is for.
State is represented by the state object, which every React component has. Like the props object, it’s a “dictionary” that components can use to store values. However, there are two key differences between state and props:
props object, the state object is read-write. Components can change the values within the state object by using the setState method.state object causes its render method to be called.That second difference is key; in fact, it’s why the library is called “React”. The name is a nod to reactive programming, which is often defined as being “oriented around data flows and the propagation of change” (in fact, Wikipedia uses his definition). A greatly simplified way to describe it as “programming code that responds to changes in data”.
And now, here’s the second of the two things you should take away from this tutorial: Making changes to React components is all about changing their state. Or, if you’re into snappy rhyming mantras or hip-hop, remember it this way: Change the state to make it update.
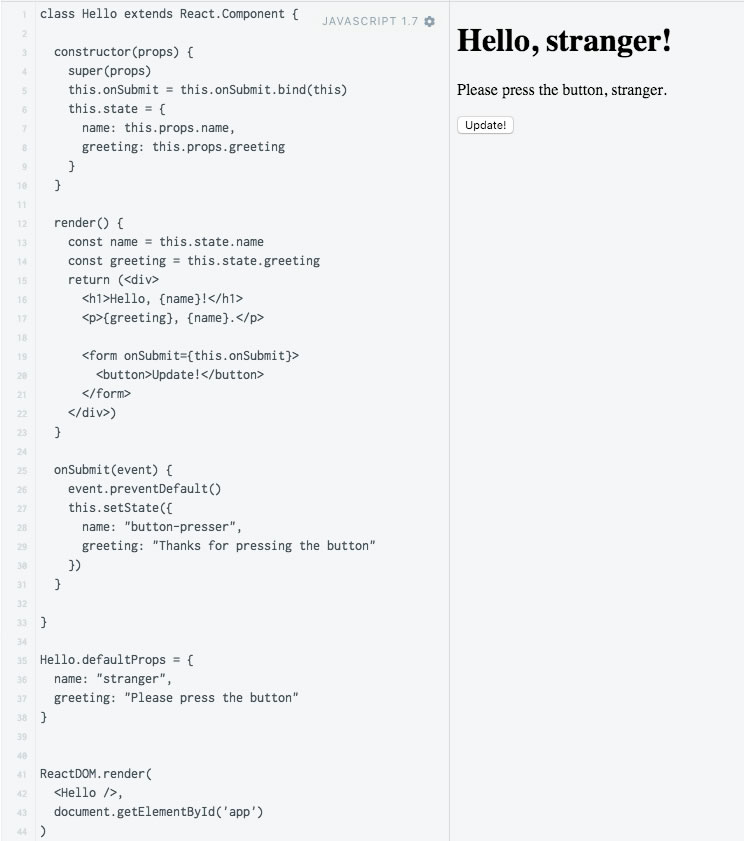
Modify the code in the JavaScript area so that it looks like this. Don’t worry about any of the unfamiliar stuff; I’ll walk you through it in a moment:
class Hello extends React.Component {

  constructor(props) {
    super(props)
    this.onSubmit = this.onSubmit.bind(this)
    this.state = {
      name: this.props.name,
      greeting: this.props.greeting
    }
  }

  render() {
    const name = this.state.name
    const greeting = this.state.greeting
    return (<div>
      <h1>Hello, {name}!</h1>
      <p>{greeting}, {name}.</p>

      <form onSubmit={this.onSubmit}>
        <button>Update!</button>
      </form>
    </div>)
  }

  onSubmit(event) {
    event.preventDefault()
    this.setState({
      name: "button-presser",
      greeting: "Thanks for pressing the button"
    })
  }

}

Hello.defaultProps = {
  name: "stranger",
  greeting: "Please press the button"
}


ReactDOM.render(
  <Hello />,
  document.getElementById('app')
)
When you press the Run button, you should be greeted with “Hello, stranger!”, an invitation to press a button, and a button, as shown below…
Click the screenshot to see it at full size.
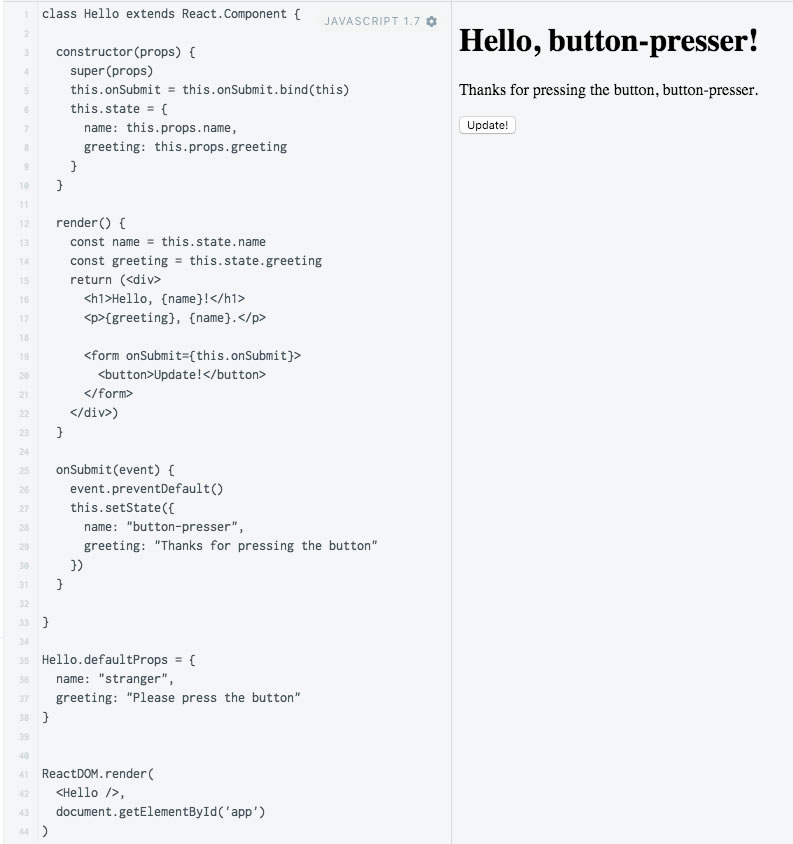
…and when you press that button, the name you’re referred to and the message below it change:
Click the screenshot to see it at full size.
Let’s take a closer look at the code. We’ll start with the render method, which is often a good place to start analyzing React components:
render() {
  const name = this.state.name
  const greeting = this.state.greeting
  return (<div>
    <h1>Hello, {name}!</h1>
    <p>{greeting}, {name}.</p>

    <form onSubmit={this.onSubmit}>
      <button>Update!</button>
    </form>
  </div>)
}
The main difference between this render method and the previous one is the addition of this form code:
<form onSubmit={this.onSubmit}>
  <button>Update!</button>
</form>
The onSubmit attribute of the <form> tag is set to {this.onSubmit}, which means that when the form is submitted — which in turn that means that the user has clicked the button — the class’ onSubmit method is called. Let’s look at onSubmit now:
onSubmit(event) {
  event.preventDefault()
  this.setState({
    name: "button-presser",
    greeting: "Thanks for pressing the button"
  })
}
Two things are happening in this method:
event.preventDefault method is called. This stops the page from reloading, which is the default behavior when a form is submitted (it also explains the name of the method).setState method is called, which changes the properties of the state object so that:
name‘s value is changed to “button-presser”, andgreeting‘s value is changed to “Thanks for pressing the button”.And since we’ve changed state, the render method gets called, which in turn causes it to display the new state values.
Finally, let’s take a look at the constructor:
constructor(props) {
  super(props)
  this.onSubmit = this.onSubmit.bind(this)
  this.state = {
    name: this.props.name,
    greeting: this.props.greeting
  }
}
Here’s what’s happening in this method:
props argument that constructor takes contains the properties that were passed to Hello via the <Hello> tag’s attributes. As with constructors in many other programming languages, we pass this argument to the component’s superclass with super(props).onSubmit attribute of our form specifies that the this.onSubmit method should be called when the form is submitted. The problem is that within the JSX, the this in this.onSubmit is undefined. We solve this problem by binding the onSubmit method to this specific instance of the Hello class, so that the this in this.onSubmit points to this instance (if you’re skeptical, comment out the line this.onSubmit = this.onSubmit.bind(this) and try running the app). You’ll need to do this sort of binding for every method that you call from JSX.state object, which in turn causes the render method to get called, redrawing the component with the new values.Let’s add a text field to our application, and change the code so that we first run, it looks like this:
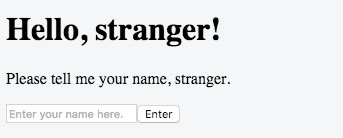
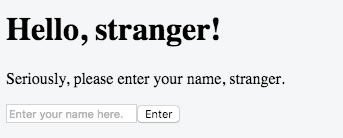
If you leave the text field blank and click the Enter button or hit the Return key, the output area should change to display this:
If you type the name “Zaphod” into the text field and click the Enter button or hit the Return key, the output area should change to display this:

Here’s the code that does this:
class Hello extends React.Component {

  constructor(props) {
    super(props)
    this.onSubmit = this.onSubmit.bind(this)
    this.state = {
      name: this.props.name,
      greeting: this.props.greeting
    }
  }

  render() {
    const name = this.state.name
    const greeting = this.state.greeting
    return (<div>
      <h1>Hello, {name}!</h1>
      <p>{greeting}, {name}.</p>

      <form onSubmit={this.onSubmit}>
        <input ref="nameTextField" type="text" placeholder="Enter your name here." />
        <button>Enter</button>
      </form>
    </div>)
  }

  onSubmit(event) {
    event.preventDefault()
    const nameTextField = this.refs.nameTextField
    const newName = nameTextField.value.trim()
    nameTextField.value = ""

    if (newName.length > 0) {
      this.setState({
        name: newName,
        greeting: "Pleased to meet you"
      })
    }
    else {
    	this.setState({
      	name: "stranger",
        greeting: "Seriously, please enter your name"
      })
    }
  }

}

Hello.defaultProps = {
  name: "stranger",
  greeting: "Please tell me your name"
}


ReactDOM.render(
  <Hello />,
  document.getElementById('app')
)
Let’s take a closer look at the code. We’ll start with the render method:
render() {
  const name = this.state.name
  const greeting = this.state.greeting
  return (<div>
    <h1>Hello, {name}!</h1>
    <p>{greeting}, {name}.</p>

    <form onSubmit={this.onSubmit}>
      <input ref="nameTextField" type="text" placeholder="Enter your name here." />
      <button>Enter</button>
    </form>
  </div>)
}
The only difference between this version of the render method and the previous one is the addition of a single line containing an <input> tag:
<input ref="nameTextField" type="text" placeholder="Enter your name here." />
It looks like a standard <input> tag, but it has a strange attribute called ref. That’s short for reference, and it a way for other code to access this tag. Think of it as being similar to HTML’s id attribute, but for React. We access refs that we define in JSX via the refs object, which is similar in structure to the props and state objects.
The onSubmit method isn’t all too different, either:
onSubmit(event) {
  event.preventDefault()
  const nameTextField = this.refs.nameTextField
  const newName = nameTextField.value.trim()
  nameTextField.value = ""

  if (newName.length > 0) {
    this.setState({
      name: newName,
      greeting: "Pleased to meet you"
    })
  }
  else {
    this.setState({
      name: "stranger",
      greeting: "Seriously, please enter your name"
    })
  }
}
Some notes:
nameTextField, which holds a reference to the element whose ref is nameTextField — the text field into which the user enters his/her name.newName, with the contents of nameTextField, trimmed of leading and trailing white space.newName‘s length will be greater than 0, and we change the state so that the newly-entered name becomes the value for the state key name and “Pleased to meet you” becomes the value for the state key greeting.newName‘s length will be 0, and we change the state so that the value for the state key name is “stranger”, and “Seriously, please enter your name” becomes the value for the state key greeting.So far, we’ve created a single component, Hello, for our application. For a simple tutorial app, this approach — sometimes called the Big Ball of Mud — is a workable one. You wouldn’t want to use it for an app of any appreciable size, as it becomes hard to code, manage, and maintain. Ideally, a React UI is supposed to be made up of small components that collectively form a larger whole.
Let’s break up our simple app into components as shown in the diagram below:
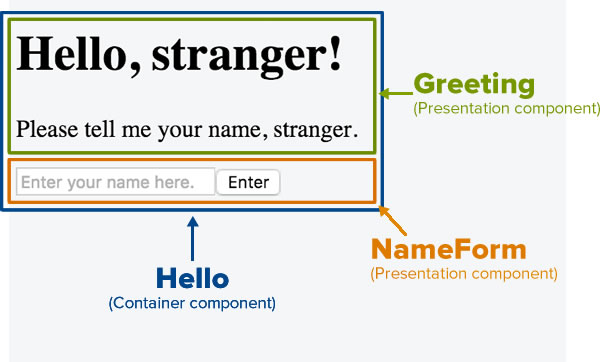
Note that in the diagram, the UI is broken into three components:
Greeting and NameForm present UI components, and are thus called presentation components. Their job is to present user interface elements that are visible to the user.
Hello is used as a container for other components, and is hence called a container component. Its has a couple of jobs:
Let’s start by coding the Greeting component, one of the presentation components:
class Greeting extends React.Component {

  render() {
    const name = this.props.name
    const greeting = this.props.greeting
    return (<div>
      <h1>Hello, {name}!</h1>
      <p>{greeting}, {name}.</p>
    </div>)
  }

}
It’s a pretty simple component: it expects two props — name and greeting — and displays them appropriately. Nothing new here.
Note that Greeter doesn’t make use of any state; it simply accepts two props and displays them. It doesn’t do any “thinking”. You’ll see this approach in a lot of React code, where presentation components don’t have much logic them and a primarily concerned with the display and input of information.
Think of this as the mantra for presentation components:

Let’s now code the NameForm component, the other presentation component:
class NameForm extends React.Component {
  constructor() {
    super()
    this.onSubmit = this.onSubmit.bind(this)
  }

  render() {
    return (<div>
      <form onSubmit={this.onSubmit}>
        <input ref="nameTextField" type="text" placeholder="Enter your name here." />
        <button>Enter</button>
      </form>
    </div>)
  }

  onSubmit(event) {
    event.preventDefault()
    const nameTextField = this.refs.nameTextField
    const newName = nameTextField.value.trim()
    nameTextField.value = ""

    if (newName.length > 0) {
      this.props.onNewName(newName)
    }
    else {
      this.props.onNoName()
    }
  }

}
The only really different part is the if statement in the onSubmit method:
if (newName.length > 0) {
  this.props.onNewName(newName)
}
else {
  this.props.onNoName()
}
In the previous version of our onSubmit method, both branches made changes to the state object. This time it’s different:
newName‘s length is greater than 0), it calls a method called onNewName, which is stored in the props object. It passes newName as an argument to onNewName.newName‘s length is 0), it calls a method called onNoName, which is also stored in the props object.Note that both onNewName and onNoName are stored in NameForm‘s props. This means that NameForm has very little built-in logic for dealing with user input, but instead receives this logic from an outside source through its props. As with Greeter, NameForm doesn’t make use of state. Once again, this is an approach you’ll see in a lot of React code — presentation components doing as little “thinking” as possible.
Both Greeter and NameForm receive their props from their container component, Hello. Let’s look at its code:
class Hello extends React.Component {

  constructor(props) {
    super(props)
    this.state = {
      name: this.props.name,
      greeting: this.props.greeting
    }
    this.handleNewName = this.handleNewName.bind(this)
    this.handleNoName = this.handleNoName.bind(this)
  }

  render() {
    return (<div>
      <Greeting name={this.state.name} greeting={this.state.greeting} />
      <NameForm onNewName={this.handleNewName} onNoName={this.handleNoName} />
    </div>)
  }

  handleNewName(newName) {
    this.setState({
      name: newName,
      greeting: "Pleased to meet you"
    })
  }

  handleNoName() {
    this.setState({
      name: "stranger",
      greeting: "Seriously, please enter your name"
    })
  }

}

Hello.defaultProps = {
  name: "stranger",
  greeting: "Please tell me your name"
}
Let’s look at its render method first:
render() {
  return (<div>
    <Greeting name={this.state.name} greeting={this.state.greeting} />
    <NameForm onNewName={this.handleNewName} onNoName={this.handleNoName} />
  </div>)
}
Note that the <div> it returns has two component tags and nothing else:
handleNewName and handleNoName — via attributes, which it receives as props.Let’s take a look at handleNewName and handleNoName:
handleNewName(newName) {
  this.setState({
    name: newName,
    greeting: "Pleased to meet you"
  })
}

handleNoName() {
  this.setState({
    name: "stranger",
    greeting: "Seriously, please enter your name"
  })
}
Note that:
handleNewName does just one thing: change the state so that the value for name is set to the contents of newName, and the value for greeting is set to “Please to meet you”. Changing the state of the Hello component causes its render method to be called, which in turn causes the Greeting and NameForm components to be redrawn, which causes them to call their render methods as well.handleNoName also does just one thing: change the state so that the value for name is set to “stranger”, and the value for greeting is set to “Seriously, please enter your name”. Changing the state of the Hello component causes its render method to be called, which in turn causes the Greeting and NameForm components to be redrawn, which causes them to call their render methods as well.handleNewName and handleNoName are passed as props to NameForm, which uses their logic to perform tasks based on what the user enters or doesn’t enter into NameForm‘s text field. It appears that while Hello doesn’t present any user interface of its own, it does a lot of the “thinking”.handleNewName and handleNoName, are passed to NameForm as props with the names onNewName and onNoName. This is a naming convention used in React:
handle. A name beginning with handle implies that we’re defining a response to a specific event.on. A name beginning with on implies that we’re calling on a defined response to a specific event.Let’s take a closer look at the constructor:
constructor(props) {
  super(props)
  this.state = {
    name: this.props.name,
    greeting: this.props.greeting
  }
  this.handleNewName = this.handleNewName.bind(this)
  this.handleNoName = this.handleNoName.bind(this)
}
The constructor sets up the app’s initial state based on the default props. It also binds the handleNewName and handleNoName methods to the current instance, so that they can be called when they’re passed as props to the NameForm component.
Speaking of default props, here’s the function that sets Hello‘s default props:
Hello.defaultProps = {
  name: "stranger",
  greeting: "Please tell me your name"
}
That’s the complete definition for the Hello component.
We’ve just reviewed all the code in the app piece by piece. Here’s the complete code:
class Greeting extends React.Component {

  render() {
    const name = this.props.name
    const greeting = this.props.greeting
    return (<div>
      <h1>Hello, {name}!</h1>
      <p>{greeting}, {name}.</p>
    </div>)
  }

}


class NameForm extends React.Component {
  constructor() {
    super()
    this.onSubmit = this.onSubmit.bind(this)
  }

  render() {
    return (<div>
      <form onSubmit={this.onSubmit}>
        <input ref="nameTextField" type="text" placeholder="Enter your name here." />
        <button>Enter</button>
      </form>
    </div>)
  }

  onSubmit(event) {
    event.preventDefault()
    const nameTextField = this.refs.nameTextField
    const newName = nameTextField.value.trim()
    nameTextField.value = ""

    if (newName.length > 0) {
      this.props.onNewName(newName)
    }
    else {
    	this.props.onNoName()
    }
  }

}


class Hello extends React.Component {

  constructor(props) {
    super(props)
    this.state = {
    	name: this.props.name,
      greeting: this.props.greeting
    }
    this.handleNewName = this.handleNewName.bind(this)
    this.handleNoName = this.handleNoName.bind(this)
  }

  render() {
    return (<div>
      <Greeting name={this.state.name} greeting={this.state.greeting} />
      <NameForm onNewName={this.handleNewName} onNoName={this.handleNoName} />
    </div>)
  }

  handleNewName(newName) {
    this.setState({
      name: newName,
      greeting: "Pleased to meet you"
    })
  }

  handleNoName() {
    this.setState({
      name: "stranger",
      greeting: "Seriously, please enter your name"
    })
  }

}

Hello.defaultProps = {
  name: "stranger",
  greeting: "Please tell me your name"
}


ReactDOM.render(
  <Hello />,
  document.getElementById('app')
)
Looking at the entire application, note that the Hello component, as the container component, doesn’t display any UI of its own; it simply displays its child components. However, it also contains all the “smarts”, maintaining the state of the application and passing its child presentation components any information they need:
handleNewName) and what it should do if the user left the name text field blank or filled with white space (handleNoName).In the meantime, the Greeting and NameForm components present their parts of the UI and do what they’re told as specified by the props passed to them.
You’ve probably noticed that this arrangement ensures that the flow of information in this application is one-way, starting at the top and going down…
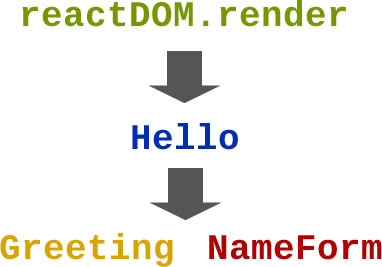
…with the top-level reactDOM.render method calling on the Hello component to render itself, and the Hello component providing data and instructions to the Greeting and NameForm components and calling on them to render themselves. The information doesn’t flow the other way — The Greeting and NameForm components don’t send any information to the Hello component, and the Hello component doesn’t send any information to the code>reactDOM.render statement. This one-way flow of information simplifies development and is a basic principle of React.

You’ve probably suspected that this is just the beginning. You’re right — there’s only so much you can cover in a 50-minute presentation, and React is already a large topic, and it’s continuing to grow. Here are some resources you might find handy:

“We’ll fix it in the next sprint.”