Relax, Fandroids. I kid because I care.
 “As a consumer, I was blown away,” says Googler Chris DeSalvo in a quote from Fred Vogelstein’s book, Dogfight, upon seeing the now-legendary January 9, 2007 Stevenote when he unveiled the first iPhone.
“I wanted one immediately,” DeSalvo continues. “But as a Google engineer, I thought ‘We’re going to have to start over.’“
According to the Atlantic article The Day Google Had to ‘Start Over’ on Android, an excerpt from Dogfight, Google’s big concern at the time was Microsoft. It made sense at the time: They seemed to be making the right moves. If you remember those days, Windows Mobile 5.0 was the third revision of their mobile operating system, and true to the general rule about Microsoft revs, it was finally good enough. They’d lined up an impressive array of nearly 50 hardware partners, including HTC, who’d end up shipping the most WinMo phones, and the big coup: Palm, whom they’d convinced to build phones that ran WinMo. Their OS featured mobile versions of Office. The industry rumblings were that Microsoft would end up eating away at the dominant phone OS player at the time, Symbian. “Microsoft comes out fighting when threatened,” the conventional wisdom said. “Remember what happened in the browser wars?”
Here’s what was considered to be the game-changer that would make Microsoft a serious mobile threat: the Palm Treo 700w…
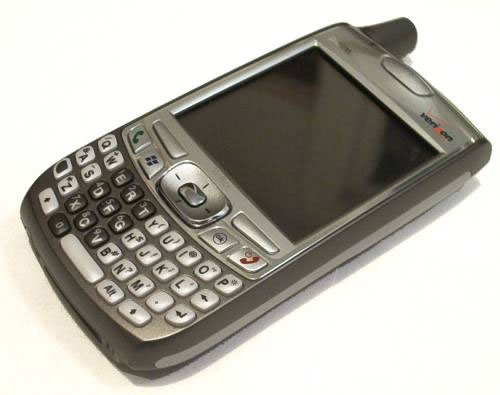
The Palm Treo 700w.
The best smartphones of the era followed a design template that had been defined years earlier by the Blackberry: screen at the top, physical keyboard at the bottom, augmented by some kind of device to move the cursor (first a scroll wheel, then a D-pad, and optionally, a stylus).
Then this happened:
(If you haven’t seen it before or in a while, watch it again. You can almost feel the audience’s excitement in the opening moments, as Steve teases them with hints of what he’s about to announce. You can also feel the envy when Google’s Eric Schmidt comes onstage at the 51-minute mark — remember that he was on Apple’s board then.)
From the article:
On the day Jobs announced the iPhone, the director of the Android team, Andy Rubin, was six hundred miles away in Las Vegas, on his way to a meeting with one of the myriad handset makers and carriers that descend on the city for the Consumer Electronics Show. He reacted exactly as DeSalvo predicted. Rubin was so astonished by what Jobs was unveiling that, on his way to a meeting, he had his driver pull over so that he could finish watching the webcast.
“Holy crap,” he said to one of his colleagues in the car. “I guess we’re not going to ship that phone.”
Another key quote, this time from Ethan Beard, one of Android’s early biz dev people:
“We knew that Apple was going to announce a phone. Everyone knew that. We just didn’t think it would be that good.“
With the announcement of the iPhone, the Android project, whose members had been working “sixty-tp-eighty-hour weeks for fifteen months — some for more than two years” made a pivot whose effects we’re still feeling today. The BlackBerry-like phone that they’d been working on — codename “Sooner”, with a physical keyboard, no touchscreen, and a general “me-too” design — was pushed aside. They filed mobile phone-related patents galore in September 2007. The iPhone forced them to rethink the OS and phone design, and from that came a new design, codenamed “Dream”. This pivot would require them to delay their first release by a year, and the end result was the HTC Dream, released in October 2008.
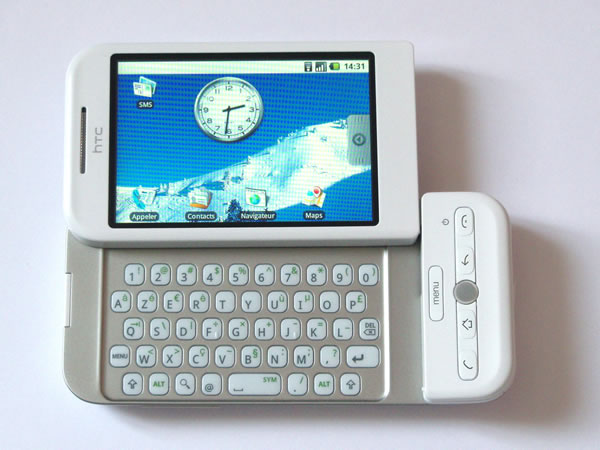
The HTC Dream.
As you can see, the Android weren’t so sure about all of Apple’s design decisions, hence the physical keyboard and trackball. Today’s phone designs tell you how those choices by the Android team worked out.
I’ll close with an observation based on the article by John “Daring Fireball” Gruber. He may be Apple’s freelance PR guy, but he’s often right, including in this case:
Remember a few years ago, at the height of the “Android is a ripoff of the iPhone” controversy, when Android supporters claimed that the similarities were just some sort of amazing coincidence, like Newton and Leibniz discovering calculus concurrently, because Android had started life a few years before the iPhone was introduced? Good times.
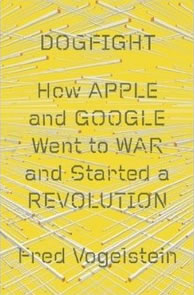
I’m going to get my paws on a copy of Dogfight and read it over the holidays. Expect a review of it in the coming weeks.