| Group | Event Name | Time |
|---|
| Tampa Bay Networking and Events • Largo, FL | Networking at The Hanger Restaurant & Flight Lounge! | Wed, Jul 19 · 7:30 AM EDT |
| Young Professionals Networking JOIN in and Connect! • Saint Petersburg, FL | St Pete Networking Breakfast at the Hangar Meet St Pete’s Top Pro’s All Weclcome | Wed, Jul 19 · 7:30 AM EDT |
| Tampa Bay Business Networking Meetings & Mixers • Tampa, FL | DOWNTOWN ST PETE YOUNG NETWORKING PROFESSIONALS BREAKFAST AT THE HANGAR! | Wed, Jul 19 · 7:30 AM EDT |
| Professional Business Networking with RGAnetwork.net • Tampa, FL | Downtown St Pete Professionals Networking Breakfast | Wed, Jul 19 · 7:30 AM EDT |
| Network Professionals Inc. of South Pinellas (NPI) • Saint Petersburg, FL | NPI Profit Partners Chapter – Exchange Qualified Business Referrals | Wed, Jul 19 · 7:30 AM EDT |
| Data, Cloud and AI in Tampa • Tampa, FL | How to Prepare for the EU AI Act by Innovating and Creating AI Responsibly | Wed, Jul 19 · 8:00 AM EDT |
| 1 Million Cups – Orlando • Winter Park, FL | 1 Million Cups – Orlando Weekly Meetup | Wed, Jul 19 · 8:30 AM EDT |
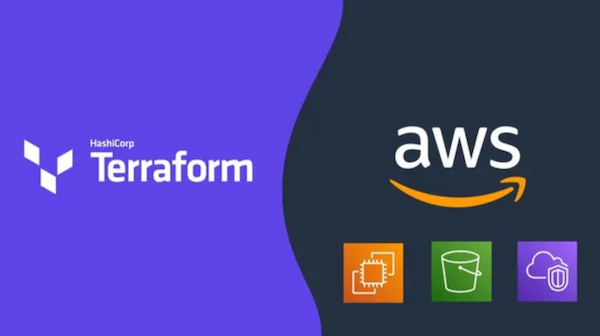
| Tampa Bay AWS User Group • Tampa, FL | AWS Customer Day: Event Driven Architectures | Wed, Jul 19 · 9:00 AM EDT |
| Tampa Bay AWS User Group • Tampa, FL | AWS Customer Day: Event Driven Architectures | Wed, Jul 19 · 9:00 AM EDT |
| Suncoast Drone Club • Tampa, FL | Cunningham Park | Wed, Jul 19 · 9:00 AM EDT |
| Data, Cloud and AI in Tampa • Tampa, FL | Seize the AI Advantage: Discover WatsonX, IBM’s Generative AI Platform | Wed, Jul 19 · 10:00 AM EDT |
| Suncoast Credit Union Micro Enterprise Development Meetup • Tampa, FL | Business Banking and Financing with SBDC Hillsborough County | Wed, Jul 19 · 10:00 AM EDT |
| Orlando Cybersecurity Meetup • Orlando, FL | The Science of Data Loss Prevention | Wed, Jul 19 · 11:00 AM EDT |
| Tampa / St Pete Business Connections • Tampa, FL | Brandon Business Professionals IN Person!!!! | Wed, Jul 19 · 11:30 AM EDT |
| Young Professionals Networking JOIN in and Connect! • Saint Petersburg, FL | Brandon Business Professionals Just Love Coffee | Wed, Jul 19 · 11:30 AM EDT |
| Tampa Bay Networking and Events • Largo, FL | Networking at Just Love Coffee! | Wed, Jul 19 · 11:30 AM EDT |
| Tampa Bay Networking Meetings and Mixers • Tampa, FL | Carrollwood Networking Lunch! Join us and win! | Wed, Jul 19 · 11:30 AM EDT |
| Tampa Bay Networking and Events • Largo, FL | Networking at Glory Days Grill! | Wed, Jul 19 · 11:30 AM EDT |
| Tampa / St Pete Business Connections • Tampa, FL | Brandon Business Professionals IN Person!!!! | Wed, Jul 19 · 11:30 AM EDT |
| Bradenton/Sarasota Networking Meetings and Mixers • Sarasota, FL | Business Networking Lunch | Wed, Jul 19 · 11:30 AM EDT |
| Young Professionals Networking JOIN in and Connect! • Saint Petersburg, FL | Brandon Business Professionals Just Love Coffee | Wed, Jul 19 · 11:30 AM EDT |
| Tampa Startup Founder 101 • Tampa, FL | Co-Founder Networking: Find a Business Partner Online | Wed, Jul 19 · 1:00 PM EDT |
| Tampa Cybersecurity Meetup | Flatiron School • Tampa, FL | Cyber Essentials | Securing the Future: AI and Password Security – Virtual | Wed, Jul 19 · 1:00 PM EDT |
| Learn Cybersecurity Tampa | Flatiron School • Tampa, FL | Cyber Essentials | Securing the Future: AI and Password Security – Virtual | Wed, Jul 19 · 1:00 PM EDT |
| Tampa Cybersecurity Meetup | Flatiron School • Tampa, FL | Cyber 101 | Info Session | Flatiron School | Wed, Jul 19 · 2:00 PM EDT |
| Network After Work Tampa – Networking Events • Tampa, FL | Small Business Owners Q&A Session | Wed, Jul 19 · 2:00 PM EDT |
| Learn Cybersecurity Tampa | Flatiron School • Tampa, FL | Cyber 101 | Info Session | Flatiron School | Wed, Jul 19 · 2:00 PM EDT |
| Florida Startup: Idea to IPO • Tampa, FL | FREE WEBINAR: How to Outsource Development of Your App | Wed, Jul 19 · 5:00 PM EDT |
| Brandon Boardgamers • Brandon, FL | Board Gaming – In Person | Wed, Jul 19 · 5:00 PM EDT |
| Tampa Blockchain Meetup Group • Tampa, FL | Taking Advantage of the Digital Money Revolution | Wed, Jul 19 · 5:30 PM EDT |
| Sarasota Business Exchange Club • Sarasota, FL | We ARE meeting again at Rusty Bucket Restaurant | Wed, Jul 19 · 5:30 PM EDT |
| Tampa Gaming Guild • Tampa, FL | Wednesday Board Game Night | Wed, Jul 19 · 5:30 PM EDT |
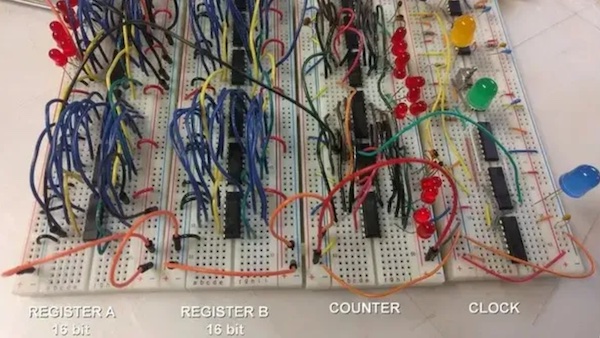
| Data Analytics – Tampa Bay • Tampa, FL | Data Analytics – Tampa Bay – JULY MEETUP | Wed, Jul 19 · 6:00 PM EDT |
| Win a Job Fast • Tampa, FL | Job Search Acceleration Group (JSAG) Workshop | Wed, Jul 19 · 6:00 PM EDT |
| DigitalDeLand • Deland, FL | Digital DeLand Monthly Meeting | Wed, Jul 19 · 6:00 PM EDT |
| Win a Job Fast • Tampa, FL | Job Search Acceleration Group (JSAG) Workshop | Wed, Jul 19 · 6:00 PM EDT |
| Sunshine Games • Tampa, FL | Casual Commander Wednesdays | Wed, Jul 19 · 6:00 PM EDT |
| The Tampa Chapter of the Society for the Exploration of Play • Tampa, FL | Critical Hit Games: Board Game Night | Wed, Jul 19 · 6:00 PM EDT |
| Critical Hit Games • Saint Petersburg, FL | Board Game Night | Wed, Jul 19 · 6:00 PM EDT |
| Nerdbrew Events • Tampa, FL | Games & Grog @ Felicitous! | Wed, Jul 19 · 6:00 PM EDT |
| Clermont Nerd Games • Clermont, FL | Dungeons & Dragons One Shot Wednesdays | Wed, Jul 19 · 6:00 PM EDT |
| Orlando D and D 5th Edition custom scenarios or campaigns • Orlando, FL | D&D 5e Savage Frontiers | Wed, Jul 19 · 6:00 PM EDT |
| Meeple Movers Gaming Group • Ocala, FL | Dominion with Dennis | Wed, Jul 19 · 6:00 PM EDT |
| Brews N Board Games • Orlando, FL | Board Game Night at Deadwords Brewing | Wed, Jul 19 · 6:00 PM EDT |
| Prose Society Writers’ Group • Saint Petersburg, FL | Monthly Meeting: How to Trust In Your Reader by Showing, Not Telling – Part II | Wed, Jul 19 · 6:00 PM EDT |
| Drunk’n Meeples the Social Tabletop (Board) Gamers • Palm Harbor, FL | Game Night! | Wed, Jul 19 · 6:30 PM EDT |
| The Weirder Things Book Club • Parrish, FL | Verity – midway point | Wed, Jul 19 · 6:30 PM EDT |
| Tampa Hackerspace • Tampa, FL | 3D Printing Orientation: Models and Slicers | Wed, Jul 19 · 7:00 PM EDT |
| Defcon813 • Tampa, FL | CigarCitySec | Wed, Jul 19 · 7:00 PM EDT |
| Tampa Amazon Seller Meetup Group • Tampa, FL | Why A Product Launch Can Fail | Wed, Jul 19 · 7:00 PM EDT |
| Central Florida CitySec • Orlando, FL | CigarCitySec Meetup | Wed, Jul 19 · 7:00 PM EDT |
| Tampa Bay Bitcoin • Tampa, FL | Bitcoin Social | Wed, Jul 19 · 7:00 PM EDT |
| Defcon813 • Tampa, FL | CigarCitySec | Wed, Jul 19 · 7:00 PM EDT |
| Central Florida CitySec • Orlando, FL | CigarCitySec Meetup | Wed, Jul 19 · 7:00 PM EDT |
| Tampa Hackerspace • Tampa, FL | 3D Printing Orientation: Models and Slicers | Wed, Jul 19 · 7:00 PM EDT |
| YouTuber Meetup – Orlando • Orlando, FL | YouTuber Meetup – Orlando – Meet and Greet, 15 Jul 2023, 07:00 PM | Wed, Jul 19 · 7:00 PM EDT |
| Tampa Amazon Seller Meetup Group • Tampa, FL | Why A Product Launch Can Fail | Wed, Jul 19 · 7:00 PM EDT |
| Geekocracy! • Tampa, FL | Geek Book Club: Looking for Alaska (at Olive Garden) | Wed, Jul 19 · 7:00 PM EDT |
| Castaways Euchre Club • Saint Petersburg, FL | Castaways Euchre Club | Wed, Jul 19 · 7:00 PM EDT |
| Tampa Bay Gaming: RPG’s, Board Games & more! • Tampa, FL | MtG Modern Constructed at Armada Games | Wed, Jul 19 · 7:00 PM EDT |
| Adventures On Tap: TTRPGs and Board Games • Orlando, FL | Nerd Night: Board Games and Beer at Deadwords Brewing | Wed, Jul 19 · 7:00 PM EDT |
| Zen City Brews Events and News • Tarpon Springs, FL | Spill the Tea & Book Club | Wed, Jul 19 · 7:00 PM EDT |
| Orlando Horror Movie Fans 20s-30s • Orlando, FL | TERRIFIER (2016) | Wed, Jul 19 · 7:00 PM EDT |
| Central Florida AD&D (1st ed.) Grognards Guild • Winter Park, FL | New Beginnings & Old Rivalries | Wed, Jul 19 · 7:00 PM EDT |
| Nerd Night Out • Tampa, FL | Game Night @ Felicitous on 42nd by USF | Wed, Jul 19 · 7:00 PM EDT |
| Professionals Meetup For Networking And Social Skillsets • Orlando, FL | How to Express Yourself and Connect with People | Wed, Jul 19 · 7:00 PM EDT |
| Women In Linux • Tampa, FL | Understanding Linux | Wed, Jul 19 · 8:00 PM EDT |
| Return to the top of the list |