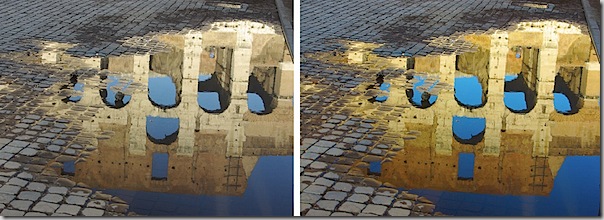
My old co-worker Darren “Problogger” Rowse IM’d me to let me know about a new article on Digital Photography School titled Turn Ho-Hum Color into WOW! with Photoshop written by guest blogger Helen Bradley. The “before and after” photos show some pretty impressive results.
This technique makes use of the Lab colour space, which people tend to eschew in favour of the CMYK (Cyan-Magenta-Yellow-blacK, which comes from the print world) and RGB (Red-Green-Blue, which geeks are comfortable with).
Here’s what Wikipedia has to say about Lab colour:
Unlike the RGB and CMYK color models, Lab color is designed to approximate human vision. It aspires to perceptual uniformity, and its L component closely matches human perception of lightness. It can thus be used to make accurate color balance corrections by modifying output curves in the a and b components, or to adjust the lightness contrast using the L component. In RGB or CMYK spaces, which model the output of physical devices rather than human visual perception, these transformations can only be done with the help of appropriate blend modes in the editing application.
Lab’s channels are:
- L: Lightness. You can use this to adjust the lightness of the image without changing any of the colour settings. This is what makes LAB stand apart from CMYK and RGB, where lightness and colour are tied together.
- a: Green and magenta.
- b: Blue and yellow.
Bradley says that “The process is ridiculously simple, it requires no selections to be made, and it can be recorded as a simple action. It’s my kind of fix – quick, easy and very powerful.”


