“Facebook reportedly plans to launch its own cryptocurrency,” reads The Verge’s headline, followed by the subhead “With an eye towards payments on the social media platform”. My immediate reaction is best summed up with the picture below:

“Facebook reportedly plans to launch its own cryptocurrency,” reads The Verge’s headline, followed by the subhead “With an eye towards payments on the social media platform”. My immediate reaction is best summed up with the picture below:
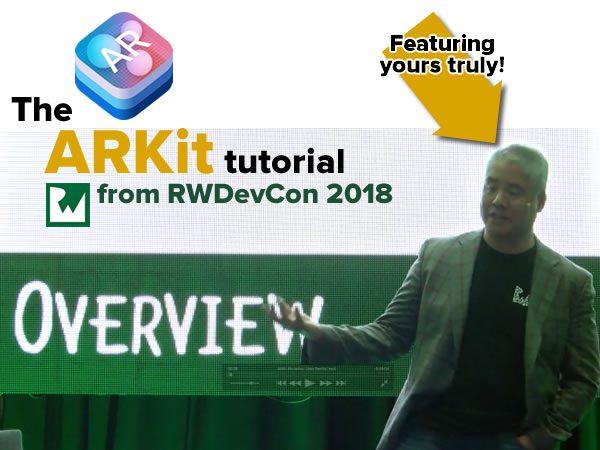
 If you missed my two-hour tutorial session on ARKit programming at RWDevCon 2018, Getting Started with ARKit, you’re in luck — you can get the video of the session, along with the slides, step-by-step instructions, and starter and finished code for free!
RWDevCon is an annual conference organized by the people behind RayWenderlich.com, the premier site for mobile app development tutorials. Over three days in early April 2018, the conference featured:
Go and download the materials from my tutorial, where you’ll enjoy all sorts of interesting stuff, including gratuitous meme abuse…

…the secret history of augmented reality, including what could be the first literary reference to what would eventually become AR glasses (and written by the author of The Wizard of Oz)…
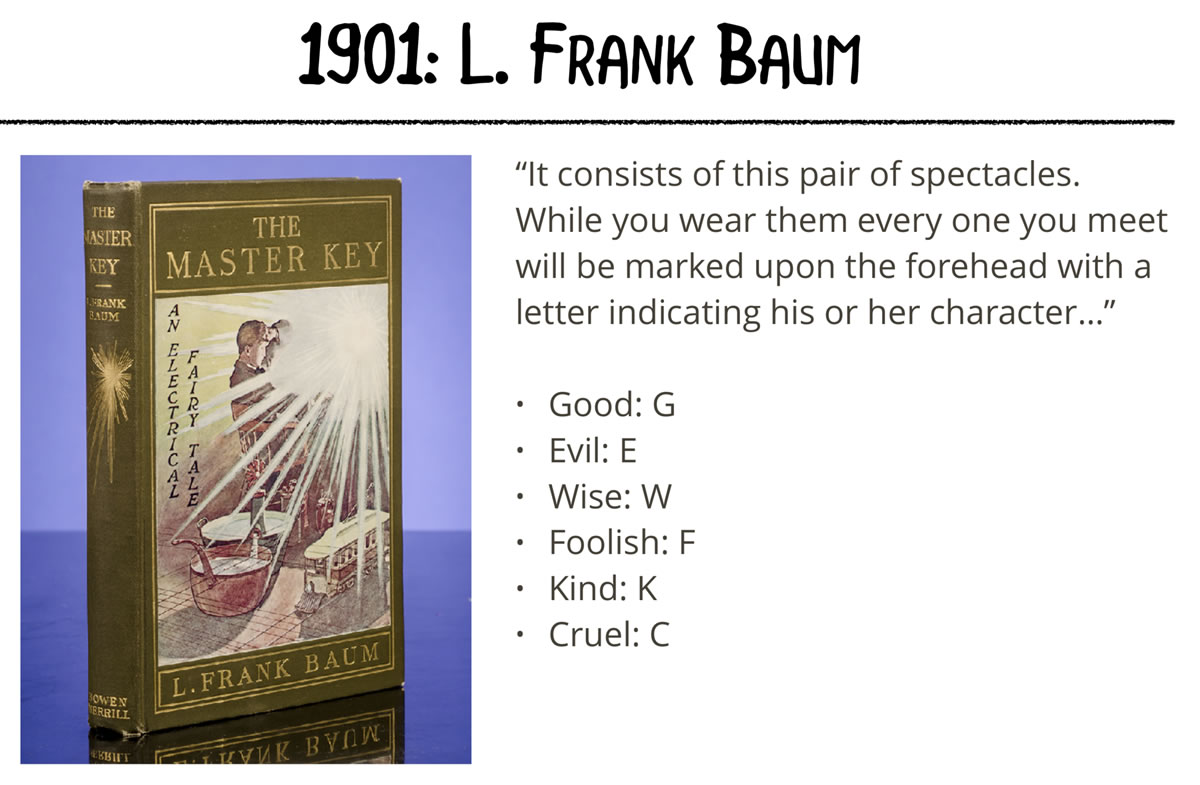
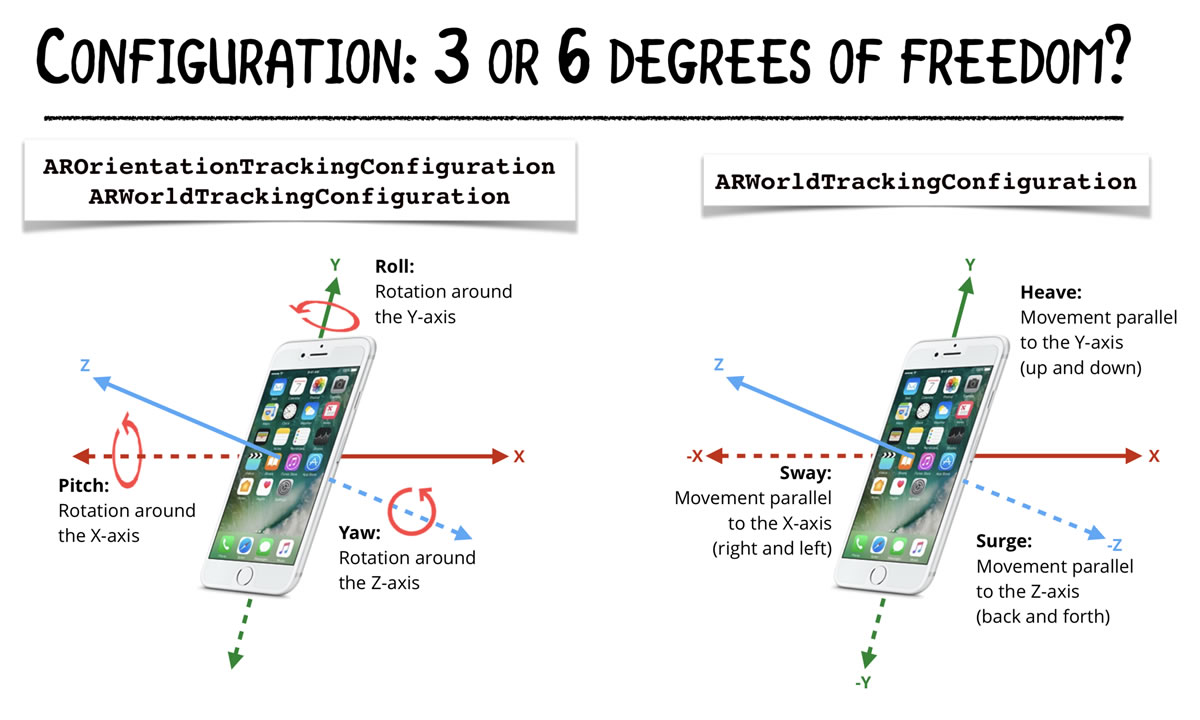
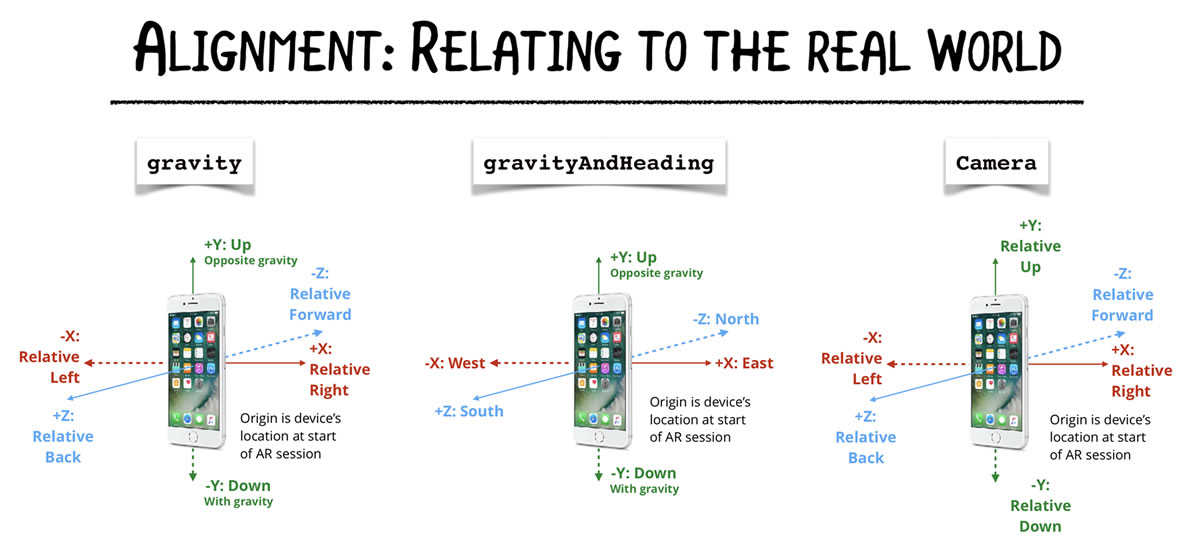
…what I consider to be some of the best diagrams explaining key ARKit concepts anywhere…
…and a complete walk through the process of building a couple of apps that are both fun to use and show you how to write your own AR apps:

Part of what you get for RWDevCon’s price of admission is the RWDevCon 2018 Vault, which is the next-best thing to being there. It includes:
If you didn’t attend RWDevCon 2018 but still want the bundle, you can buy it. Better yet, for a limited time, you can buy it for half price — $99.99 instead of $199.99! (And in case you were wondering, I don’t make any money from sales of the Vault.)

RayWenderlich.com is giving away three copies of the RWDevCon 2018 Vault to three lucky people! Enter the draw by going to this article on their site and leave a comment. On Friday, May 18, they’ll pick three random commenters and give them a free copy of the Vault.

Every week, I compile a list of events for developers, technologists, tech entrepreneurs, and nerds in and around the Tampa Bay area. We’ve got a lot of events going on this week, and here they are!
I’ve been doing a number of programming presentations lately: my monthly Tampa iOS Meetup gatherings, my recent ARKit workshop and tutorial at RWDevCon, an intro to Android programming with Kotlin at DevFest Florida, and an ARKit session at Tampa CodeCamp. At each of these gatherings, I’ve had post-presentation Q&A sessions, and without fail, I’m asked a question along these lines:
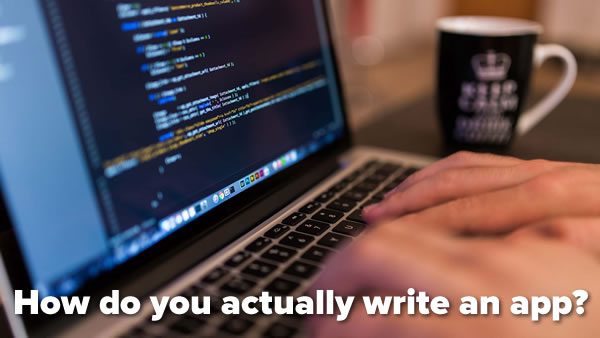
“I’ve taken some programming courses, I’ve followed some coding tutorials, and I’ve gone through some development books. But when I set out to write an app, I have no idea how to begin. How do you actually write an app?”
On this blog, over the next few months, I’ll try to answer that question indirectly — by example. As my first example, I’ll take the app that I and the attendees of the most recent Tampa iOS Meetup built as a group.

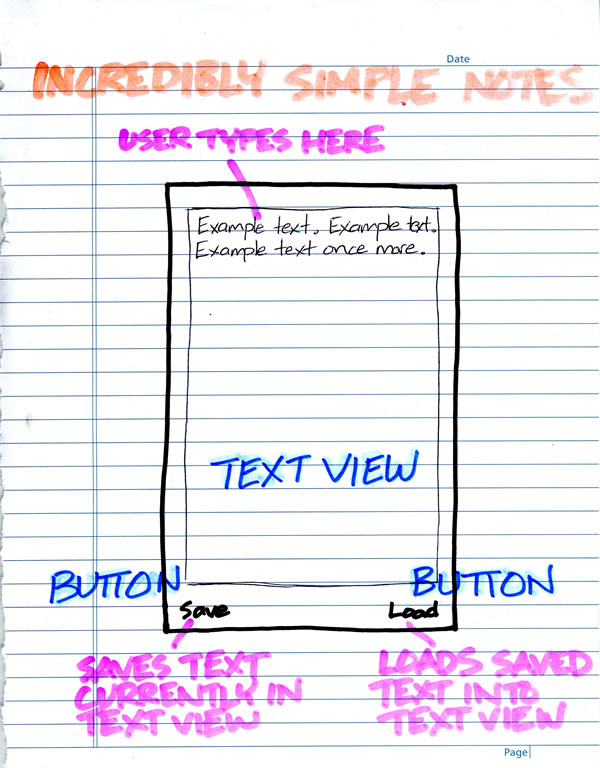
That meetup was the first in a series on saving data in iOS apps, and focused on writing an app that demonstrated saving and retrieving data to the file space reserved for the app by iOS. The app was a simple notepad app that had just three controls:
Here’s a quick hand-drawn “wireframe” for the app:
Let’s get started! Open Xcode and start with a new project (File → New → Project…), create a Single View App, and find some place to save it. Once that’s done, we can get to work.
Open Main.storyboard and drag a Text View and two Buttons — with one’s Title property set to Save, and the other’s set to Load — onto the view as shown in the screenshot below:
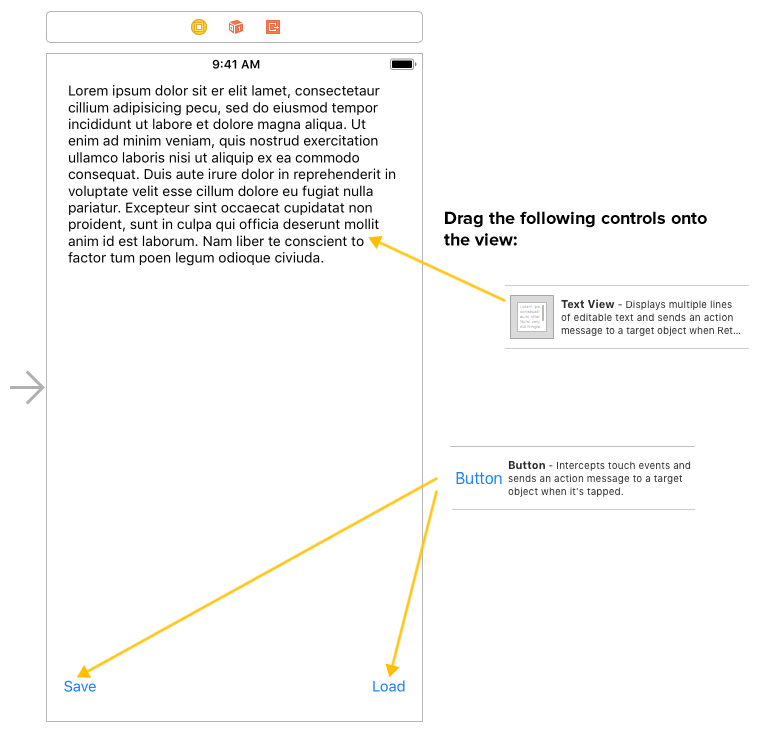
Click the screenshot to see it at full size.
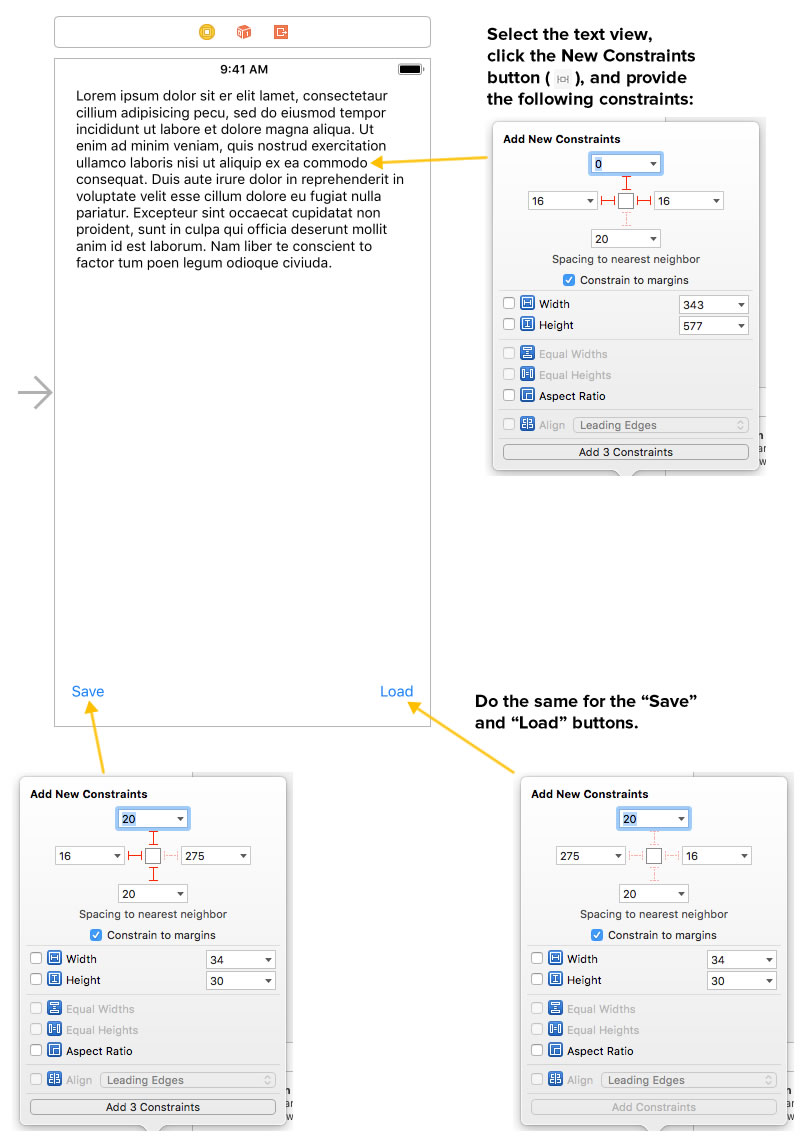
With those controls in place, we want to apply some constraints to them so that we get the following effect:
We’ll apply the constraints to each of these controls, clicking the ![]() button, and setting the constraints using the pop-up that appears:
button, and setting the constraints using the pop-up that appears:
Click the screenshot to see it at full size.
Open the Assistant Editor — do it with the ![]() button. Xcode should show you two things now:
button. Xcode should show you two things now:
It’s time to create an outlet for the text view, a way to refer to it in code. Select it in Main.storyboard, and then control-drag from it into an empty line near the top of the ViewController class, as shown in the screenshot below:
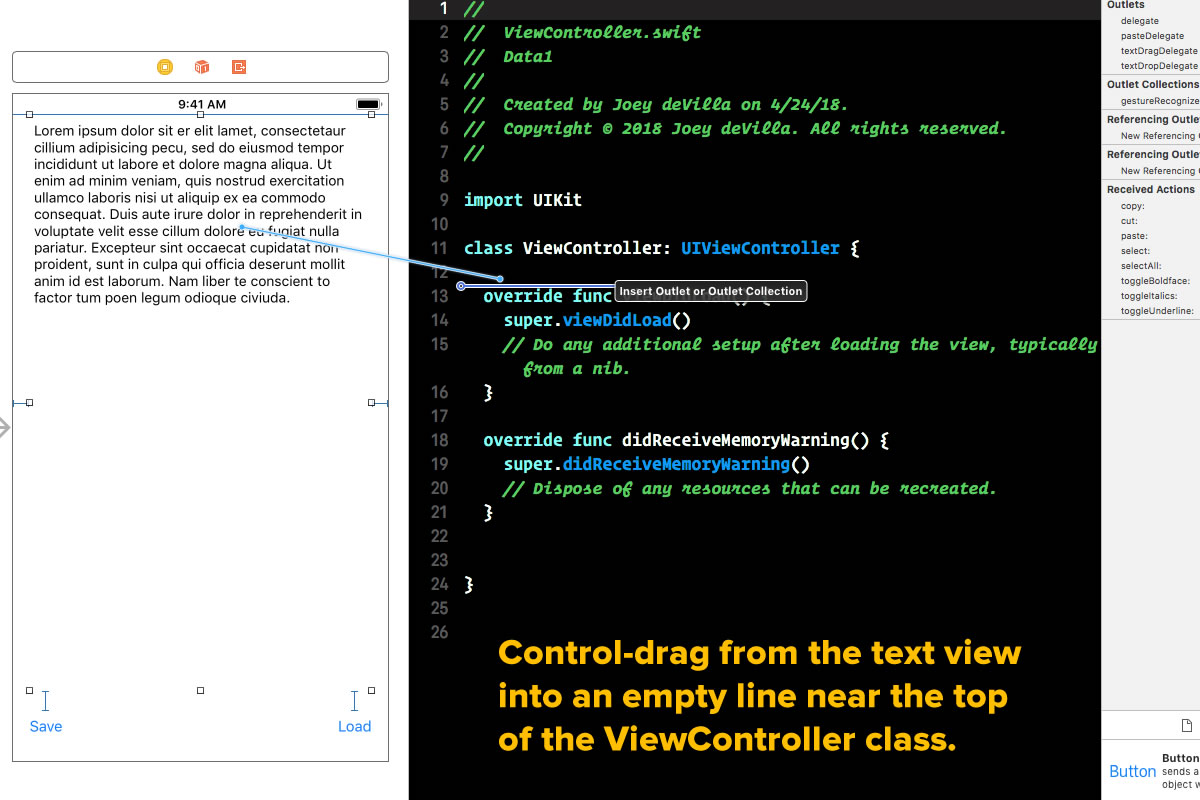
Click the screenshot to see it at full size.
Release the mouse or trackpad button, and you’ll see a pop-up appear:
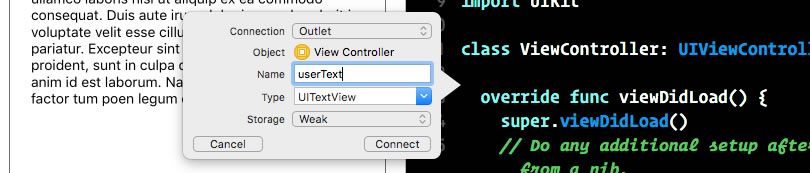
Click the screenshot to see it at full size.
Adjust the settings in the pop-up so that you create an outlet for the text view named userText. Use the settings, as shown in the screenshot above:
Then click the Connect button to make the connection. You should now see this line added to the ViewController class:
@IBOutlet weak var userText: UITextView!
With this connection, we now have a way to refer to the text view in code: userText, the name of the outlet connecting the code to the text view. We’ll use this outlet soon, but let’s connect the buttons to the code, starting with the Save button.
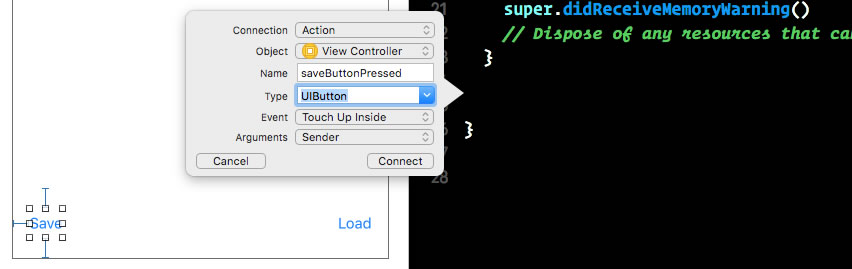
Let’s create an action for the Save button, which is a method that gets called in response to an event raised by the button. Select it in Main.storyboard, and then control-drag from it into an empty line near the bottom of the ViewController class, as shown in the screenshot below:
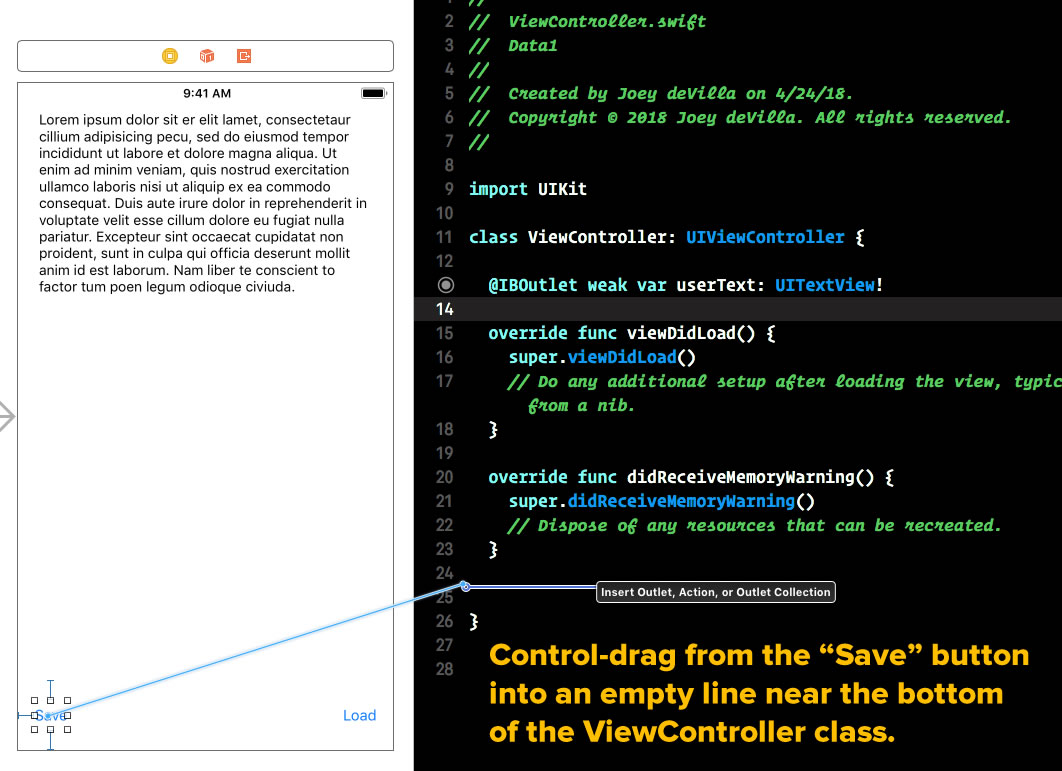
Click the screenshot to see it at full size.
Release the mouse or trackpad button, and you’ll see a pop-up appear:
Click the screenshot to see it at full size.
Adjust the settings in the pop-up so that you create an action for the text view named saveButtonPressed that gets called when the button is pressed. Use the settings, as shown in the screenshot above:
Then click the Connect button to make the connection. You should now see these lines added to the ViewController class:
@IBAction func saveButtonPressed(_ sender: UIButton) {
}
We’ll fill that method with code that will execute in response to a press on the Save button soon. But first, we need to make our final connection: the one for the Load button.
Select the Load button in Main.storyboard, and then control-drag from it into an empty line near the bottom of the ViewController class, as shown in the screenshot below:
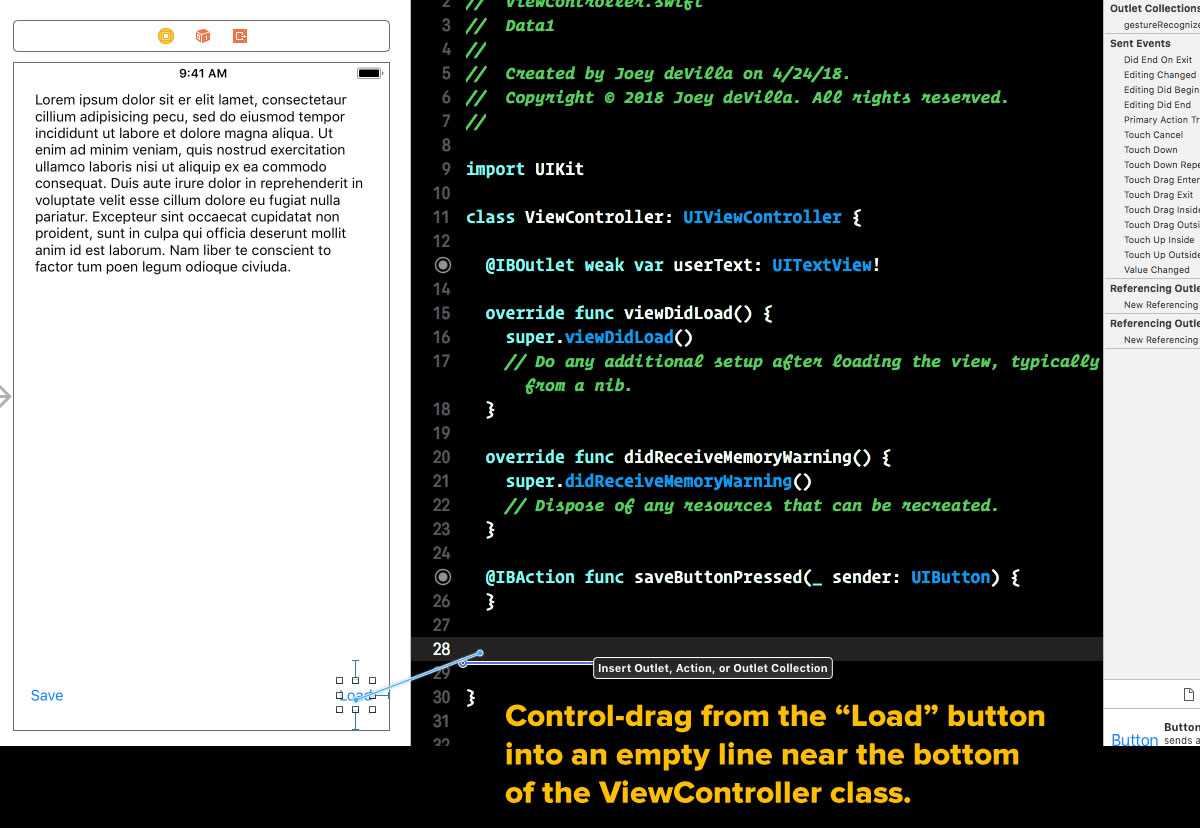
Click the screenshot to see it at full size.
Release the mouse or trackpad button, and you’ll see a pop-up appear:
Click the screenshot to see it at full size.
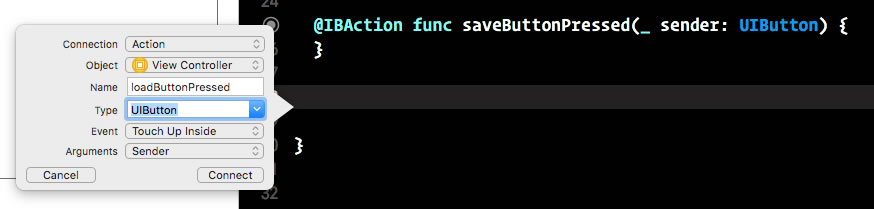
Adjust the settings in the pop-up so that you create an action for the text view named loadButtonPressed that gets called when the button is pressed. Use the settings, as shown in the screenshot above:
Then click the Connect button to make the connection. You should now see these lines added to the ViewController class:
@IBAction func loadButtonPressed(_ sender: UIButton) {
}
Again, we’ll fill that method with code that will execute in response to a press on the Load button.
Run the app. You should see something like this:
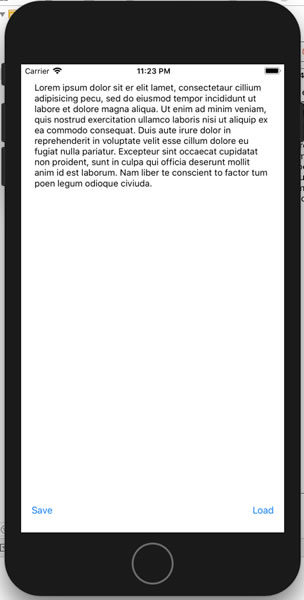
Since you haven’t written any code, the Save and Load buttons do nothing…yet.
Let’s add some code to change the contents of the text view in response to presses on the Save and Load buttons:
Change the code for the saveButtonPressed and loadButtonPressed methods:
@IBAction func saveButtonPressed(_ sender: UIButton) {
  userText.text = "You pressed the 'Save' button!"
}

@IBAction func loadButtonPressed(_ sender: UIButton) {
  userText.text = "Ah, the 'Load' button. Nice."
}
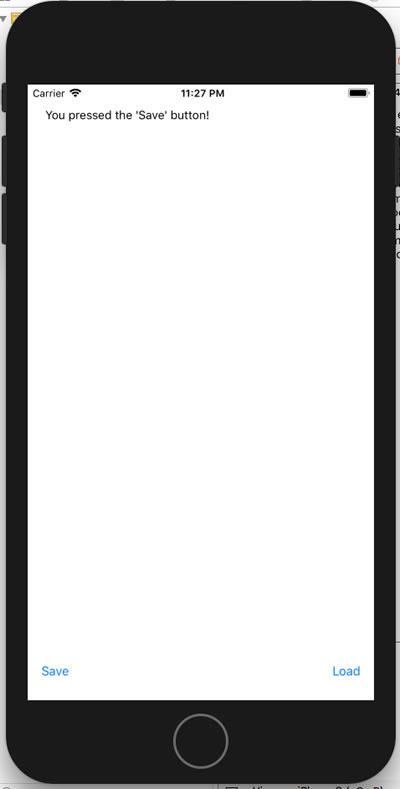
Run the app again, and press the Save button. You should see this result:
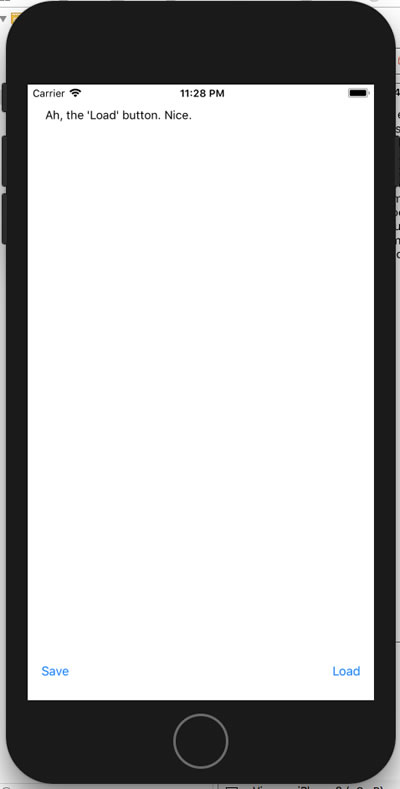
Now press the Load button. You should see this:
In this exercise, we have:
In the next installment, we’ll make the buttons do what we set out to have them do:
Click the image to see it at full size.
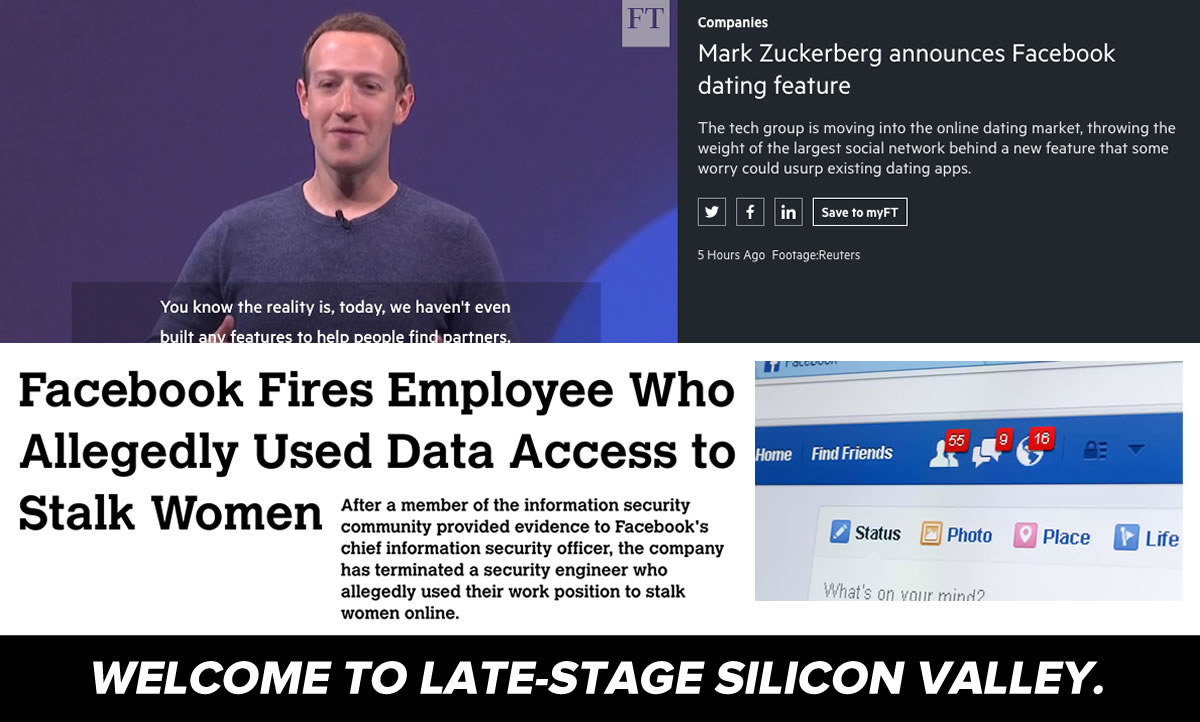
Welcome to late-stage Silicon Valley, folks, where Facebook’s announcement that they’re adding dating features and the revelation that they had to fire someone for using their inside access to Facebook profiles to stalk women come less than 24 hours apart.
Perhaps it’s time to have some kind of Hippocratic Oath for data or a computer/data science equivalent of a Pugwash (a series of conferences for scientists and engineers to bring their expertise, insight, and reason to threats brought about by the weaponization of science and technology).
While I’m on the topic, here’s some additional reading: