Every week, I compile a list of events for developers, technologists, tech entrepreneurs, and nerds in and around the Tampa Bay area. We’ve got a lot of events going on this week, and here they are!
Monday, June 18
- Tampa Bay DevOps Monthly Meetup: monitoring micro-services @ Salesforce Tampa, 6:00 PM to 9:00 PM
- Girl Develop It Tampa Bay — Take Your Website to the Next Level: 2 Part Workshop @ Bank of the Ozarks’ Innovation Lab, Monday, June 18, 2018, 6:00 PM to Tuesday, June 26, 2018, 9:30 PM
- Code for Tampa Bay Brigade — St. Pete June Meetup: Pitch Perfect & Code for America Summit Update @ TEC Garage, 6:00 PM to 8:00 PM
- Cool ‘n Confident Toastmasters @ SPC – St. Petersburg/Gibbs Campus, 6:30 PM to 7:45 PM
- Tampa Bay Bitcoin — Mining Mondays @ BlockSpaces, 7:00 PM to 9:00 PM
- South Tampa Toastmasters @ Unity of Tampa, 7:00 PM to 8:15 PM
- YouTube Support Group — Generate more profits from your customers! @ Village Inn (9107 4th Street, St. Petersburg), 7:00 PM to 9:00 PM
Tuesday, June 19
- Tampa Small Business Owner Workshops — Free Entrepreneurs Workshop @ Rocky Point Centre, 9:00 AM to 11:00 AM
- Entrepreneurs & Startups – Bradenton Networking & Education — Jenny Clark – Funding innovation and growth from federal $$$ @ Station 2 Innovation Center, 11:30 AM to 1:00 PM
- Westshore Toastmasters @ FIVE Labs, 12:00 PM to 1:00 PM
- Tampa SQL User Groups — Pinellas – Getting Started with Machine Learning Service and Python @ St Pete College – EpiCenter, 6:00 PM to 9:00 PM
- Weekly Open Make Night @ Tampa Hackerspace, 6:00 PM to 10:00 PM
- Tampa Bay Python — Serverless Python Lightning Talks @ Salesforce Tampa, 6:30 PM to 8:30 PM
- Tampa Investor/Training Meetup — Tampa Bay Investor Training @ The Real Estate Center, 6:30 PM to 9:30 PM
- Spirited Toastmasters @ St Stephens Catholic School, 6:30 PM to 8:00 PM
- THS Board Meeting @ Tampa Hackerspace, 6:30 PM to 8:00 PM
- Game Club Tampa Meetup — Tuesday Nite Roleplayers (RPGs) (LFP) @ Grand Arena of Mind Expansion, 6:30 PM to 9:30 PM
- St. Pete Beers ‘n Board Games Meetup for Young Adults @ Flying Boat Brewing Company, 7:00 PM to 10:00 PM
- Tampa R Users Group — Basic Machine Learning Techniques! @ Southern Brewing & Winemaking, 7:00 PM to 9:00 PM
- Woodshop Tool Sign Off-Jointer, Planer, & Bandsaw (Members Only) @ Tampa Hackerspace, 7:15 PM to 9:15 PM
Wednesday, June 20

- OPEN/FREE Coworking for Veteran Entrepreneurs @ FirstWaVE Venture Center, 9:00 AM to 6:00 PM
- 1 Million Cups St. Pete — Startup Space, LLC @ St. Petersburg Greenhouse, 9:00 AM
- 1 Million Cups Tampa — Sike42 / E-Building Concepts LLC (BILL) @ Mark Sharpe Entrepreneur Collaborative Center, 9:00 AM
- Learn Cybersecurity Tampa — Career Convos: Nathan Fisk, Ph.D. @ SecureSet Tampa Campus, 5:00 PM to 7:00 PM
- Bradenton Blockchain Business And Development Meetup — Come share ideas and listen to experts in the field of blockchain technology @ Connect Bradenton, 5:30 PM to 6:30 PM
- Tampa Bay Agile — QA THE AGILE WAY: Speaker Session “The Changing Role of Quality Assurance” @ Grow Financial, 6:00 PM to 8:00 PM
- Saint Petersburg Cyber Security Professionals Connection — Cyber Security Professionals – Networking Happy Hour! @ King Street Food Counter, 6:00 PM to 8:00 PM
- Girl Develop It Tampa Bay — How to Read a Job Posting with GDI and Tech Ladies @ Suncoast Developer’s Guild, 6:30 PM to 8:30 PM
- SKILL: Intro To Soldering @ Tampa Hackerspace, 7:00 PM to 9:00 PM
- Blockchain Enthusiasts — Blockchain/Cryptocurrency Meetup: News, Q&A, Networking, Social @ BlockSpaces, 7:00 PM to 10:00 PM
- Women Who Code Tampa — Networking Night at American Social @ American Social Bar & Kitchen, 7:00 PM to 9:00 PM
- Nerdbrew Trivia — Games & Grog @ Peabody’s Billiards and Games, 7:00 PM to 11:00 PM
- Women In Linux — Understanding Linux @ 7:00 PM
- Geekocracy! — Geeks Who Drink Quiz Night @ District Tavern, 8:00 PM to 10:00 PM
- Chess With Cochez — Chess night – Bricks Ybor! @ The Bricks Ybor, 9:00 PM to 12:00 AM
Thursday, June 21
- Tampa Bay Professionals (IT, Sales, HR & more) — IT PROS – How to “Not Lose Your Job” over how you come across @ Online, 8:30 AM to 10:30 AM
- Brandon Boardgamers — Let’s Game on Thursdays @ Panera Bread (3490 Lithia Pinecrest Road, Valrico), 5:30 PM to 9:30 PM
- Lean Beer for All Things Agile @ Gaspar’s Grotto, 6:00 PM to 7:30 PM
- WITI – Tampa Bay (Women in Technology International) — Innovations In Healthcare Technology @ Johnson &Johnson, 6:00 PM to 8:00 PM
- GDG SunCoast — I/O 2018 Extended Tampa @ SecureSet, 6:00 PM to 9:00 PM
- Tampa SEO and Internet Marketing Monthly Meetup with Steve Scott @ 6:30 PM to 8:00 PM
- WordPress St. Petersburg — Building WordPress Websites: DIY vs. BUY @ TEC Garage at SPC Downtown Campus, 6:30 PM to 8:30 PM
- Tampa JUG — An Introduction to the Elastic Stack (Formally the ‘ELK’ Stack) @ Valpak Manufacturing Center, 6:30 PM to 8:30 PM
- Fusion 360 Open Workshop @ Tampa Hackerspace, 7:00 PM to 10:00 PM
- Hyperledger Tampa — Introduction to Hyperledger @ BlockSpaces, 7:00 PM to 9:00 PM
- Tampa.rb: Mystery Meetup! @ Suncoast Developers Guild, 7:00 PM to 10:00 PM
Friday, June 22
- Lean Coffee for All Things Agile (Westshore) @ Panera Bread (112 S Westshore Blvd, Tampa), 7:30 AM to 8:30 AM
- Café con Tampa @ Oxford Exchange, 8:00 AM to 9:00 AM
- Tampa Monopoly Meetup June Meetup @ Panera Bread (112 S Westshore Blvd, Tampa), 6:45 PM to 9:30 PM
Saturday, June 23
- Critical Hit Games’ Store Anniversary Party @ Critical Hit Games, 12:00 PM to 11:00 PM
- Sarasota Game Design & Development — June Meetup @ Ringling College Academic Center, 2:00 PM to 4:00 PM
- Geekocracy! — Board Game Night! @ 7:00 PM to 11:00 PM
Sunday, June 24

Last night, Anitra and I enjoyed delivering our presentation on building user experiences for mobile augmented reality apps to the combined Tampa Bay User Experience and Front-End Design meetups at Bank of the Ozarks’ Innovation Lab in St. Pete.
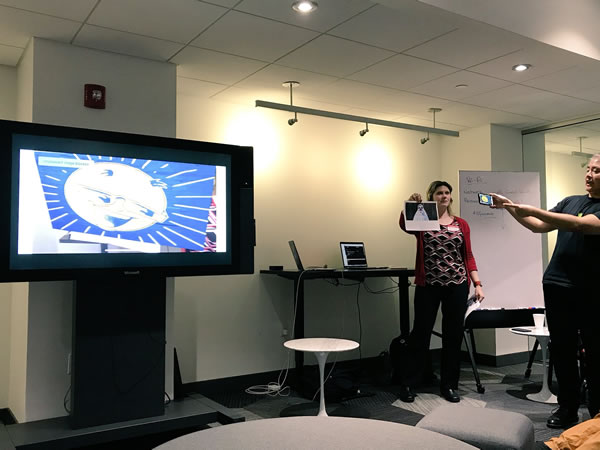
Photo by Beth Galambos.
Augmented reality is still relatively new territory for most mobile app developers and designers. Until recently, if you wanted to build AR apps for smartphones and tablets, you were faced with the task of doing a lot of programming in order to “roll your own” capabilities, including:
- Overlaying virtual images over camera images and displaying both on the screen
- Detecting changes to the device’s location and orientation in real-world space
- Re-orienting virtual images and drawing new ones in response to changes in the device’s location and orientation
- Detecting and responding to objects in the real world as seen by the device’s camera and other sensors
This has changed in the past year, with the introduction of built-in augmented reality frameworks by Apple into iOS (ARKit) and Google into Android (ARCore). With these, you don’t have to be an expert low-level programmer to built AR apps; even if you can build basic web or mobile applications, building AR apps is now something within your reach.
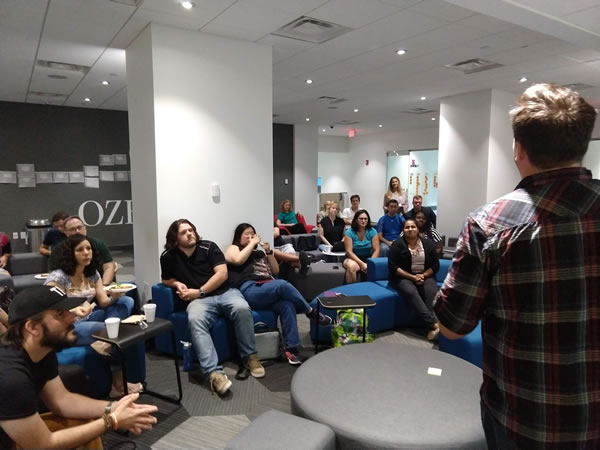
Photo by Joey deVilla.
Augmented reality is also relatively new territory for users. Desktop and laptop computers have had the processing power to do AR for many years, but in order to be truly useful, AR needs the kind of portability that comes with tablets, smartphones, and wearable devices. For the longest time, these portable devices lacked the power to do usable AR.
The past year has seen the introduction of the A11 “Bionic” processor in the iPhone 8 and iPhone X, and the Snapdragon 845 or Exynos 9810 processor in the Samsung Galaxy S9. We now have flagship smartphones and tablets with processing power that rivals the processor in the current MacBook Pro. These devices are now powerful enough to deliver practical AR experiences.
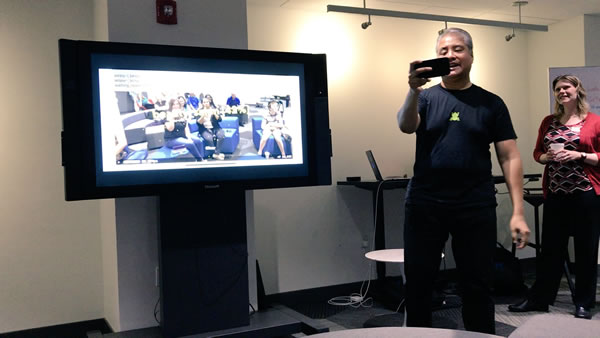
Photo by Beth Galambos.
With augmented reality now within easy reach of developers and users, it’s time for UX specialists and front-end designers to start thinking about building AR experiences. AR interactions are quite different from those for desktop applications, and expand upon plain mobile applications.
It’s AR’s early days. Think of AR today as being at the same point as…
- Personal computers in the mid- to late 1980s
- The GUI, multimedia, and CD-ROMs in the early 1990s
- The internet and web in the mid- to late 1990s
- Web 2.0 in the early 2000s
- Mobile apps in the late 2000s and early 2010s
If you take the leap, you can make a splash.
The presentation
AR’s a big topic, and we had a big presentation — 99 slides! We had a lot of ground to cover, as you can see from the SlideShare above.
![]()
![]() For those of you who want to download your own copy of our slides, here they are in a couple of formats:
For those of you who want to download your own copy of our slides, here they are in a couple of formats:
The presenters
In case you don’t know who we are, here’s a quick summary…
Anitra Pavka

- Technical Product Manager at Malwarebytes, working on the consumer anti-malware product used by almost 15 million people.
- Contributing author to O’Reilly’s book, HTML5 Cookbook.
- Technical editor for O’Reilly’s book, Universal Design for Web Applications.
- Three-time speaker on accessibility and usability issues at SXSW Interactive.
- Previous Tampa Bay UX Meetup speaker about Apple TV UX.
anitra@anitrapavka.com | @APavka | LinkedIn
Joey deVilla
- Lead Product Manager at Sourcetoad, overseeing the design and implementation of mobile applications.
- Contributing author at the mobile developer tutorial site RayWenderlich.com.
- ARKit session and tutorial presenter at RWDevCon 2018.
- Technical editor for the book ARKit by Tutorials.
- Tampa iOS Meetup organizer.
- Former Microsoft dev evangelist; tried to make Windows Phone 7 happen.
joey@joeydevilla.com | @AccordionGuy | LinkedIn
Learn to build your own ARKit apps!
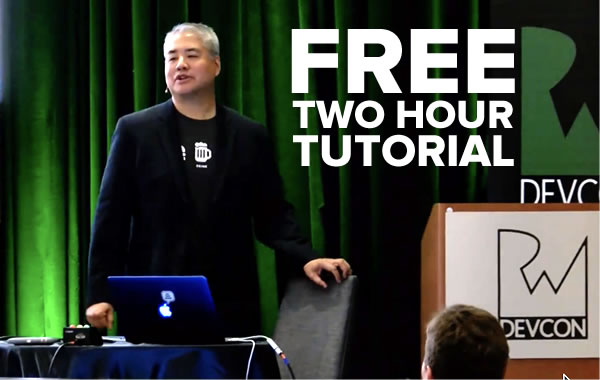
If you’d like to try your hand at building AR apps for iOS, take a look at the tutorial session that I gave at RWDevCon 2018 in April. In it, I walk the audience through building two of the apps that we demoed last night:
- Happy AR Painter, which lets you “paint” augmented reality shapes in real-world space.
- Raykea, a scaled-down version of the IKEA Place app.
Not only does this page contain the video of the entire tutorial session, it also has links to the starter and final projects for both these apps. All you need is Xcode (available for free from Apple) and an AR-ready iDevice (iPhone 6S or later).
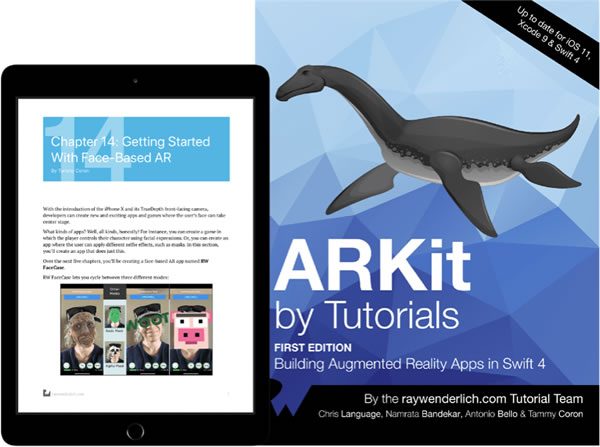
If you’d like to get even further into AR development for iOS, there’s no better book than ARKit by Tutorials, which not only teaches you all sorts of things about ARKit, but shows you how to build 5 AR apps:
- Tabletop Poker Dice
- Immersive Sci-Fi Portal
- 3D Face Masking
- Location-Based Content
- Monster Truck Sim
I was part of the technical editing team for the book, and I can say with certainty that it’s a fantastic resource for the AR developer.

On Thursday, June 14 at 6:30 p.m. at the Bank of the Ozarks’ Innovation Lab, Anitra and I will be do a presentation on augmented reality at the joint Tampa Bay User Experience / Tampa Bay Front End Design meetup. We’ll talk about building user experiences for augmented reality apps on mobile devices and show some AR apps that I’ve built. Join us!

Shortly after the release of Avengers: Infinity War, the site DidThanosKill.me appeared, and many of my friends visited it and shared their results. There were two possible outcomes:
- You were spared by Thanos.
- You were slain by Thanos, for the good of the Universe.
If you tried to reload the page to get a different result, you quickly learned that you can’t cheat fate. Once you got a result from DidThanosKill.me, it stayed that way, no matter how many times you reloaded the page.
If you’re new to programming, or if you’ve hit that point where you can follow a programming tutorial but are having trouble taking an idea and turning it into an application, this article is part of an ongoing series that will help you.
Nerd interlude (or: a little background for people who didn’t read comics in the ’90s)
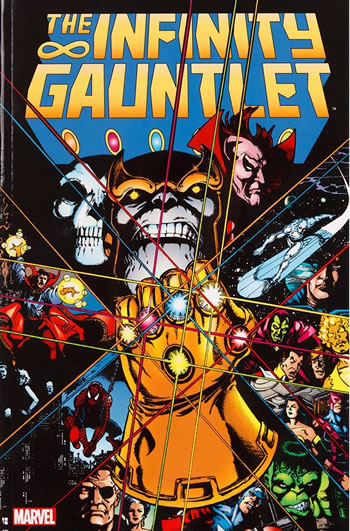
The eradication of half the life in the universe happened (both in the 1991 comic book The Infinity Gauntlet and the movie, which borrows bits and pieces from the comic book) when Thanos gathered the Infinity Gems/Stones (in the comics, they’re Gems, and they were originally called the Soul Gems; in the movies, they’re Stones)…
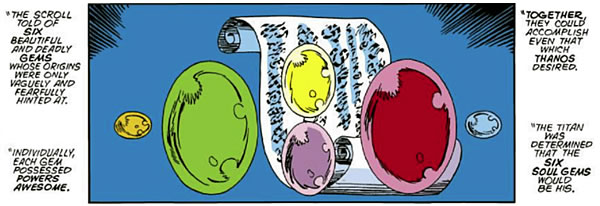
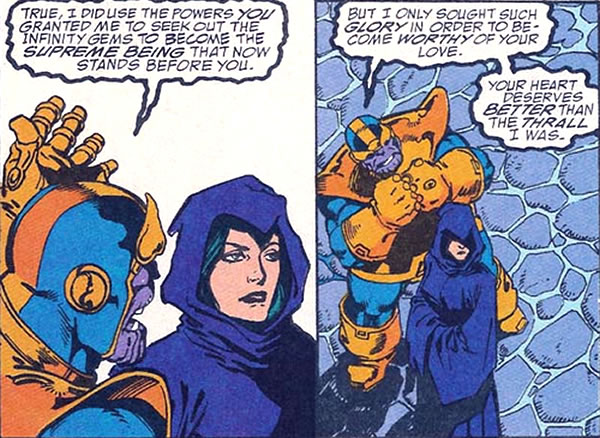
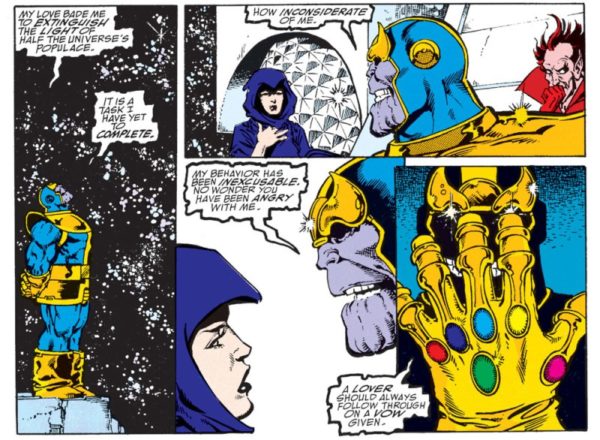
…into the Infinity Gauntlet, giving him near-unlimited power. In the comics, Thanos did this to impress and win the love of Death — the cosmic entity, personification of death, and Thanos’ dream woman:
The “to challenge humans is to court death” post-credits scene from the first Avengers movie gave the non-comic-book-reading audience its first glimpse of Thanos and hinted at the possibility that they might go with the same storyline…
…but instead, they went with a more mundane, Malthusian motivation for Thanos: bringing balance to the universe, and population control. It’s a pity, because the Marvel Cinematic Universe had already introduced a great death goddess character who would’ve worked wonderfully with the “Thanos is in love with Death” idea:
How DidThanosKill.me works: The high-level version

In both the movies and the comics, when Thanos finally gets all the gems/stones in the Gauntlet, he uses its power to kill off half the life in the universe by random selection. The word random should be your hint that a random number generator is involved.

The other thing that DidThanosKill.me does is remember whether or not Thanos killed you. When a web app remembers something about a particular visitor without requiring that visitor to log in first, that’s your hint that it’s probably making use of a cookie.
How DidThanosKill.me works: Looking at the actual code
Let’s take a look at DidThanosKill.me’s source. This is the complete source for that page, which you can see when you use your browser’s View Source functionality on DidThanosKill.me:
<!DOCTYPE html>
<html>
    <head>
        <title>Did Thanos Kill You?</title>
        <meta name="description" content="Did Thanos kill you?">
        <meta name="keywords" content="did,Thanos,kill,me,you,avengers,infinity,war,half,fifty,50,percent,snap">
        <meta name="author" content="Tristan Bellman-Greenwood">
        <script>
            function getCookie(cname) {
                var name = cname + "=";
                var decodedCookie = decodeURIComponent(document.cookie);
                var ca = decodedCookie.split(';');
                for(var i = 0; i <ca.length; i++) {
                    var c = ca[i];
                    while (c.charAt(0) == ' ') {
                        c = c.substring(1);
                    }
                    if (c.indexOf(name) == 0) {
                        return c.substring(name.length, c.length);
                    }
                }
                return "";
            }

            function onLoad() {
                var displayElement = document.getElementById("display");

                var randomNumber = getCookie("thanosNumber");

                if (!randomNumber) {
                    randomNumber = Math.random();
                    document.cookie = "thanosNumber=" + randomNumber + "; expires=Fri, 3 May 2019 00:00:00 UTC";
                } else {
                    randomNumber = Number(randomNumber);
                }

                if (randomNumber < 0.5) {
                    displayElement.textContent = "You were slain by Thanos, for the good of the Universe.";
                } else {
                    displayElement.textContent = "You were spared by Thanos.";
                }
            }

            function clearCookie() {
                document.cookie = "thanosNumber=; expires=Thu, 01 Jan 1970 00:00:00 UTC";
                location.reload();
            }
        </script>
    </head>
    <body onload="onLoad()">
        <div style="width: 100%; height: 100%;">
            <span id="display" style="position: fixed; top: 50%; left: 50%; transform: translate(-50%, -50%); font-family: sans-serif; font-size: 4em; text-align: center;"></span>
            <!-- <button onclick="clearCookie()">Clear Cookie</button> -->
        </div>
    </body>
</html>
Making the code run as soon as the page is done loading
On line 50, you’ll find the body tag:
<body onload="onLoad()">
This is an often-used technique to make something happen when the page loads:
- The
onloadevent occurs when the object it belongs to has fully loaded. - In the case of the
bodytag, theonloadevent happens when the body of the web page has fully loaded, which means that it has loaded all content, including images, scripts, CSS, and so on. - With this particular
bodytag, once the web page has fully loaded, it executes theonLoad()method.
The method where everything happens
The onLoad() method lives in the script tag (it starts at line 25) and looks like the code below, with one key exception: I’ve added a couple of numbers at the end of key lines, which correspond to the items below the code.
function onLoad() {
    var displayElement = document.getElementById("display");  // 1

    var randomNumber = getCookie("thanosNumber");             // 2

    if (!randomNumber) {                                      // 3
        randomNumber = Math.random();
        document.cookie = "thanosNumber=" + randomNumber + "; expires=Fri, 3 May 2019 00:00:00 UTC";
    } else {                                                  // 4
        randomNumber = Number(randomNumber);
    }

    if (randomNumber < 0.5) {                                 // 5
        displayElement.textContent = "You were slain by Thanos, for the good of the Universe.";
    } else {
        displayElement.textContent = "You were spared by Thanos.";
    }
}
1. It gets the HTML element that will display the “You were slain” or “You were spared” message.
It does this by getting the element whose id is display and assigns it to the variable displayElement.
If you look at line 52 of the source, you’ll see that this element is a span that is:
- Set in the center of the screen (as determined by
position: fixed; top: 50%; left: 50%; transform: translate(-50%, -50%);in thestyleattribute) - Has a large font size (as determined by
font-family: sans-serif; font-size: 4em;in thestyleattribute) - Is center-aligned (as determined by
text-align: center;in thestyleattribute)
The span will eventually contain the text that will display either “You were slain by Thanos, for the good of the Universe”, or “You were spared by Thanos.”
2. It checks to see if the user’s fate was already determined and memorized during a previous visit.
This is done by calling a method named getCookie(), which tries to get the value of the cookie with the given key. In this case, the key is thanosNumber. A cookie with the key thanosNumber would exist on the user’s system only if the user had visited the site before and didn’t clear the browser’s cookies since then.
- If user’s system contains a cookie with the key
thanosNumber,getCookie("thanosNumber")returns the value associated with that key, and that value gets put into the variablerandomNumber. - If the user has never visited DidThanosKill.me before (or cleared their cookies since their last visit), the user’s system not contain a cookie with the key
thanosNumber. The call togetCookie("thanosNumber")would result in anullvalue, which would then be put into the variablerandomNumber.
At this point, randomNumber contains either nullor a value.
3. If the user’s fate hasn’t already been determined and memorized, it determines and memorizes the user’s fate.
If randomNumber contains null, the following happens:
- A random number between 0 and up to (but not including) 1 is generated and stored in
randomNumber. This number represents the user’s fate. - The value in
randomNumberis saved to the user’s system in a cookie with the keythanosNumber.
4. If the user’s fate has already been determined and memorized, it recalls the user’s fate.
The value in randomNumber is converted to its numerical equivalent.
5. It displays the user’s fate.
At this point, as a result of either step 3 or step 4, randomNumber is guaranteed to contain a number between 0 and up to (but not including) 1.
- If the value in
randomNumberis less than 0.5, the user was slain by Thanos, and this fate is displayed onscreen. - If the value in
randomNumberis greater than 0.5, the user was spared by Thanos, and this fate is displayed onscreen.
And thus half the universe is spared, and half the universe dies.
An exercise for the reader

There are still two bits of the code that I haven’t yet explained, and they’re the ones that read and write the cookie data. The first is the getCookie() function…
  var name = cname + "=";
  var decodedCookie = decodeURIComponent(document.cookie);
  var ca = decodedCookie.split(';');
  for(var i = 0; i <ca.length; i++) {
      var c = ca[i];
      while (c.charAt(0) == ' ') {
          c = c.substring(1);
      }
      if (c.indexOf(name) == 0) {
          return c.substring(name.length, c.length);
      }
  }
  return "";
}
…and the second is clearCookie():
function clearCookie() {
    document.cookie = "thanosNumber=; expires=Thu, 01 Jan 1970 00:00:00 UTC";
    location.reload();
}
See if you can figure them out. I’ll explain how they work in a future article.

Every week, I compile a list of events for developers, technologists, tech entrepreneurs, and nerds in and around the Tampa Bay area. We’ve got a lot of events going on this week, and here they are!
Monday, June 11
- Tampa Bay Agile — The REAL difference between Outcome and Output (AgileDad, Lee Henson) @ KForce, 6:00 PM to 8:00 PM
- Cool ‘n Confident Toastmasters @ SPC – St. Petersburg/Gibbs Campus, 6:30 PM to 7:45 PM
- Largo Board Games Meetup — Roll Player: Monsters & Minions @ 7:00 PM to 9:00 PM
- Fusion 360 Deep Dive (8 Weeks) @ Tampa Hackerspace, 7:00 PM to 10:00 PM
- Tampa Bay Thinkers — Why is there an opioid crisis? What can be done to stop it? @ Carrollwood Cultural Center, 7:00 PM to 9:00 PM
- Nerdbrew Trivia — Pints & Pixels Gaming Night! @ Brew Bus, 7:00 PM to 11:00 PM
- Tampa Bay Bitcoin — Mining Mondays @ BlockSpaces, 7:00 PM to 9:00 PM
- South Tampa Toastmasters @ Unity of Tampa, 7:00 PM to 8:15 PM
Tuesday, June 12
- Westshore Toastmasters @ FIVE Labs, 12:00 PM to 1:00 PM
- Brandon Boardgamers — Tuesday Night Gaming @ Cool Stuff Games, 5:00 PM to 8:00 PM
- Startup Hustle Tampa — Network & Chill @ Irish 31, 5:00 PM to 7:00 PM
- Tech4Good Tampa — How to Develop & Enhance Online Giving through Your Website @ Panera Bread, 5:30 PM to 6:30 PM
- Entrepreneurs & Startups – Bradenton Networking & Education — Top takeaways for today’s business leader: Karla Campos Female Tech Entrepreneur, Station 2 Innovation Center, 5:30 PM to 7:30 PM
- Plant City Software Development Meetup — meetup[0] == “Our First Meetup & Intro to ZMQ” @ The Mad Botter HQ, 6:00 PM to 8:00 PM
- Game Club Tampa Meetup — Fear Agent: One Bad Day (Full) @ Grand Arena of Mind Expansion, 6:00 PM to 11:00 PM
- Women in Tech Panel Talk @ Malwarebytes, 6:00 PM to 8:00 PM
- Weekly Open Make Night @ Tampa Hackerspace, 6:00 PM to 10:00 PM
- Florida Podcasters Association General Meeting!!! @ IHop, 4910 Spruce Street, Tampa, 6:30 PM to 8:30 PM
- Game Club Tampa Meetup — Tuesday Nite Roleplayers (RPGs) (LFP) @ Grand Arena of Mind Expansion, 6:30 PM to 9:30 PM
- Code Katas — Let’s Do Some Fun Code Challenges! @ Suncoast Developers Guild, 7:00 PM to 10:00 PM
- Tampa Bay Social Media Meetup — Web Entrepreneurs @ Tampa Bay Technology Center, 7:00 PM to 10:00 PM
- Geekocracy! — “Token Tuesday” @ The Lowry Parcade and Tavern, 7:00 PM to 10:00 PM
- Woodshop Safety (Members Only) @ Tampa Hackerspace, 7:15 PM to 9:15 PM
Wednesday, June 13

- The Tampa Bay Career Transition Meetup — Savvy Networking: It Really can be FUN! @ 123 S. Westshore Blvd. 8th floor, 7:30 AM to 9:00 AM
- Open/FREE Coworking for Women Tech Entrepreneurs @ FirstWaVE Venture Center, 9:00 AM to 8:00 PM
- 1 Million Cups St. Pete — Sike42 @ St. Petersburg Greenhouse, 9:00 AM
- 1 Million Cups Tampa — Dognia Group / fanDUMB @ Mark Sharpe Entrepreneur Collaborative Center, 9:00 AM
- Learn Cybersecurity Tampa — Hacking 101: Social Engineering, Featuring Stacy M. Arruda, Special Agent, FBI @ SecureSet Tampa Campus, 5:00 PM to 7:00 PM
- Tampa Bay Blockchain Developers Meetup — Open Code @ Blockspaces, 5:00 PM to 8:00 PM
- Tampa Bay Agile — Product Owner Group – June: How to Show Real World Status on Agile Projects @ South University – Tampa, 6:00 PM to 8:00 PM
- Tampa Bay UAS and Drone University — Saint Petersburg College UAS Meetup – June Meeting @ St. Petersburg College EpiCenter, 6:00 PM to 7:30 PM
- Tampa Bay Data Science Group — Standard Meeting: Round Table Discussion @ Alessi/Vigo Foods Bacardi Memorial Tasting Room, 6:30 PM to 9:30 PM
- Ignite Tampa Bay 2018 @ Palladium Theater St. Petersburg, 6:30 PM to 9:30 PM
- Crypto Investors Club @ Panera Bread, 1908 4th Street North, Saint Petersburg, 6:30 PM to 8:30 PM
- Tampa Artificial Intelligence Meetup — AI Study Group Meeting – Movie Review Progress @ Town ‘N Country Regional Public Library, 6:30 PM to 8:00 PM
- Introduction to Fusion 360 @ Tampa Hackerspace, 7:00 PM to 10:00 PM
- The Suncoast Linux Users Group — SLUG – Tampa @ New HDR Location, 7:00 PM to 9:00 PM
- Women In Linux — Understanding Linux @ 7:00 PM
- Nerdbrew Trivia — Games & Grog @ Peabody’s, 7:00 PM to 11:00 PM
- FIBA’s Innovation Fusion @ Bryan Glazer JCC, 8:00 PM to 1:00 AM
Thursday, June 14

- Brandon Boardgamers — Let’s Game on Thursdays @ Panera Bread, 3490 Lithia Pinecrest Road, Valrico, 5:30 PM to 9:30 PM
- Network & Social – Tampa Networking Events — Tampa Networking Social @ Irish 31, 6:00 PM to 9:00 PM
- Tampa Bay UX Group / Tampa Bay Front End Design Meetup — AR Lessons Learned with Anitra Pavka and Joey deVilla @ Bank of the Ozarks’ Innovation Lab, 6:30 PM to 9:00 PM
- Hyperledger Tampa — Introduction to Hyperledger @ BlockSpaces, 7:00 PM to 9:00 PM
- Tampa Bay Geek Association — Secret Hitler @ PJ Dolan’s, 7:00 PM to 9:00 PM
- NerdBrew Meetup: RiffTrax Live! — Space Mutiny @ AMC Regency 20, 8:00 PM to 10:30 PM
Friday, June 15
- Lean Coffee for All Things Agile (Downtown Tampa & Seminole Heights) @ FOUNDATION coffee co., 1607 North Franklin Street, 7:30 AM to 8:30 AM
- Café con Tampa — The clock is ticking and everyone’s watching @ Oxford Exchange, 8:00 AM to 9:00 AM
- IEEE Young Professionals Tampa Meetup — Taco social @ Tijuana Flats,
- Tampa Bay Blockchain Developers Meetup — EOS Tampa Bay: Intro to the EOS Blockchain @ BlockSpaces, 7:00 PM to 9:00 PM
Saturday, June 16
- Game Club Tampa Meetup — Learn to Play Role Playing Games @ Grand Arena of Mind Expansion, 12:00 PM to 4:00 PM
- Microcontroller Monthly Meetup (M3) @ Tampa Hackerspace, 1:00 PM to 4:00 PM
- Tampa Unity User Group — Game Project Therapy @ Perkins Restaurant & Bakery, 3:00 PM to 6:00 PM
- Tampa Streaming Community Meetup — Summer social @ GameTime Tampa, 6:00 PM to 9:00 PM
- Tampa Hackerspace Monthly Board Game Night @ Tampa Hackerspace, 7:00 PM to 11:59 PM
- Tampa CE-5 Ambassador to the Universe Meetup — June Meetup @ 7:30 PM to 9:30 PM
- Nerd Night Out — KARAOKE NIGHT! @ Fat Cat Tavern, 8:30 PM to 12:30 AM
Sunday, June 17
By now, you’ve probably heard that Microsoft has acquired GitHub for $7.5 billion. Reactions have been all over the map, but have you wondered how Microsoft’s acquisitions fared after the fact? Here’s a quick run-down of some of the bigger and better-known ones:
Acquisition |
Details |
Outcome |
| 86-DOS (1981) |
Originally named QDOS (short for Quick and Dirty Operating System), it was developed by Seattle Computer Products for systems based on the Intel 8086. Its command structure was modeled after the then-relatively-widely-used CP/M operating system created by Digital Research. IBM wanted to use CP/M as the operating system that came with their soon-to-be-released PC, as there were a number of applications already written for it. There are many versions of the story why this didn’t happen, but the most credible one is that Digital’s licensing representative hesitated to sign IBM’s NDA. Microsoft, who were providing the BASIC programming language for the PC (back then, many desktop computers provided a ROM-based BASIC interpreter), heard about IBM’s problem, bought 86-DOS, and hired Tim Paterson to port it to the PC, which used the less expensive Intel 8088. Microsoft first purchased a non-exclusive license to use 86-DOS for $25,000 in December 1980 (about $80,000 in 2018 dollars). In July 1981, they purchased all rights to the operating system for $50,000 (about $143,000 in 2018 dollars). |
Two words: World domination. I’ll let Wikipedia do the talking:
DOS had a 19-year run, from its 1.0 version released on August 12, 1981, to the final version, 8.0, released on September, 16, 2000. |
| Forethought (1987) | You’ve probably heard of their stuff. One of their products was a presentation application called Presenter, which they later renamed to PowerPoint. They also developed the rights to develop the Mac version of a DOS database application called Nutshell; they named this application FileMaker. |
PowerPoint became part of Microsoft Office, where it’s one of its most (ab)used applications. In 1998, FileMaker was acquired by Claris, an Apple subsidiary, which became FileMaker, Inc. in the late 1990s. For some reason that eludes me, FileMaker still exists. |
| Hotmail (1997) | Originally called HoTMaiL (with the H, T, M, and L capitalized), this was one of the first web-based email services. Launched in July 1996 with a 2MB free storage limit (top-of-the-line machines in 1996 had 32MB RAM), it acquired over 8.5 million subscribers by December 1997 when they were bought by Microsoft. |
Hotmail was replaced by Microsoft’s Outlook.com in 2013. Outlook.com had over 400 million users as of July 2016. You may find this worth reading: How Hotmail changed Microsoft (and email) forever. |
| Visio Corporation (2000) | Visio, a diagram-drawing application, was first shipped by Shapeware Corporation in 1992. It became Shapeware’s flagship application, and they renamed themselves to Visio Corporation in 1995, which Microsoft acquired in 2005. | Visio remains an active Microsoft product, and while a stand-along application, has been promoted as one that can be used in conjunction with Microsoft Office and Visual Studio. |
| Great Plains Software (2001) | Great Plains was best known for its accounting application for mid-sized businesses. It was one of the first multi-user accounting applications to run on 32-bit Windows. Microsoft completed the acquisition of Great Plains in 2001. | Great Plains lives on as Microsoft Dynamics GP, which is the mid-market accounting application in the family of Microsoft Dynamics products. |
| Navision (2002) | A multi-user client/server accounting system created by Danish software company PC&C A/S (Personal Computing and Consulting) in 1987. PC&C renamed itself to Navision after its flagship product in 1995. Microsoft acquired Navision as a complement to its acquisition of Great Plains. | Navision lives on as Microsoft Dynamics NAV, which is the ERP (enterprise resource planning) application in the family of Microsoft Dynamics products. |
| aQuantive (2007) | This was the parent company of three tech companies:
Microsoft acquired aQuantive in August 2007. |
aQuantive was absorbed into Microsoft’s then-new Advertiser and Publisher Solutions Group. This business never did well, and in 2012, Microsoft took a $6.2 billion writedown, most of which was related to the aQuantive acquisition. Publicis Groupe purchased Razorfish from Microsoft in August 2009, and in 2016 merged with SapientNitro to go under the even more unweildy name SapientRazorfish. |
| FAST Search and Transfer (2008) | A data search/search engine company founded in Olso in 1997 that offered FAST ESP, an enterprise search product. They built strategic alliances with Lycos, Dell, and TIBCO in 1998 and 1999, and in 2003 narrowed their focus to enterprise search, selling their web search businesses to Overture (which was eventually acquired by Yahoo!). The company ran into serious financial trouble and controversy over its mismanagement in the mid-2000s, which is what probably led to its acquisition by Microsoft in January 2008. | FAST lives on as a subsidiary of Microsoft known as Microsoft Development Center Norway. |
| Skype (2011) | Another Danish company on this list! Founded in 2003, this text, voice, and video chat application was built on the same back-end software used by the music-sharing application Kazaa. eBay acquired Skype in 2005, and then the combination of Silver Lake, Andreesen Horowitz, and the Canada Pension Plan Investment Board bought 65% of Skype in 2009. Microsoft acquired Skype in May 2011. | Microsoft has re-focused Skype on the corporate market, and in this writer’s opinion, made it more like its other communications products — that is, worse. Many consumers have since switched to competing and more consumer-focused offerings from Facebook, Apple, and Google. |
| Yammer (2012) | Started as the internal communications application for Geni.com (a genealogy website), Yammer became a stand-alone enterprise social networking application in 2008. Microsoft acquired Yammer in 2012 for $1.2 billion. | Yammer lives on as yet another enterprise communications platform under the Microsoft umbrella. |
| Nokia’s mobile hardware division (2013) | The oldest company on this list (it was founded in 1865, when it was a pulp mill and later expanded into rubber and cables), they grew into a mobile telephony powerhouse in the 1990s. In the early 2000s, they were one of the top mobile vendors, but were unseated by the rise of iOS and Android. Combined with a disastrous Microsoft-ization with the installation of Microsoft VP Stephen Elop as its CEO and subsequent partnership with Microsoft and focus on Winwos Mobile, Nokia sales plummeted and announced the sale of its mobile and devices division to Microsoft in September 2013. | Nokia still exists as two business groups:
The Nokia acquisition lives on in pieces as Microsoft’s devices division. Microsoft took a $7.6 billion writedown as a result of acquisition. |
| Mojang (2014) | One word: Minecraft! Founded by Markus “Notch” Persson in 2009, Minecraft was released as a 1.0 product in 2011 and acquired by Microsoft in 2014 for $2.5 billion. |
Minecraft lives on as a successful product under Microsoft. Notch has gone on to be an unhappy, bored, lonely, and all-round unpleasant person, who despite repeated, unhinged rants about so-called “SJWs”, took a surprisingly neutral stance on GamerGate. |
| Xamarin (2016) |
The descendant of the GNOME desktop UI project for Linux, the Mono project was launched by Miguel de Icaza and Nat Friedman to build a Linux version of the .NET framework. Mono became Ximian, which was acquired by Novell in August 2003. Ximian was acquired by Attachmate, which laid off hundreds of people in the Novell workforce, including Mono’s developers. Xamarin was formed in May 2011 to continue the Mono project, which was now largely focused on .NET developer tools for Android, iOS, and Windows Mobile. Xamarin was acquired by Microsoft in February 2016 for somewhere between $400 million and $500 million. |
Xamarin lives on within Visual Studio for both Windows and MacOS. |
| LinkedIn (2016) | Founded in the last days of 2002 and launched in May 2003, LinkedIn grew into the de facto business social network. In May 2015, LinkedIn bought the online video course site Lynda.com for $1.5 billion. As of April 2017, LinkedIn had 500 million members. Microsoft completed its acquisition of LinkedIn in December 2016, for which it paid about $26.4 billion. | If you read this blog, you’re probably on LinkedIn! It continues to grow, although this recent Forbes article credits external factors rather than Microsoft, including:
|
| GitHub (2018) |
If you read this blog, the odds are pretty good that you have a GitHub account (and if you were curious, mine’s here). Founded as Logical Awesome, LLC, GitHub provided web-based hosted version control using git, the version control system developed by Linus Torvalds and the de facto standard today. GitHub is the spiritual successor to SourceForge, which was the go-to place for open source projects during the “Cathedral and Bazaar” days. In addition to developing the service that bears its name, GitHub are also behind the Atom text editor and Electron framework. Since Microsoft makes its own cross-platform code editor — Visual Studio Code (which is my current go-to editor) — it should be interesting to see what happens with Atom. While you might think that they might kill it immediately, Microsoft has been known to have competing versions of the same thing as a result of acquisitions; think of their mess of communications platforms, FoxPro and Access, competing frameworks, and so on. |
It’s just the beginning! It has been announced that Ximian co-founder Nat Friedman, who has some serious open source credentials and goodwill, will be GitHub’s new CEO. |