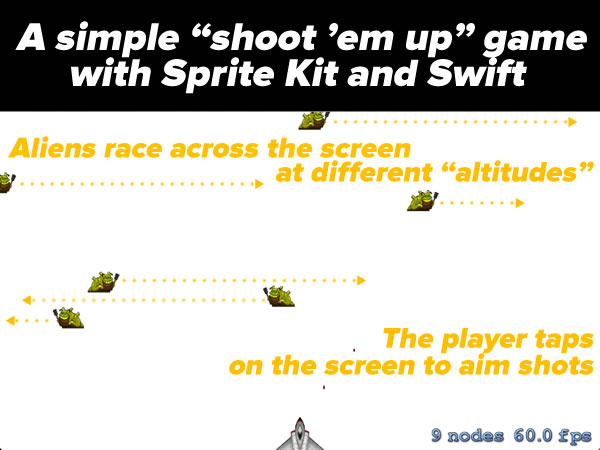
 This article is part two in a series that looks at a simple “Shoot ‘Em Up”-style game for iOS written using Sprite Kit and Swift. If you missed the first installment, which provides the complete code, the necessary graphics and sound resources, as well as instructions for assembly, it’s here.
In this article, we’ll look at:
- How the code is organized, both in the way it’s ordered, and through the use of
MARK: comments, and
- The operator overloads and extensions to
CGPoint that support vector math
How the code is organized, and those MARK: comments
The code in the Simple Shoot ‘Em Up game is divided into two major sections:
- A set of operator overrides and extension properties for doing vector math on
CGPoints
- The
GameScene class, which defines the entire game
The GameScene class is divided into three subsections:
- Properties
- Event-handling methods
- Game state methods
Each section is marked with a MARK: comment. If you’re familiar with iOS development with Objective-C, // MARK: is Swift’s answer to good ol’ #pragma mark. If you’re not familiar with #pragma mark, read on…
Organizing code with MARK: comments
There’s a jump bar at the top of every editor window in Xcode, which makes it easy to navigate throughout your project. If you’re editing the GameScene.swift file (go edit it right now if you’re not), it should look like this:

Click on the part of the jump bar just to the right of GameScene.swift, as shown below:

A menu will appear. It will display the various named entities — functions, classes, properties, methods, and so on — inside GameScene.swift:
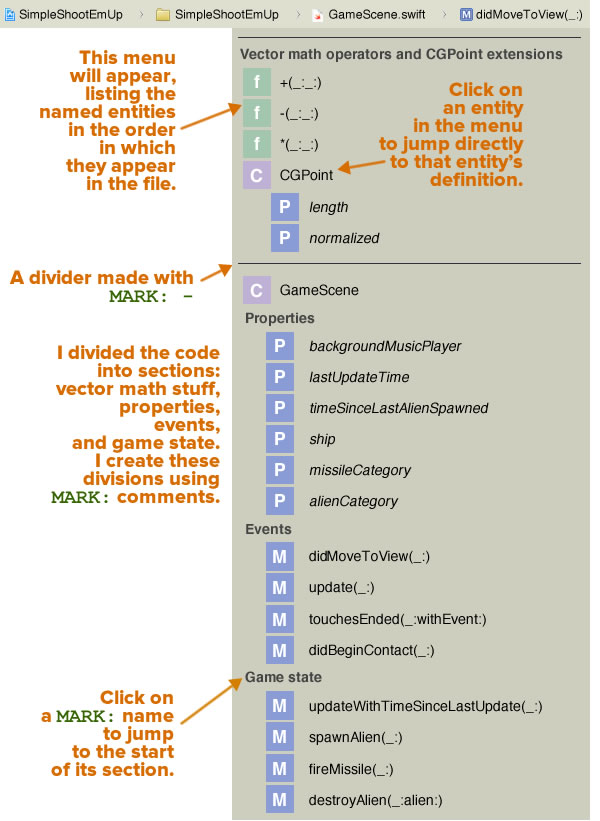
You might notice that the menu lists the entities in the order in which they appear in the code, and that they’ve been organized into the following sections. You’ll see that:
- There’s a line above each major section: one for the vector math stuff, and one for the
GameScene class, and
- The code has named sections, namely:
- Vector math operators and
CGPoint extensions: A set of operator overloads and extension properties to allow for vector math on CGPoints.
- Properties: Properties of the
GameScene class.
- Events: Methods that respond to events.
- Game state: Methods that change the game state.
These divisions were created using MARK: comments:
- The Properties, Events, and Game state sections were created using the comments
// MARK: Properties, // MARK: Events, and // MARK: Game state respectively,
- The Vector math operators and
CGPoint extensions section, complete with a line above it, was created using the comment // MARK: - Vector math operators and CGPoint extensions. Note the - (minus sign) that comes between // MARK: and the section name.
- The dividing line separating the vector math stuff and the
GameScene class was created with the comment // MARK: - — that is, // MARK: followed by a - (minus sign with nothing after it).
Using // MARK: and its Objective-C cousin, #pragma mark to organize your code is a good habit to take up.
Vector math
In the game, the player’s ship remains stationary and dead-center at the bottom of the screen. The player shoots at the aliens passing overhead by tapping on the screen, and the ship fires shots in the direction of that tap:
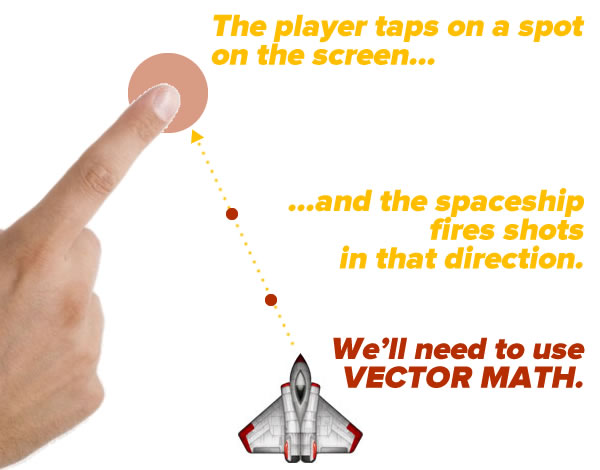
In order to program this action, we’ll need to make use of vector math.
Before we begin: Sprite Kit’s coordinate system
Most UI and computer graphics programming systems have their origin at the upper right-hand corner of the screen, with X increasing as you go rightward, and Y increasing as you go downward. Sprite Kit is based on OpenGL, which uses the same coordinate system that you use in math, with X increasing as you go rightward, and Y increasing as you go upward:
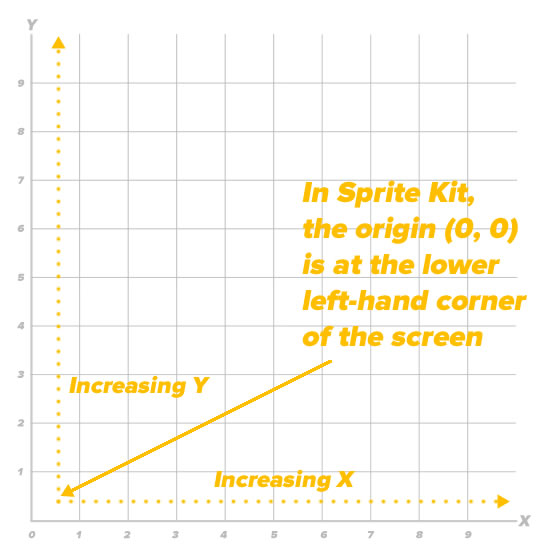
With this coordinate system, the origin (0, 0) is located at the lower left-hand corner of the screen rather than the upper left-hand corner.
Vectors and points
An ordered pair (x, y) can represent:
- A point located at (x, y), or
- A vector that starts at (0, 0) and ends at the point (x, y)
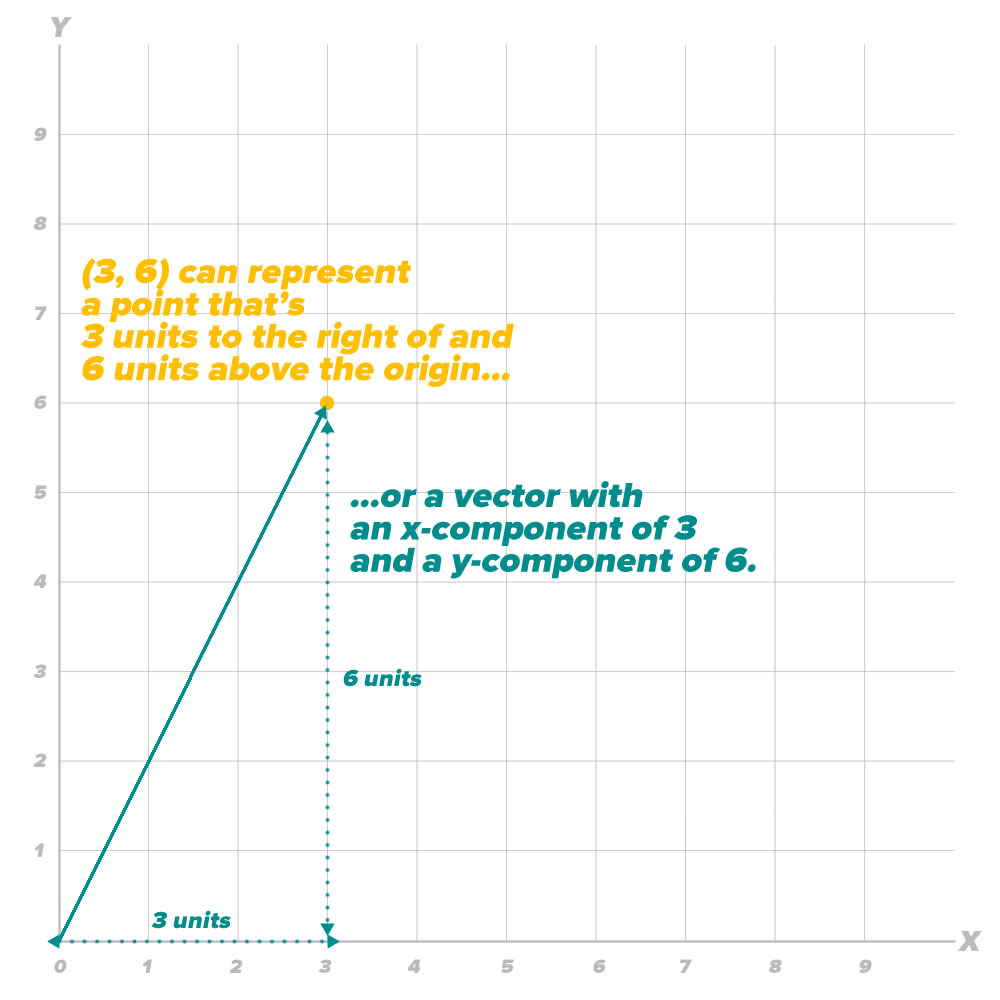
We’re going to use the connection between point coordinates and vector coordinates to create some overloads and extensions that will help simplify programming our game.
Vector addition
The first overload we’ll implement will allow us to add two vectors together, as pictured below:
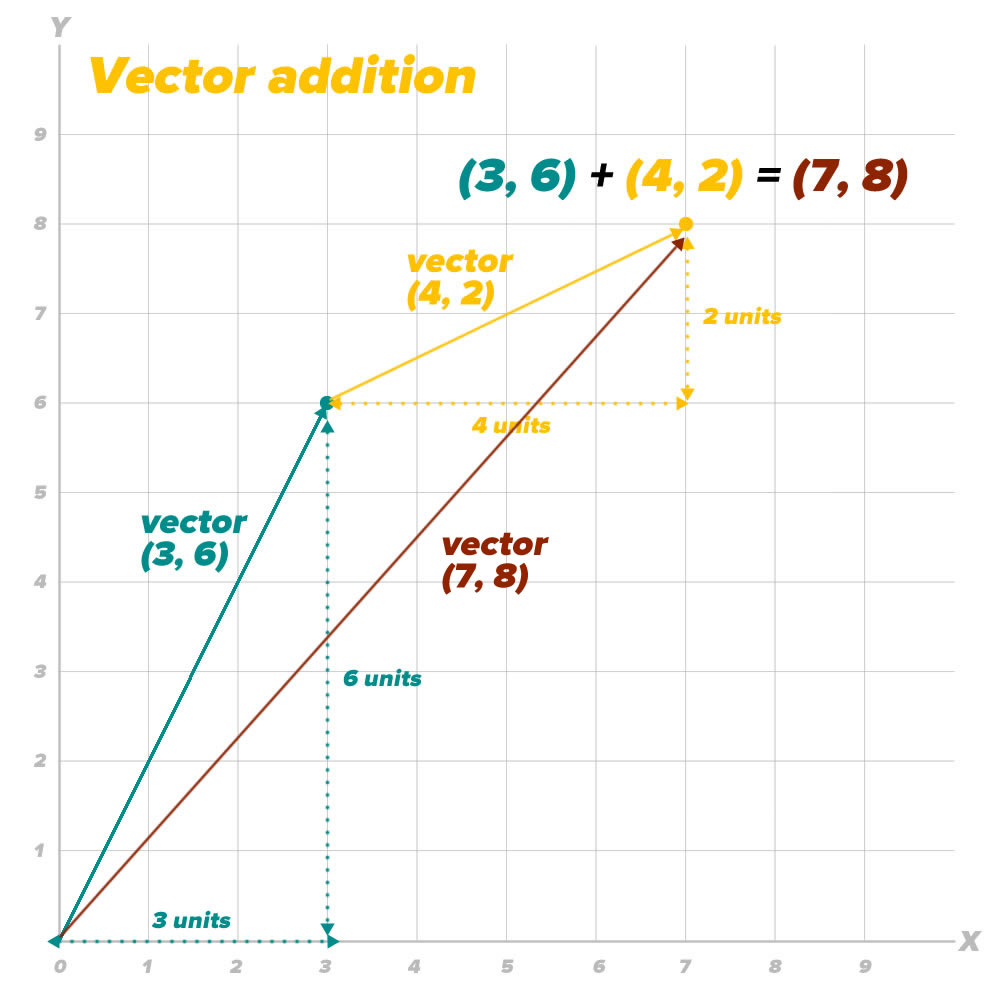
If you take a vector (x1, y1) and add another vector (x2, y2) to it, the resulting vector is (x1 + x2, y1 + y2).
In Swift, we’ll implement vector addition by taking advantage of the point coordinate/vector coordinate connection and use CGPoints to represent vectors. As a result, our vector addition overload of the + operator takes two CGPoints (x1, y1) and (x2, y2), and returns the vector sum (x1 + x2, y1 + y2):
// Vector addition
private func + (left: CGPoint, right: CGPoint) -> CGPoint {
  return CGPoint(x: left.x + right.x, y: left.y + right.y)
}
With this overload, you can add any two vectors represented by CGPoints just by adding them with the + operator.
Vector subtraction
It’s easy to picture vector addition, but it’s a little harder to picture vector subtraction. The diagram below should help:
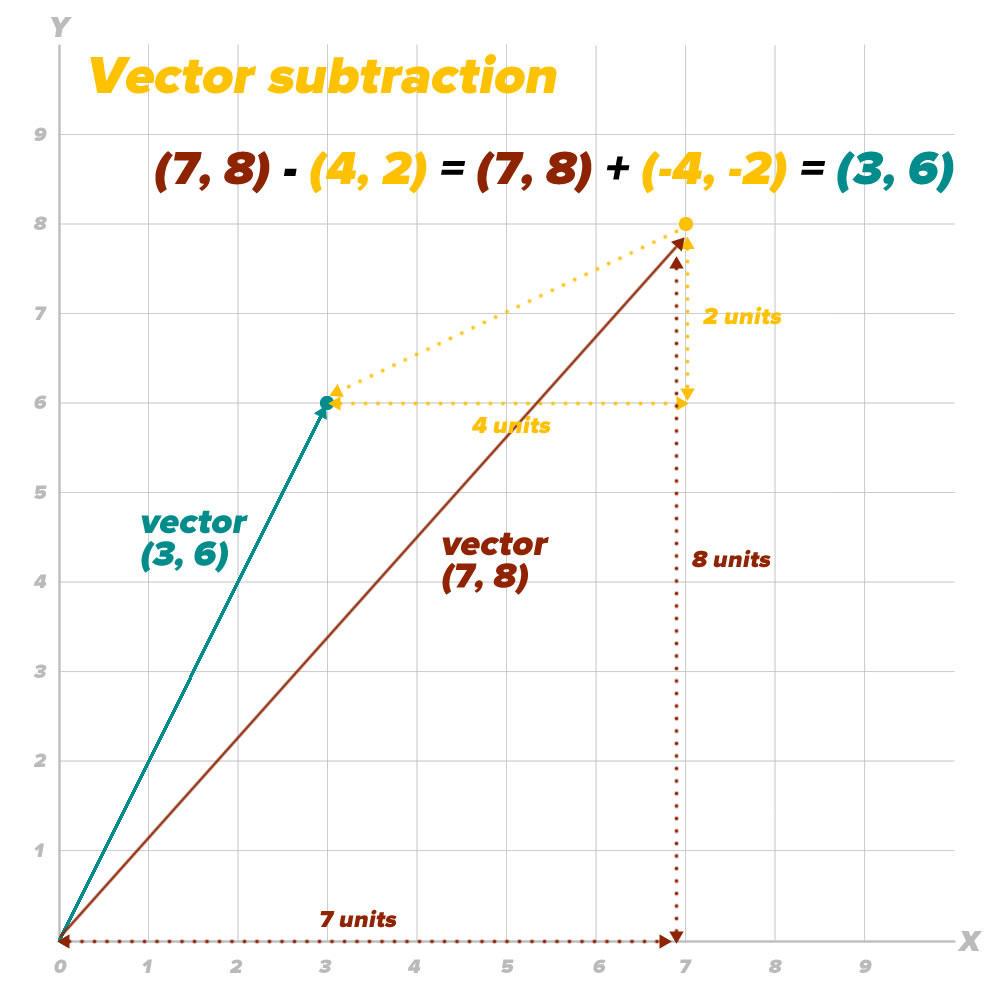
Subtracting a vector is easy to see in equation form: taking a vector (x1, y1) and subtracting another vector (x2, y2) gives you a resulting vector (x1 – x2, y1 – y2). Here’s our game’s implementation of vector subtraction:
// Vector subtraction
private func -(left: CGPoint, right: CGPoint) -> CGPoint {
  return CGPoint(x: left.x - right.x, y: left.y - right.y)
}
This overload lets you subtract a vector represented by a CGPoint from another vector represented by a CGPoint through the use of the - operator.
Vector multiplied by a scalar
Multiplying a vector by a scalar preserves the vector’s direction, but changes its magnitude:
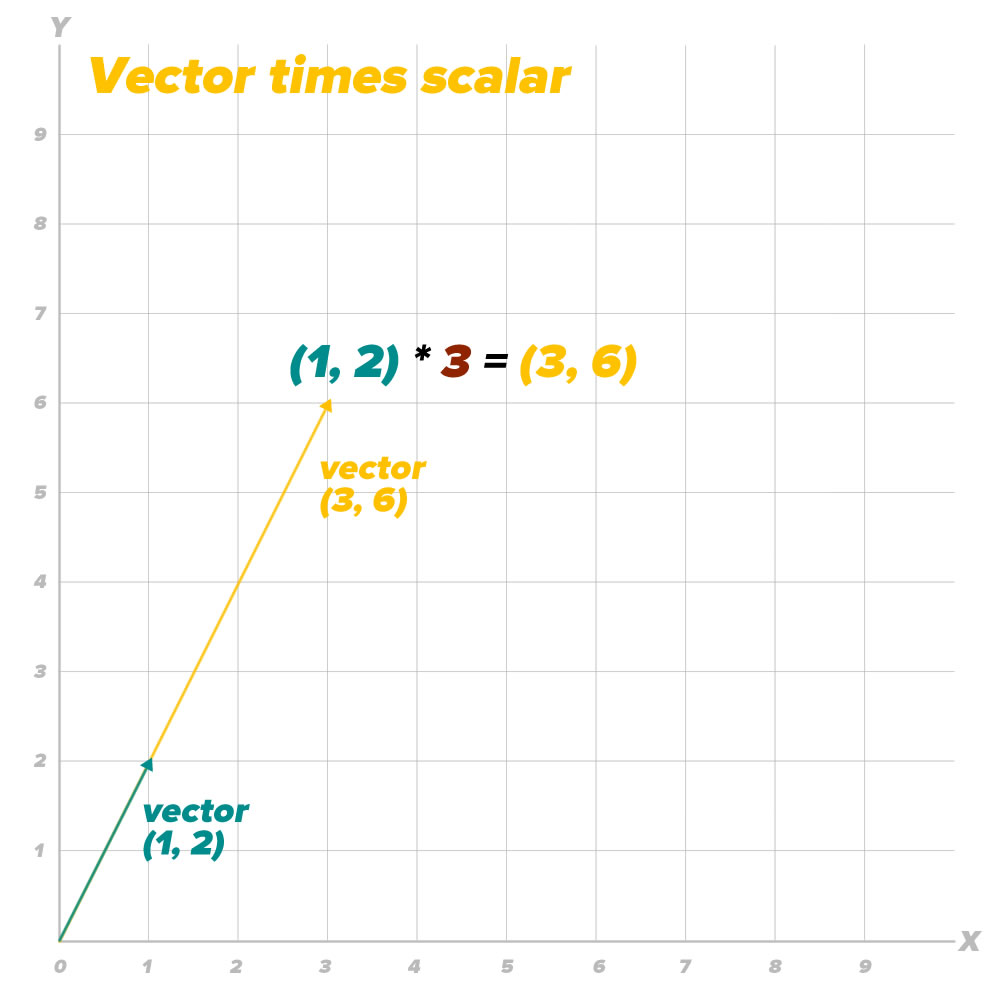
Multiplying a vector (x, y) by a scalar k gives you the resulting vector (kx, ky). Here’s how we implement vector-scalar multiplication in our game:
// Vector * scalar
private func *(point: CGPoint, factor: CGFloat) -> CGPoint {
  return CGPoint(x: point.x * factor, y:point.y * factor)
}
With this overload, you use the * operator to multiply a vector represented by a CGPoint by a scalar factor represented by a CGFloat. Note that order is very important in this operation: the first operand must be the vector, and the second operand must be the scalar — it won’t work the other way around!
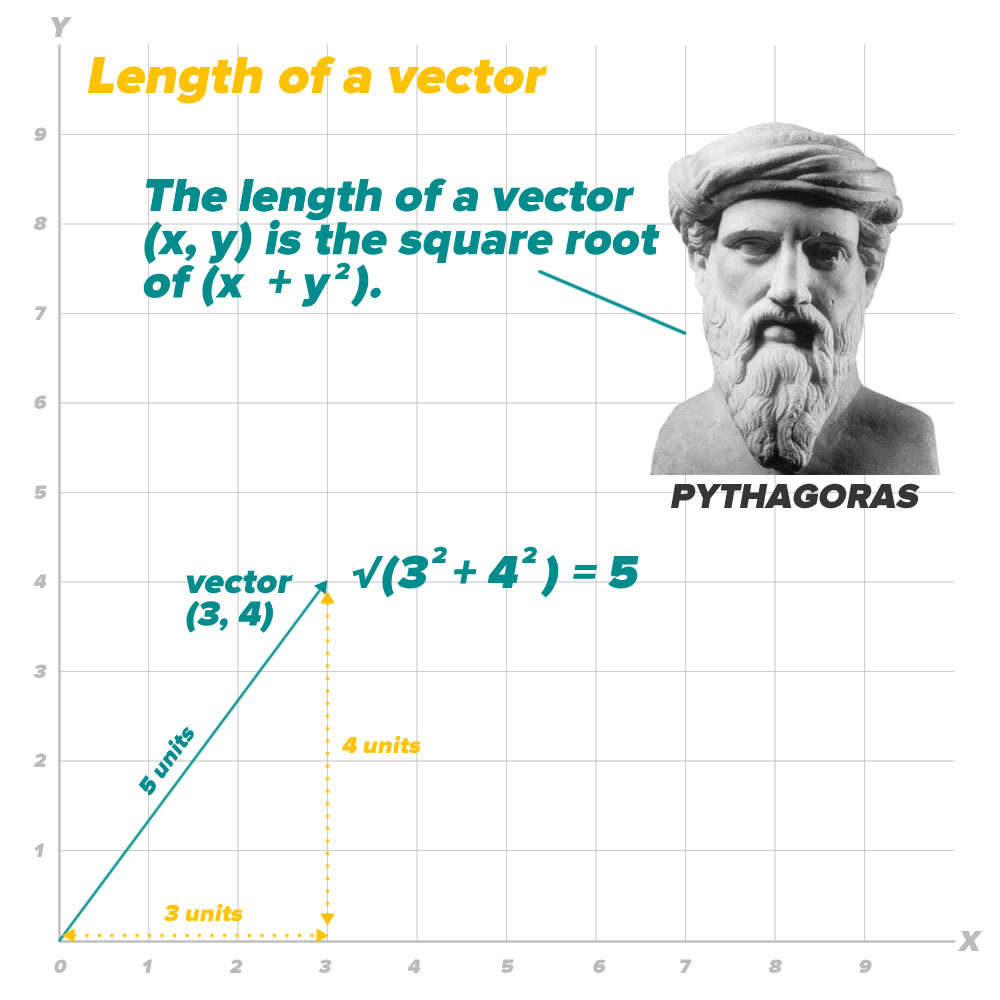
Length of a vector and normalizing a vector
We’ll need to get the length of a vector, and for that we’ll use the Pythagorean theorem:
Being able to get the length of a vector will come in handy when we want to normalize it. By “normalizing”, we mean preserving its direction, but changing its length to 1:
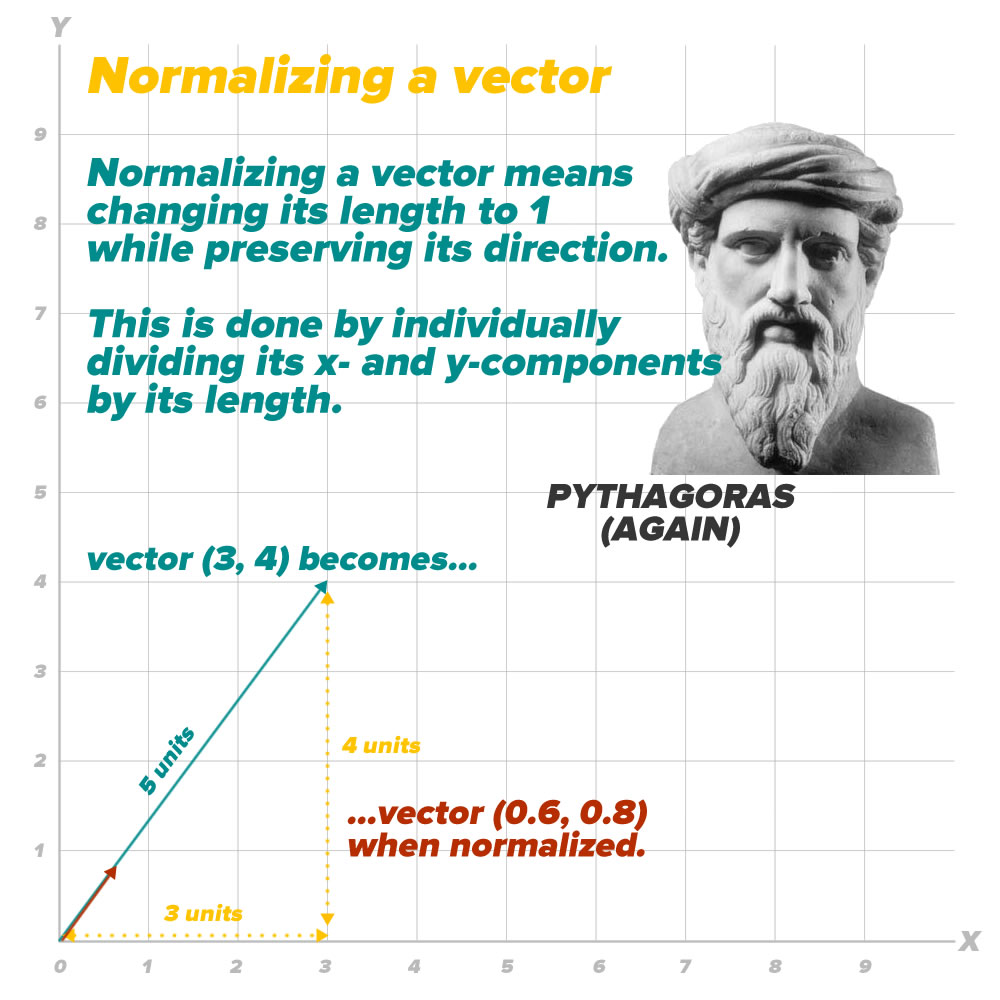
I wrote an extension to the CGPoint struct that provides two properties:
length, which returns the length of a vector represented by a CGPoint, andnormalized, which returns a CGPoint representing 1-unit-long vector that has the same direction as the vector in question.
Here’s the code:
private extension CGPoint {
  // Get the length (a.k.a. magnitude) of the vector
  var length: CGFloat { return sqrt(self.x * self.x + self.y * self.y) }

  // Normalize the vector (preserve its direction, but change its magnitude to 1)
  var normalized: CGPoint { return CGPoint(x: self.x / self.length, y: self.y / self.length) }
}
Next steps
With the code organization explained and the vector math taken care of, we’ll cover the actual workings of the game in the next installment.


 If you register a new iPhone with AT&T’s Next plan by September 30th, whether you’re a new or current customer, AT&T will give you a $100 credit on your mobile bill. They’ll also buy your old iPhone for up to $300, which you can apply to a purchase of an iPhone 6 or 6 Plus.
 Sprint will beat any trade-in offer on the iPhone 6 or 6 plus from a major carrier, and they’ll pay up to $350 per line if you switch to them. They’re also offering a new plan specifically for iPhone 6/6 Plus customers with unlimited voice, text, and data for $50 a month.
 T-Mobile is also taking the “find an iPhone trade-in deal and we’ll match it” tack and sweetening it with an additional $50 credit on your bill, plus up to $350 for switching.
 If you’re on a budget but still want the new iDevices, Walmart will sell the base versions of the 6 and 6 Plus at a $20 discount; Sam’s Club will add an extra $2 to that discount.