(In case you missed part 1, it’s here. Be warned; it’s long, but it’s a good read.)
In this installment of Upwardly Mobile, I’m going to give you a quick introduction to developing applications for Windows Mobile 6 phones and handheld devices. I can’t cover all aspects of Windows Mobile development in this article, but there should be enough material in this entry to get you started.
What You Need
In order to build an application for Windows Mobile 6, you’ll need the following things:
Visual Studio 2008, Professional Edition or higher  |
This is the development environment. It’s not the only one that you can use to develop Windows Mobile apps, but it’s the one we’re using.
You can also use Visual Studio 2005 – if you do so, Standard Edition or higher will do. If you don’t have Visual Studio, you can download a trial version of Visual Studio 2008. |
| The Windows Mobile 6 SDKs |
The Windows Mobile 6 SDKs contain the templates for building Windows Mobile 6 projects and emulators for various Windows mobile phones.
There are two such SDKs to choose from: I recommend downloading both SDKs. You never know where you’ll deploy! |
.NET Compact Framework 3.5 Redistributable  |
The .NET Compact Framework 3.5 Redistributable is the version of the .NET framework for mobile devices. It only needs to be sent to the device once. |
A Windows Mobile 6 Device  |
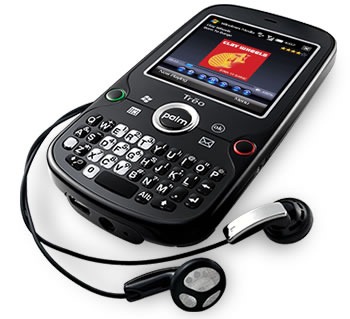
You can get by in the beginning with just the emulators, but you’ll eventually want to try out your app on a real phone. I’m using my phone, a Palm Treo Pro.
As the saying goes, “In theory, there is no difference between theory and practice; in practice, there is.” |
| The mobile device syncing utility that works with your operating system |
If you’ve got a Windows Mobile 6 device, you’ll need the application that connects your mobile phone to your OS:
|
Let’s Start Programming!
In this example, we’re going to write a “Magic 8-Ball” style application called Ask the Kitty. It’ll be a simple app that provides random answers to questions that can be answered with a “yes” or “no”.
Fire up Visual Studio, open the File menu and click on Project… (or click control-shift-N). The New Project dialog box will appear:
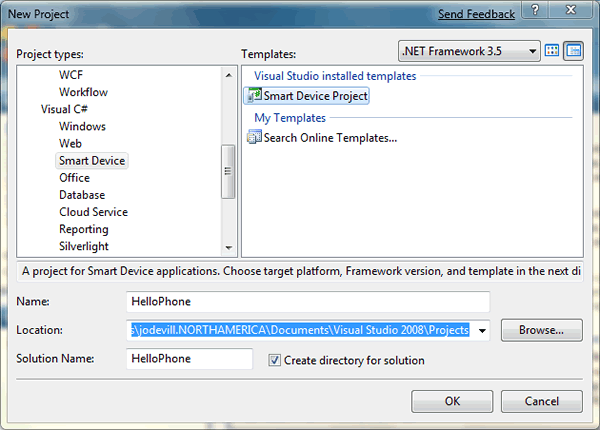
In this example, we’ll be doing development in Visual C#. From the Project types list on the left, expand the Visual C# menu and click the Smart Device sub-item. The Templates list on the right will display the available templates for a smart device project; select Smart Device Project.
(You can do Windows Mobile 6 development in Visual Basic if you prefer; there’s a Smart Device option under the Visual Basic menu.)
Give your project a name (for this example, I’m using the name HelloPhone) and specify a location (I’m just using the default Visual Studio directory for projects), make sure the Create directory for solutioncheckbox is checked, and click the OK button.
The Add New Smart Device Project dialog box will appear:
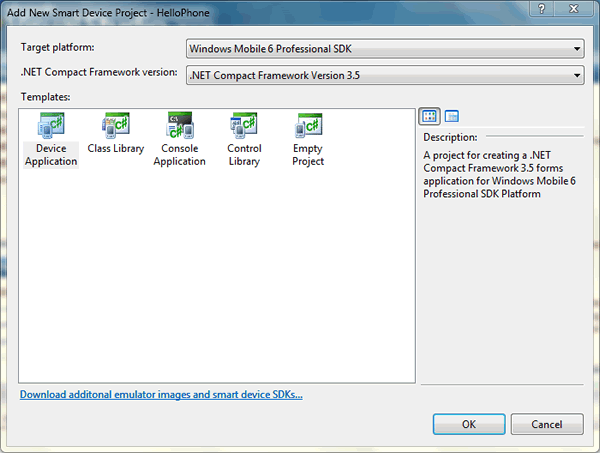
You specify the type of device you’re developing for using the Target platform menu. My Palm Treo Pro is a touch screen device and uses Windows Mobile 6 Professional as its OS, so I’m going to select Windows Mobile 6 Professional SDK from that menu.
We want to use the latest version of the .NET Compact Framework, so leave the default option, .NET Compact Framework Version 3.5, selected in the .NET Compact Framework version menu.
We want to create an application, so select Device Application from the Templates menu and click the OK button. Visual Studio will create your project, and you can start developing. Here’s what you’ll see:
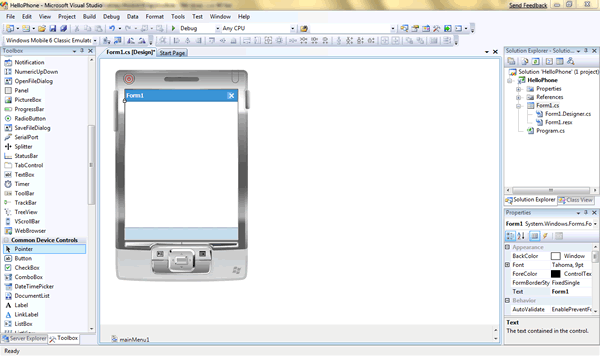
If we were writing a regular WinForms desktop app, the forms designer would show a blank window. If we were developing an ASP.NET application, the forms designer would show a blank web page, Since we’re developing a Windows Mobile app, the forms designer by default shows a blank mobile app window enclosed in a mockup – the “skin” — of a generalized mobile device. Here’s the skin for a Windows Mobile 6 Professional device:
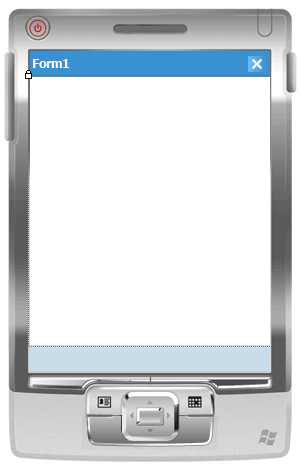
You can choose to display or hide the skin in the Forms Designer. I’m going to work without the skin; I can hid it by opening the Format menu and toggling the Show Skin item.
Set Up the User Interface
This application will use a single form. We’ll take the default form from the project, Form1, and do the following using the Properties pane:
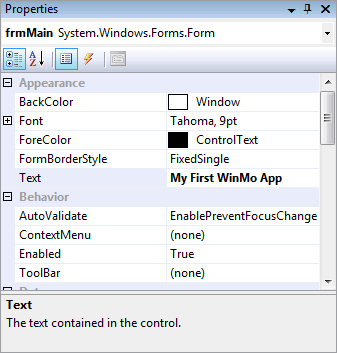
- Rename it as frmMain.
- Change its AutoScaleMode property to None (We don’t want the app to automatically resize its controls and fonts, we want it to use the control sizes and locations and font sizes that we specify).
- Change its Size to 320,250, the right size for many Windows Mobile 6 Professional Devices including my Palm Treo Pro.
- Change the form’s heading – set the Text property to My First WinMo App.
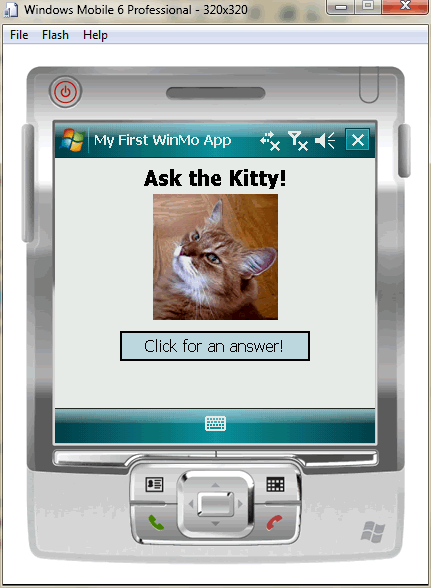
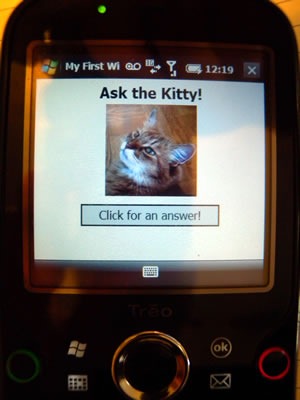
We’ll set up the form to look like this:
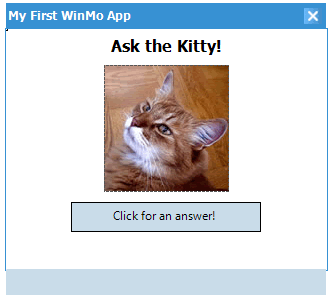
The “Ask the Kitty!” at the top of the form is a Label control, with its font set to Tahoma, font style set to Bold, font size set to 12 points and text set to Ask the Kitty!
The “Click for an answer!” at the bottom is a Button control, with its font set to Tahoma, font style set to Regular, font size set to 9 points and text set to Click for an answer!. I also renamed the button as btnAnswer.
The cat picture in the middle is a PictureBox control. The trick is to provide a picture to fill the PictureBox. It’s simple. The first step is to copy a picture file into the project directory:
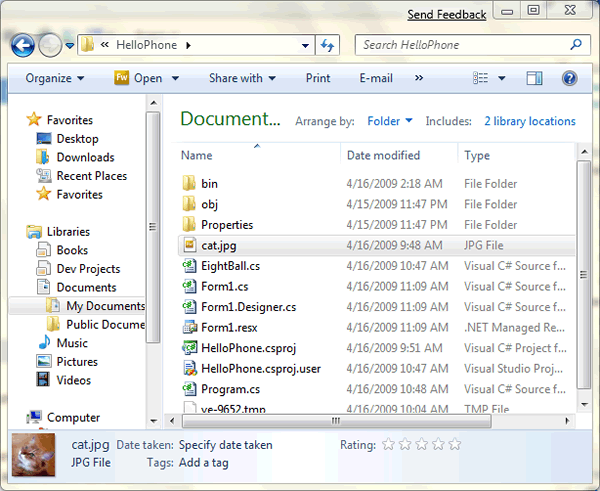
Make sure that the picture is included in the project. If you can’t see the picture file in the Solution Explorer window, click the Show All Files button. Right-click the picture file in Solution Explorer and select Include in Project:
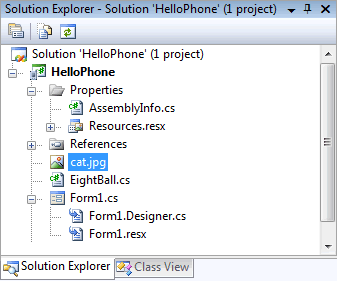
Once you’ve included the picture file in the project, you can use it to fill the PictureBox. Select the PictureBox in the Forms Designer, go to the Properties window and change its Image property – use the selector to pick the picture file that we just included in the project.
Add Some Code
There’s a lot of example code out there that puts programming logic inside the UI – that is, in the code for the forms. I’m going to avoid that and do the right thing by creating a class for the “engine” of this application. Creating a new class is easy – open the Project Menu, select Add Class…, and then select Visual C# Items –> Code –> Class. I named the class file Kitty.cs in the Solution Explorer; here’s its code:
using System;
using System.Linq;
using System.Collections.Generic;
using System.Text;

namespace HelloPhone
{
    class Kitty
    {
        List<string> _responses = new List<string< {
            "Yes",
            "No",
            "Maybe",
            "Ask again later"
        };
        Random _rand = new Random();

        public string GetResponse()
        {
          return _responses[_rand.Next(_responses.Count)];
        }
    }
}
The next step is to wire up btnAnswer to provide an answer when clicked. This means adding an event handler to btnAnswer. The easiest way to do this is select btnAnswer, then go to the Properties window, select the Events view (it’s the lightning bolt button) and double-click on the Click event. That will automatically create a method called btnAnswer_Click() in the frmMain class and wire up that method to be called whenever btnAnswer is clicked.
Here’s the code for frmMain:
using System.Drawing;
using System.Text;
using System.Windows.Forms;

namespace HelloPhone
{
    public partial class frmMain : Form
    {
        Kitty _eightBall = new Kitty();

        public frmMain()
        {
            InitializeComponent();
        }

        private void btnAnswer_Click(object sender, EventArgs e)
        {
            btnAnswer.Text = _eightBall.GetResponse();
        }

    }
}
Run the App in the Emulator
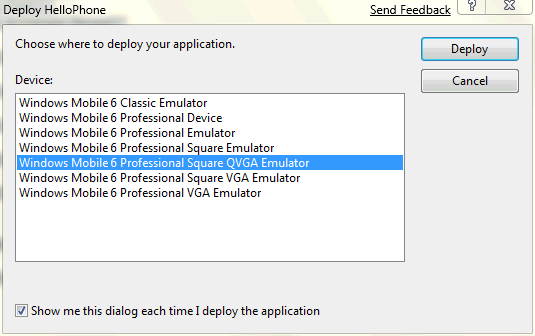
The app’ is now ready to take for a test run in the emulator. Click the Start Debugging button (it looks like a “play” button) or press the F5 key. This window showing your deployment options will appear:
I want an emulator that best matches my Palm Treo Pro, which has a square QVGA display, so I selected Windows Mobile 6 Professional Square QVGA Emulator and clicked the Deploy button. Give it a moment or two to compile and fire up the emulator, after which you should see this:
Run the App on Your Mobile Device
Running the app on your mobile device is almost as easy. Make sure that your mobile device is connected to your computer, then click the Start Debugging button (it looks like a “play” button) or press the F5 key. This window showing your deployment options will appear:
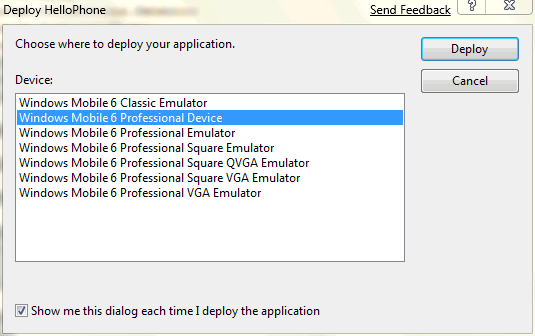
This time, select Windows Mobile 6 Professional Device in the menu and click Deploy.
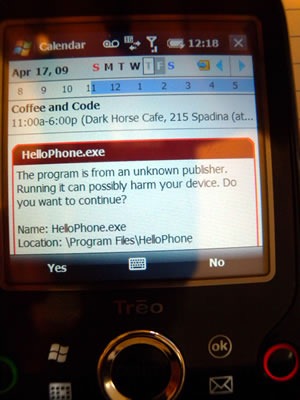
Keep an eye on your phone; you’ll get a couple of “should I install this?”-type messages – click Yes to all of them:
After that, you should see this:
You should have enough information to start experimenting with Windows Mobile 6 development. Have fun, try things, and if you have any questions, feel free to ask them in the comments!
13 replies on “Upwardly Mobile, Part 2: Your First Windows Mobile 6 Application”
Nice article, Joey!
I’ve got an older version of windows mobile (2003 I believe the “About” window on my Toshiba E830 PPC says), would I be able to use VS2008 to develop for it? I’m guessing I would need at least the SDK.
Danny V: I just took a look at my setup (Visual Studio Pro, Windows Mobile 6 SDKs included) that I get the following options for Target Platform when I create a new Smart Device project:
This page says that the operating system for the Toshiba E830 is “Windows Mobile PocketPC
(Windows Mobile 2003 Premium edition)” which would suggest that you should be able to develop for it if you select Pocket PC 2003 as your target when you create a new project.
Let me know how it works out!
Perfect! Once I get this stats exam out of the way, I’ll give it a shot!
Thanks for a great, clear and concise tutorial on this! You are awesome, Joey!
The thing that I am also trying to do is to use NetBeans to create and deploy a java app to my Palm Treo 700wx, too. Any thoughts on the matter?
Maybe if you are up to the challenge someday you could write a tutorial for a simple .jar/.jad deployment, too, eh? (Wink, wink, nudge, nudge ;-)
Sincerely, thanks for a great article. I am really looking forward to taking it for a spin, tomorrow!
Woof
Yeah, unfortunately I only have the express edition so that’s why I was using NetBeans *sigh*.
Oh well… Great article, none the less!
Woof
I am getting errors when trying to compile. VS has an issue with
 List _responses = new List {

            "Yes",

            "No",

            "Maybe",

            "Ask again later"

        };
I get this error:
Using the generic type ‘System.Collections.Generic.List’ requires ‘1’ type arguments C:\Users\Danny\Documents\Visual Studio 2008\Projects\HelloPhone\HelloPhone\Kitty.cs
I’ve even tried copying and pasting your code and I still get the error.
Danny V: D’oh! I copied the code straight from Visual Studio and pasting it straight into the HTML of my post, forgetting about what happens to things in angle brackets when you paste them in HTML — they effectively “disappear”.
The code should read:
I’ve corrected the code in the article; it should work now.
Perfect! Thanks!
Apart from some formatting errors (text and form too big for the VGA resolution for some reason) it works great!
I’m looking forward to your next article!
Oh and I fixed that issue too now. Just had to select the correct form factor in the Design editor :-)
[…] my previous article in Upwardly Mobile, the ongoing article series in which I look as various aspects of Windows Mobile […]
[…] a snippet from an earlier article of mine that shows you what you need in order to get started with Windows Mobile …. In order to build an application for Windows Mobile 6, you’ll need the following […]
where is the eightball.cs?
eightball is an variable that was created by Kitty object