
 On Monday, I posted the first of my fortnightly — that means “once every two weeks” — tutorials covering iOS development. If you’ve got some experience with an object-oriented programming language, and better still, any experience with an MVC application framework, these tutorials are for you!
The first tutorial covered a simple “Magic 8-Ball” app, where you’d tap a button, and it would display a randomly-selected answer to a “yes or no?” question. The program is pretty simple, and that’s a good thing — that way, it doesn’t get in the way of showing how to use Xcode, Objective-C, the various frameworks that make up Cocoa Touch, and so on.
While the main tutorials will appear every fortnight, from time to time, I’ll post supplementary articles in which I’ll expand on a topic covered in the tutorial or make an improvement to the app. This is one of those supplementary articles.
Defining the Answers
In the “8-ball” app created in the tutorial, the answers that the app can randomly choose from are defined in the model object’s constructor, shown below:
// DecisionMaker.m

// ... (other code here) ...

- (id)init
{
    self = [super init];
    answers = @[
                @"Yes.",
                @"No.",
                @"Sure, why not?",
                @"Ummm...maybe not.",
                @"I say \"Go for it!\"",
                @"I say \"Nuh-uh.\"",
                @"Mmmmmaybe.",
                @"Better not tell you now.",
                @"Why, yes!",
                @"The answer is \"NO!\"",
                @"Like I\'m going to tell you.",
                @"My cat\'s breath smells like cat food."
                ];
    return self;
}

// ... (other code here) ...
It works, but I get a little uncomfortable when hard-coding these sorts of values in this fashion. I’d much rather populate the array of answers by reading the contents of some kind of file or resource that isn’t part of the code. This approach typically makes the code more maintainable, as it makes the code less cluttered with data, and editing resource files is less likely to break something than editing code.
plists
plists, a.k.a. property lists, are XML files used in Mac OS and iOS to store data for things like initialization, settings, and configuration. Plists can hold the following types of scalar data:
- boolean
- data (binary data, that is)
- date/time
- number
- string
Within a plist, any piece of data can sit on its own, or be organized into these collections:
- array
- dictionary (a.k.a. hash)
Here’s a quick plist example. It has a single array that contains the 1977 members of the Superfriends:
<?xml version="1.0" encoding="UTF-8"?>
<!DOCTYPE plist PUBLIC "-//Apple//DTD PLIST 1.0//EN"
"http://www.apple.com/DTDs/PropertyList-1.0.dtd">
<plist version="1.0">
<array>
<string>Superman</string>
<string>Batman and Robin</string>
<string>Wonder Woman</string>
<string>Aquaman</string>
<string>Wonder Twins</string>
</array>
</plist>
Within Xcode, plists can be read and modified using a nice editor, which saves you the trouble of entering XML tags and lets you focus on the data instead.
In this exercise, we’re going to replace the 8-ball app’s hard-coded array of answers with a plist, and then initialize that array with the data in the plist.
Creating the plist of 8-Ball Answers
In the menu bar, select File → New → File…. You’ll see the following appear:
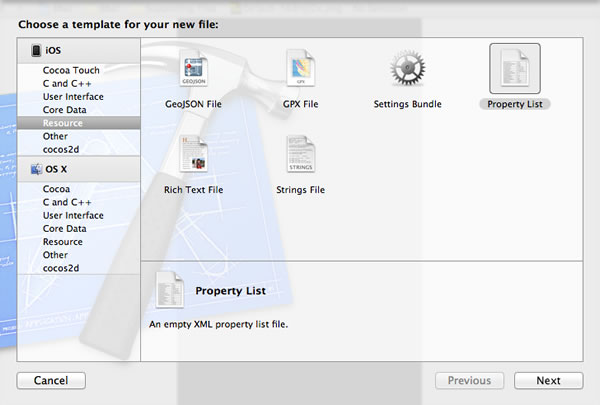
In the left sidebar under the iOS section, select Resource. Then, from the main view, select Property List, then click Next. You’ll be taken to this dialog box:
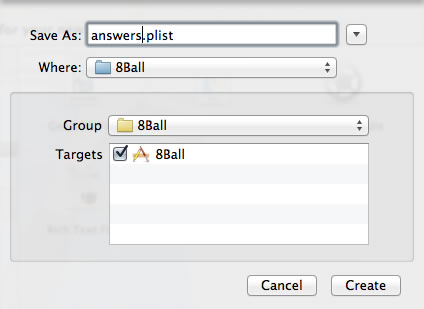
Give the file a name in the Save As: text box; I named my file answers.plist. Click Create to save the plist to your project.
Filling the answers Array with the plist
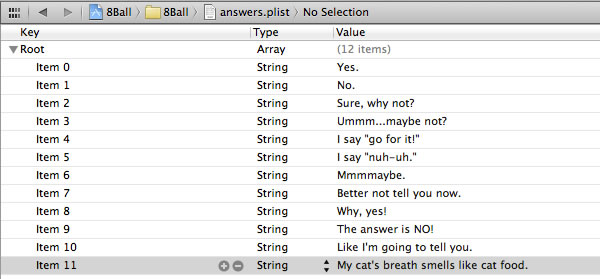
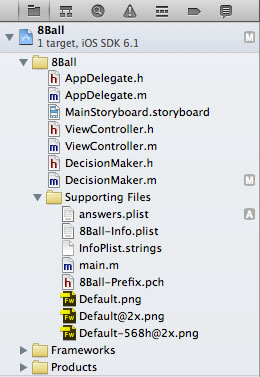
Your Project Navigator should look something like this:

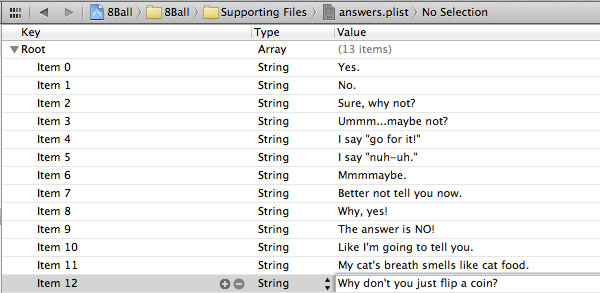
Select the plist in the Project Navigator. The plist editor will appear in Xcode’s main pane. Use it to enter the 8-ball answers into the plist as shown below:
Now that we’ve defined the plist, let’s change the constructor of the 8-Ball’s model, DecisionMaker, so that it reads the plist and feeds it into the answers array:
// DecisionMaker.m

- (id)init
{
    self = [super init];
    NSString *answersListPath = [[NSBundle mainBundle] pathForResource:@"answers"
                                                                ofType:@"plist"];
    answers = [NSArray arrayWithContentsOfFile:answersListPath];
    return self;
}
Let’s take a look at the new code line by line:
NSString *answersListPath = [[NSBundle mainBundle] pathForResource:@"answers"
                                                                ofType:@"plist"];
We need the list of answers, so we need to access answers.plist. It lives in the main bundle.
A bundle is a directory with a hierarchical structure that holds executable code and the resources used by that code. NSBundle is the class that handles bundles, and the mainBundle method returns the bundle that holds the app executable and its resources, which in the case of our 8-Ball app, includes answers.plist. The pathForResource:ofType: method, given the name of a resource and its type, returns the full pathname for that bundle.
Once we know the pathname for the bundle, we can construct the path to answers.plist, which is what the second line does.
answers = [NSArray arrayWithContentsOfFile:answersListPath];
arrayWithContentsOfFile is a handy method: given the path to a file containing a plist representation of an array, it will use the contents of a file to fill the array.
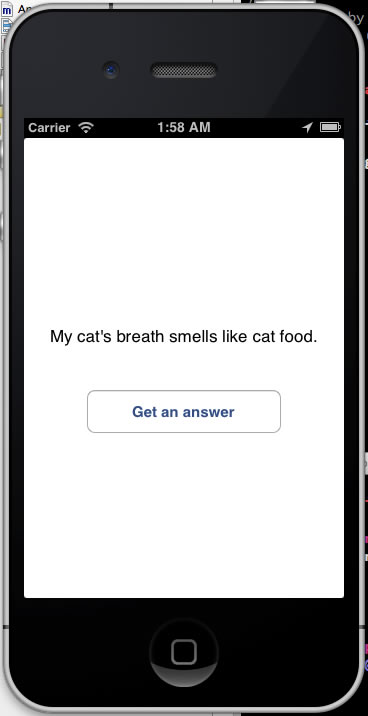
Run the App
The app is ready to go — fire it up, and it should look like this:
Reorganize the App…Just a Little
This is a small project, so it doesn’t have too many files. Even at this size, it’s good to keep its component files organized. Let’s put answers.plist into the Supporting Files folder, where the other resource files in the project live. Moving it is simply a matter of dragging and dropping in the Project Navigator, which should look something like this once you’ve moved answers.plist:
Run the app again. It still works, even though answers.plist is in now in the Supporting Files folder, the folders are just a convenience for you, the developer, to organize files into manageable groups.
You’ve now got an app that loads its gets it answers from a plist rather than via a hard-coded array. You can even add new answers…
Commit that Sucker!
At this point, it’s a good idea to commit this change to the repository. Call up File → Source Control → Commit… from the menu bar, enter an appropriate commit message (I used “Answers are now read from answers.plist instead of being hard-coded.”) and commit your changes. If you’re not in the habit of using source control, get into it now. It will save you a lot of pain.
5 replies on “iOS Fortnightly: Tweaking the 8-Ball App with a plist”
Another good one. Thank you.
And another nitpick: I’d use
NSString *answersListPath = [[NSBundle mainBundle] pathForResource:@”answers” ofType:@”plist”]
Saves a step, and the intent is clearer; why not let the bundle figure out the path for you. Bonus: it handles localization, so if you have differing French resources in a fr.lproj, it’ll figure that out.
Steve: Thanks for the heads-up, and keep those nitpicks coming! I’ll update the article later tonight.
[…] or build new projects using this one as a basis. Be sure to take a look at the follow-up article, Tweaking the 8-Ball App with a plist, where we make use of property lists, a.k.a. plists, a useful feature. This subtle change to the […]
I keep getting “EXC-ARITHMETIC 9code=EXC_I386_DIV, subcode=0x0” in DecisionMaker.m under NSString *)getRandomAnswer.
I understand its a division by 0 issue, but I dont know why Im getting it when Ive followed your code to the best I understand.
Any ideas?
@uroborus: I ran into what I believe was the same problems as you’re describing. Solved it by opening the answers.plist in XCode5 and changing the list type from “Dictionary” to “Array”.