About 150 airports in the U.S. have TSA PreCheck, an expedited security line for pre-screened travellers. If you fly often, you’ll find it very convenient as the line’s usually short, and you can forego having to remove your shoes, jacket, and belt, as well as having to separate your laptop and “3-1-1 liquids” from the rest of your carry-on luggage. There is a price to be paid for this — a registration fee, along with providing the U.S. Customs and Border Protection agency enough info to do a background check on you, and there’s an interview as well. If you’re an American or Canadian with a NEXUS card, you’re already in the TSA PreCheck program.
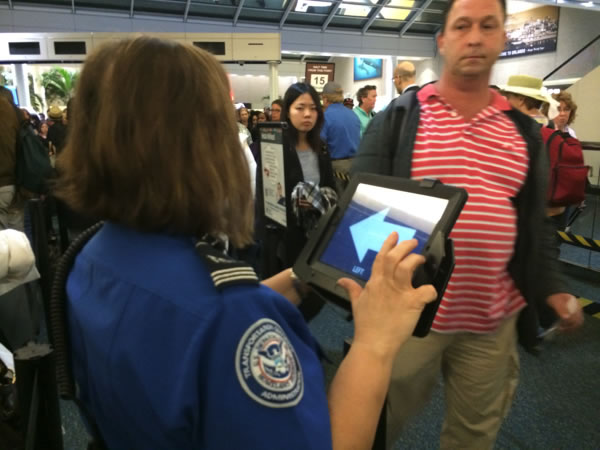
Even the pre-screened people going through TSA PreCheck get some additional random screening every now and again. The TSA PreCheck line often has two lanes, one on the left, one on the right, and they pick people for additional security screenings from one of them. In order to keep people from trying to guess which line that is, the TSA commissioned the development of a “randomizer”, which is an iPad app that randomly determines which line you should use.
The video below shows the randomizer in action:
The app would make a good “iPad programming 101” assignment; a newbie developer should be able to complete it in a day, and someone with even a couple of months’ of experience should be able to complete it in an hour.
Developer Kevin Burke wondered how much the TSA paid to have the app developed. As a government agency, they’d have put out an RFP to companies that do contracts for government work, and none of them come cheap. He filed a Freedom of Information Act request, and mirabile dictu, he got some answers in the form of two documents:
- A letter explaining that some of the information they provided had to be redacted, and
- a contract dated September 30, 2013 between the TSA and the development contractor, IBM.
Here’s the most eye-catching part of the contract:
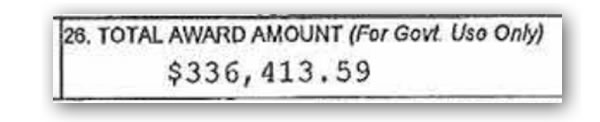
Burke posted his findings online, and Pratheek Rabala, who does interactive graphics for TIME, pointed out that not only the information was readily available to the public, but that the payment shown above was just one in a series of payments totalling $1.4 million.
It turns out that the $1.4 million dollars covers the cost of a larger project, which includes other mobile applications, software to support an “enhanced staffing model” for the TSA, and all the project management that such an undertaking requires.
With that in mind, it’s time to fire up Xcode and start on the path to that sweet, sweet government contract money. Why should IBM have all the fun?
If you’re new to iOS programming or even programming in general, the TSA Randomizer app is a good starter project. You might want to try writing it on your own before following the steps below. Here’s a hint that should help — you’ll need to know how to do these things in order to write the app:
- How to generate a random number
- How to display an image on the screen
- How to change the contents of an image on the screen
- How to know when the user has tapped on the screen
How to write the app
![]()
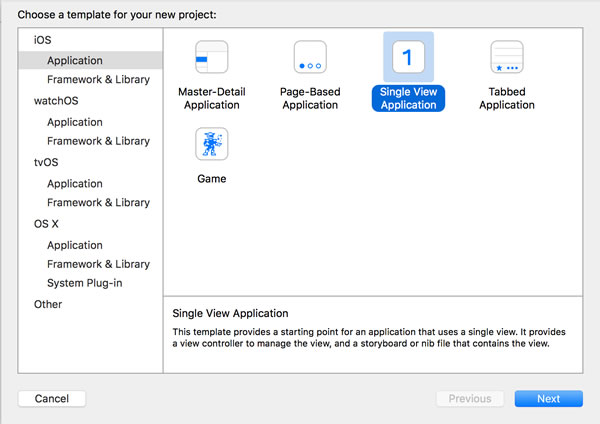
Open up Xcode and do the File → New → Project… dance. As you may have already suspected, you’re going to specify that this is a Single View Application:
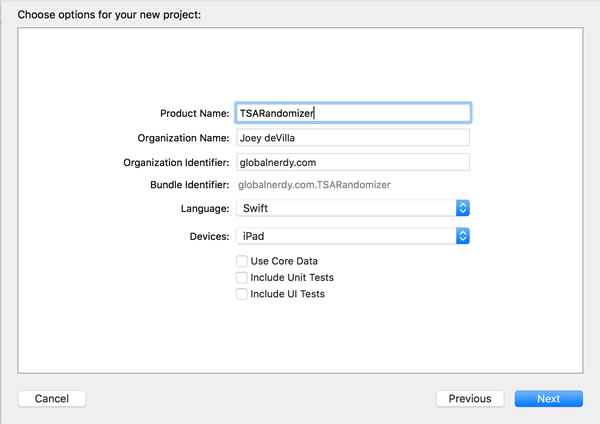
Give the project a name (I called mine TSARandomizer), and select iPad from the Devices drop-down menu:
Once you’ve chosen a place to save the project and it’s been written to disk, you’ll be taken to the General page for your project. Under Device Orientation, make sure that Portrait is checked and that all other orientations are unchecked:
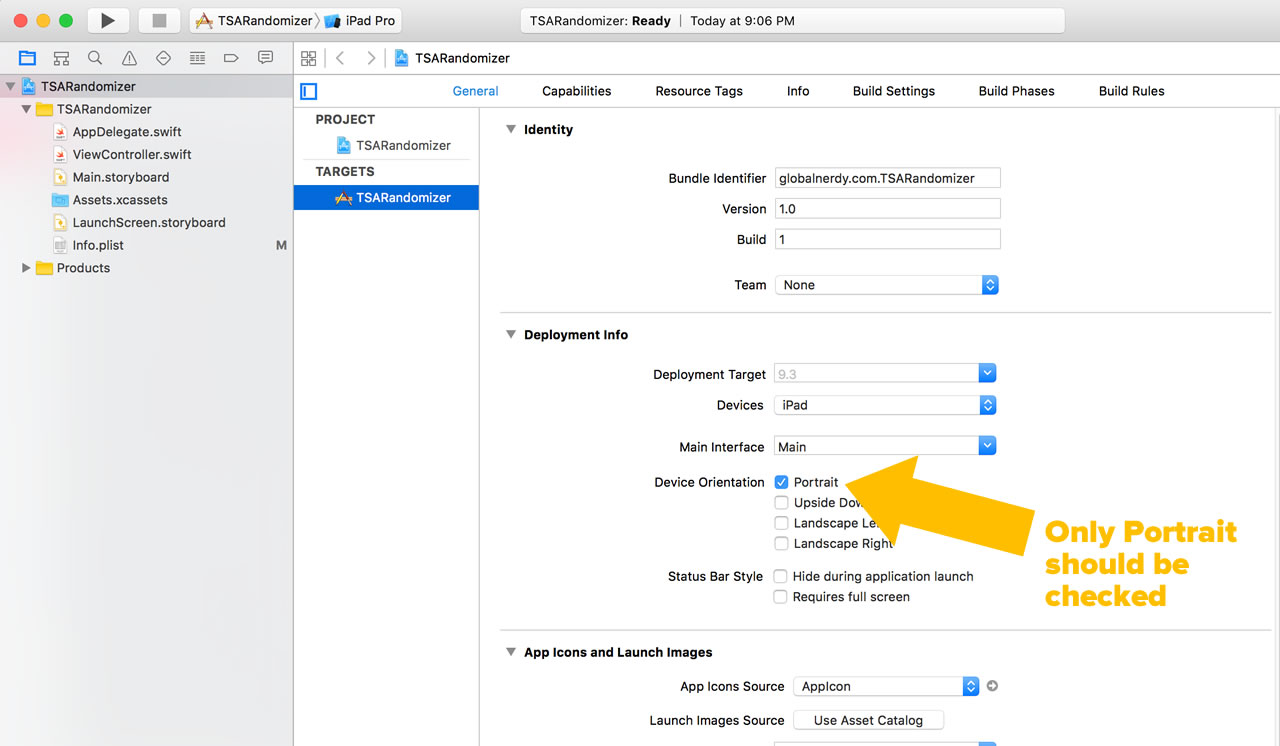
Click the screenshot to see it at full size.
Edit ViewController.swift and change its contents to the following:
import UIKit

class ViewController: UIViewController {

  @IBOutlet weak var arrowImageView: UIImageView!

  let leftArrowImage = UIImage(named: "arrow-left")!
  let rightArrowImage = UIImage(named: "arrow-right")!

  override func viewDidLoad() {
    super.viewDidLoad()

    let tapGestureRecognizer = UITapGestureRecognizer(target:self, action:#selector(arrowImageViewTapped))
    arrowImageView.userInteractionEnabled = true
    arrowImageView.addGestureRecognizer(tapGestureRecognizer)

    displayRandomizedArrow()
  }

  override func didReceiveMemoryWarning() {
    super.didReceiveMemoryWarning()
    // Dispose of any resources that can be recreated.
  }

  func arrowImageViewTapped() {
    displayRandomizedArrow()
  }

  func displayRandomizedArrow() {
    if arc4random_uniform(10) < 5 {
      arrowImageView.image = leftArrowImage
    }
    else {
      arrowImageView.image = rightArrowImage
    }
  }

}
This is all the logic needed to make the app work. The displayRandomizedArrow method is currently set so that 50% of the time, the left arrow is selected, and the other 50% of the time, the right arrow appears. You can adjust this to taste.
Time to build what little user interface there is. Open Main.storyboard and put an Image View control on the view. This will contain the arrows. We want it to fill up the screen, so set its constraints so that all its sides are 20 pixels from the view:
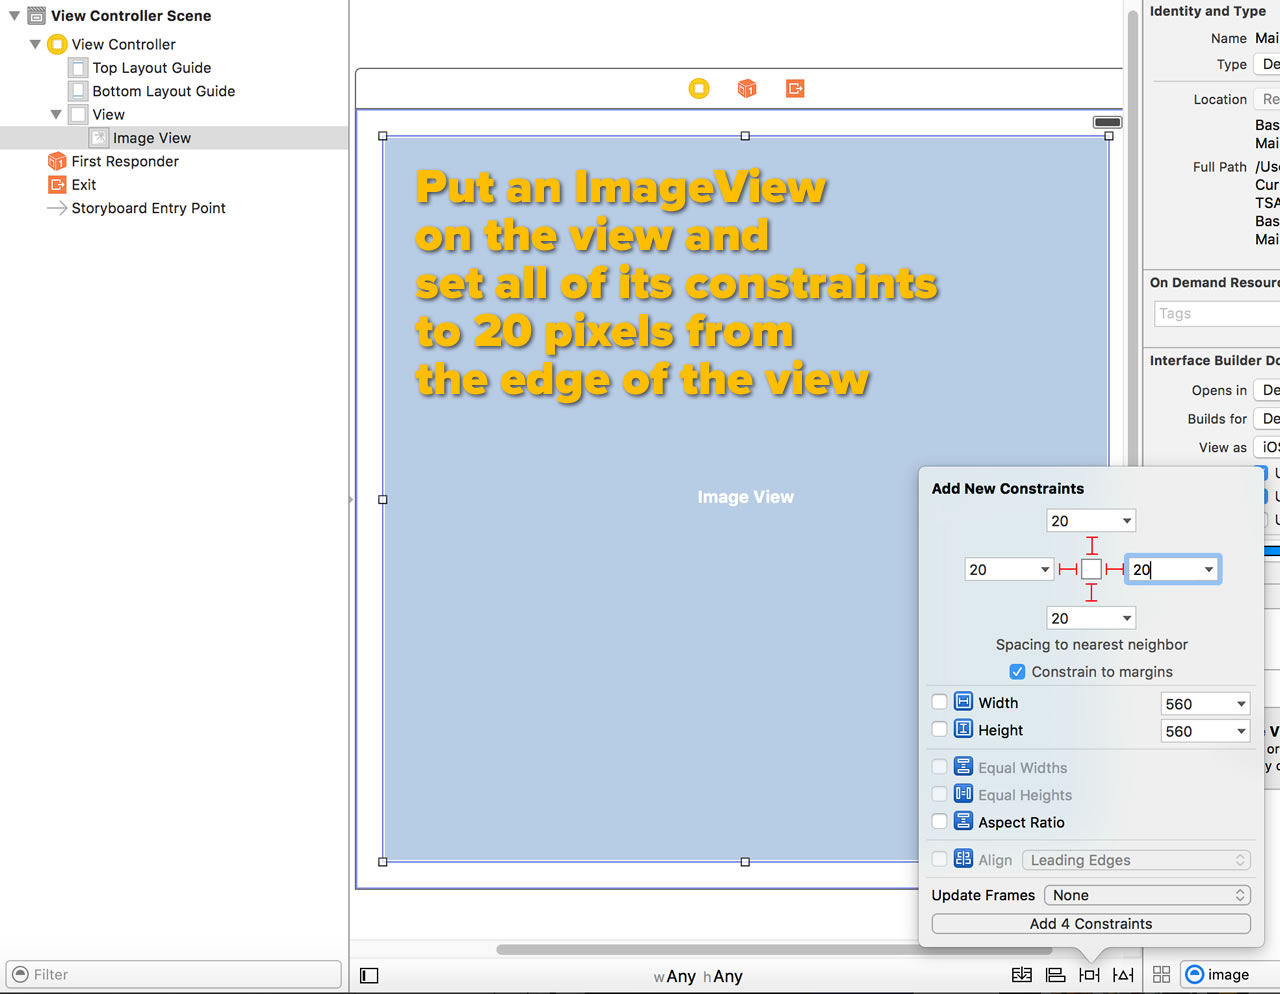
Click the screenshot to see it at full size.
In our code, we have an outlet variable named arrowImageView. We need to connect it to the image view we just added. Select the view and open the Connections Inspector. Drag from the circle to the right of New Referencing Outlet to the View Controller icon above the view, as shown in the screenshot below.
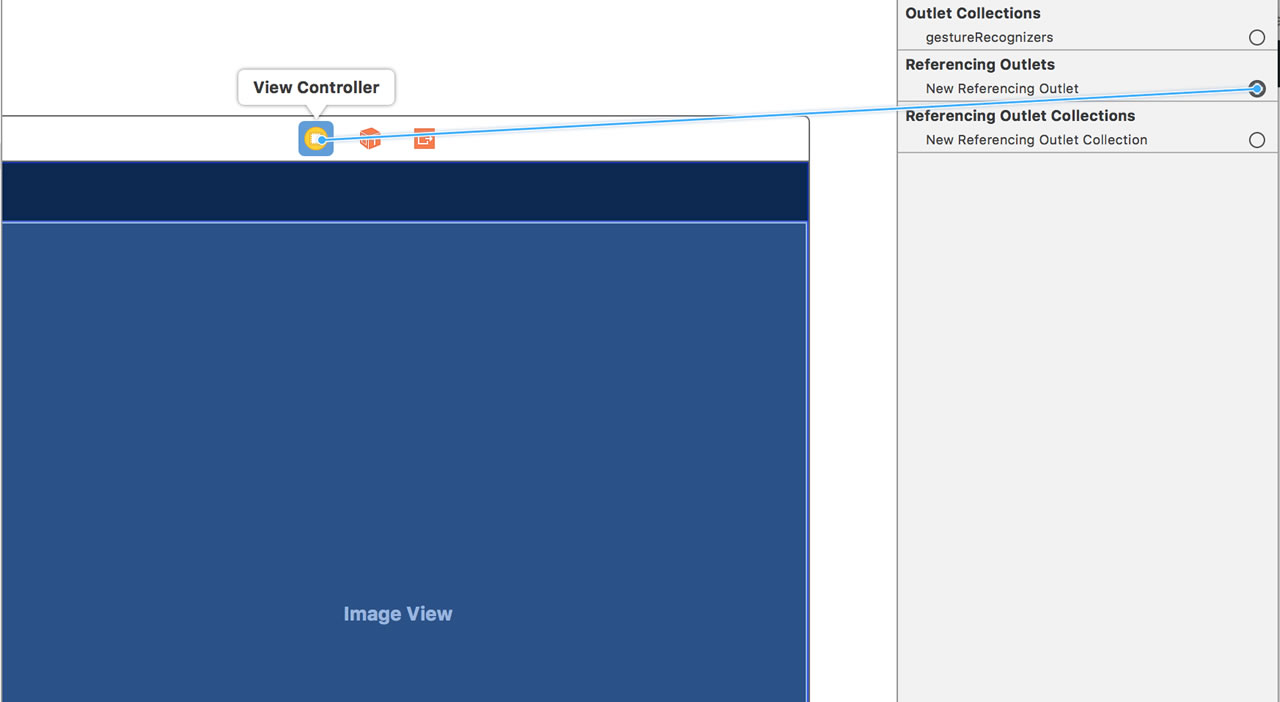
Click the screenshot to see it at full size.
Select arrowImageView from the pop-up menu that appears.
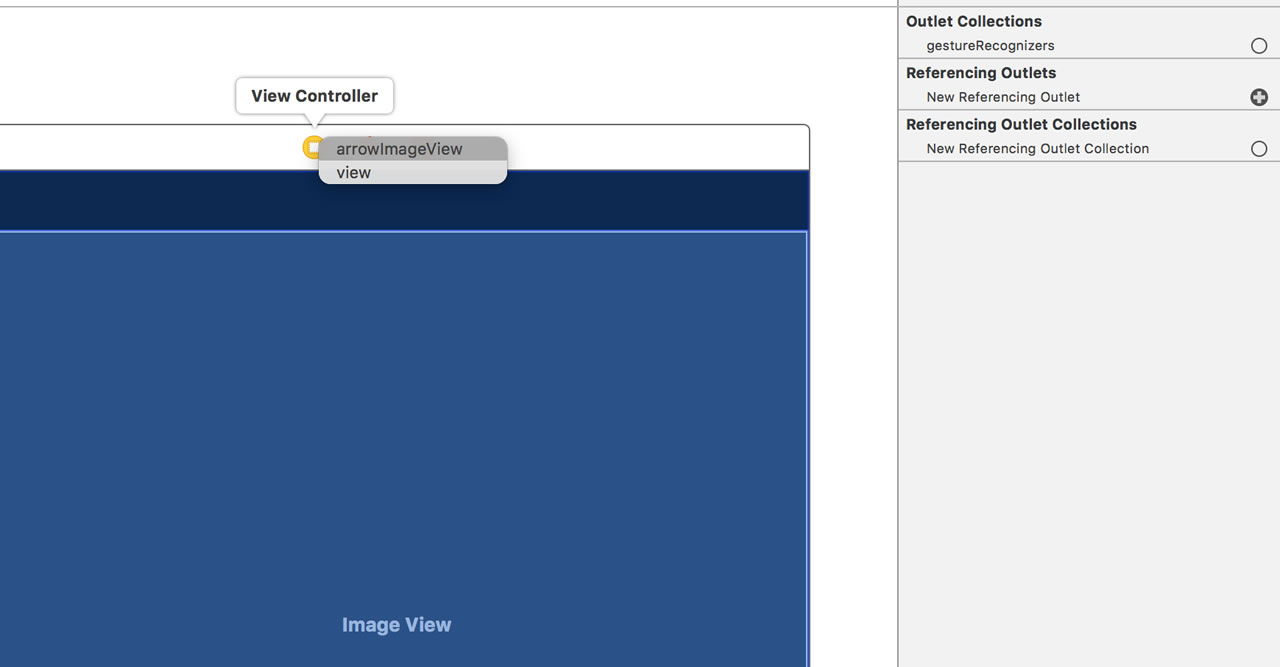
Click the screenshot to see it at full size.
Finally, we need to add the arrow images to our app: arrow-left.png and arrow-right.png. Open Assets.xcassets and drag the left-arrow and right-arrow images into it.
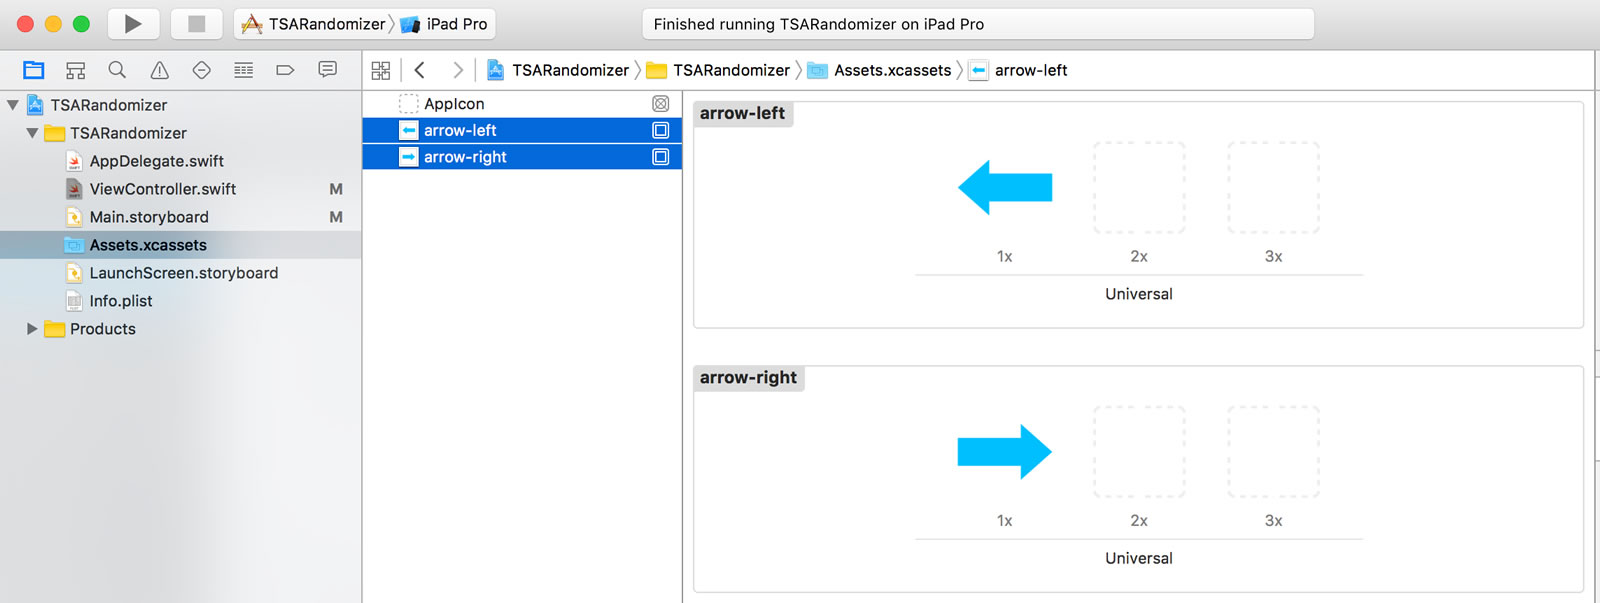
Click the screenshot to see it at full size.
Fire it up in the simulator or deploy it to your iPad, and start bidding on some TSA RFP’s — you’ve got a functioning TSA randomizer app!
I’ve zipped up my project and made it available for download (it’s a mere 300KB zipped). Enjoy!
One reply on “How to write your own TSA security line randomizer app (and maybe make sweet government contract money)”
TSA has a program called Pre-Check. Essentially, frequent travelers that pay extra to get a more extensive background check can avoid some of the more annoying things about TSA security, like removing shoes, belts, laptops, and liquids. However, to maintain security, they do random extra searches. To ensure they are random and not on the basis profiling, the TSA wanted an app that would randomly choose. It takes the form of an arrow that points left or right, one the quick line, one the line with an extra search.