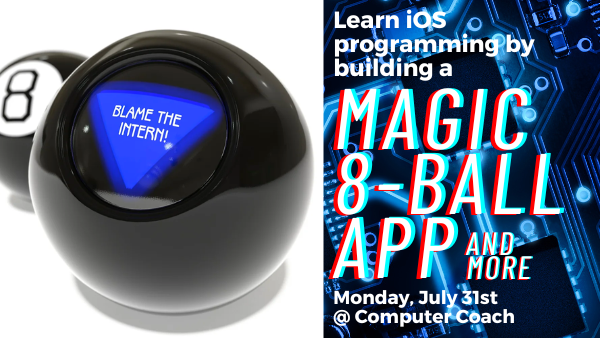
This Monday — Monday, July 31st — I’ll hold another Tampa Bay Apple Coding Meetup at Computer Coach, where we’ll continue our exploration of building iOS apps by building an app that mimics the classic toy, the Magic 8-Ball.

Join us at Computer Coach on Monday, July 31st at 6:00 p.m. and learn how to build simple but interesting iOS apps! Register here — it’s free, and we’ll provide food as well!
A little practice exercise before the meetup
Don’t worry, this isn’t mandatory, but if you’re new to Xcode (or new-ish), you might want to try out this simple app exercise beforehand, just to get comfortable with the tools.
In order to do the exercise below — as well as the exercises at the meetup — you’ll need Xcode, the development tool for building applications for all things Apple. The simplest way to get it is to the Mac App Store. Follow this link, and you’ll be on your way to downloading and installing Xcode.
Once you’ve installed Xcode, launch it and follow the steps below. The app you’ll make is simple, but the exercise will get you used to working with the tools.
Create a new project
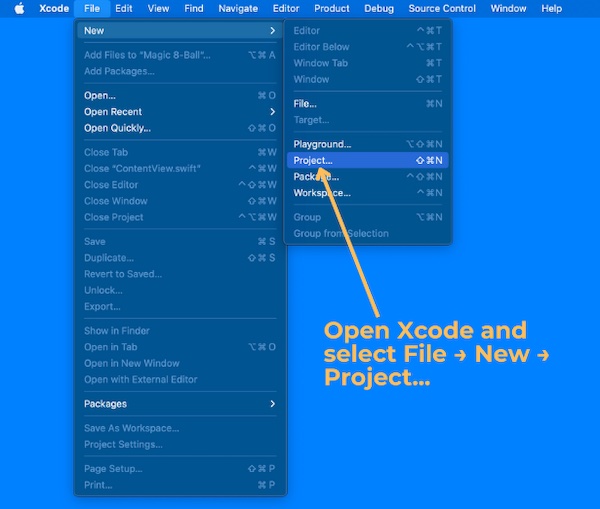
Open Xcode. From the File menu, select New, then Project.
You’ll see this window pop up:
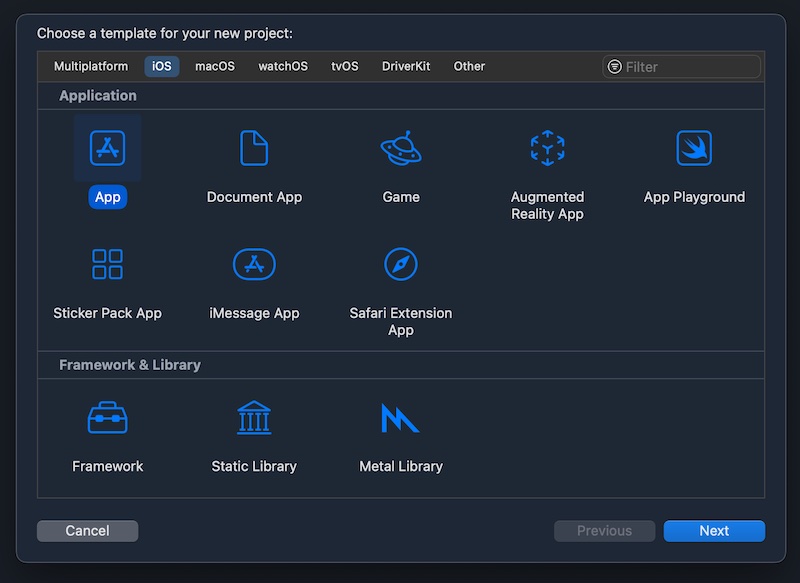
This window lists templates for the different kinds of projects that you can build using Xcode. Templates are starting points for projects that contain just enough code to actually work, but they do little more than display a blank (or mostly blank) screen.
Make sure that the selected template category near the top of the window is iOS and that App is the selected template. Then click the Next button.
The contents of the window will change to this:
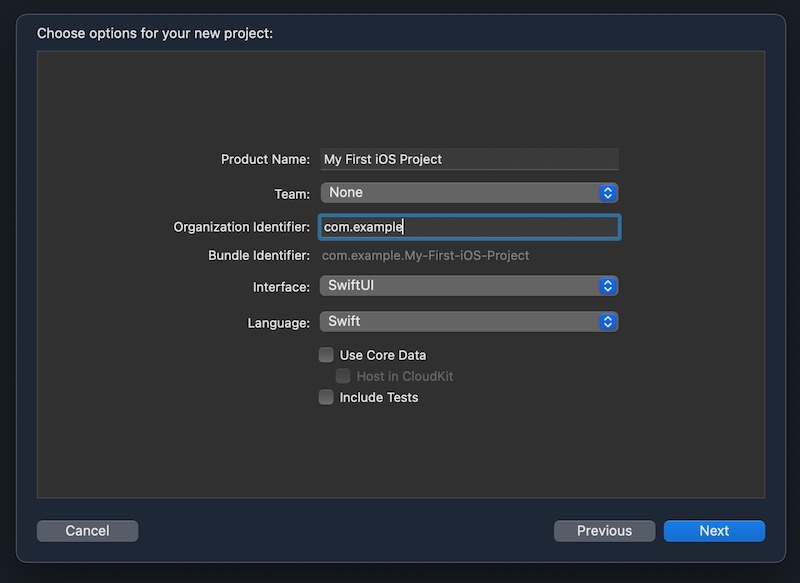
This window lets you choose options for the project you’re creating. For simplicity’s sake, we’ll take the approach you might take if you’d just installed Xcode and don’t have an Apple Developer account. Here’s how you should fill out this screen:
- Product Name:
My First iOS Project - Team: Select
None. - Organization Identifier: Use
com.example(or, if you own your own domain, use it, but in reverse — for example, if you own the domainabcde.net, you’d enternet.abcdeinto this field). - Interface: Go with the default
SwiftUI. - Language: Go with the default
Swift. - Leave the Use Core Data and Include Tests checkboxes unchecked.
Click the Next button, and you’ll see this:
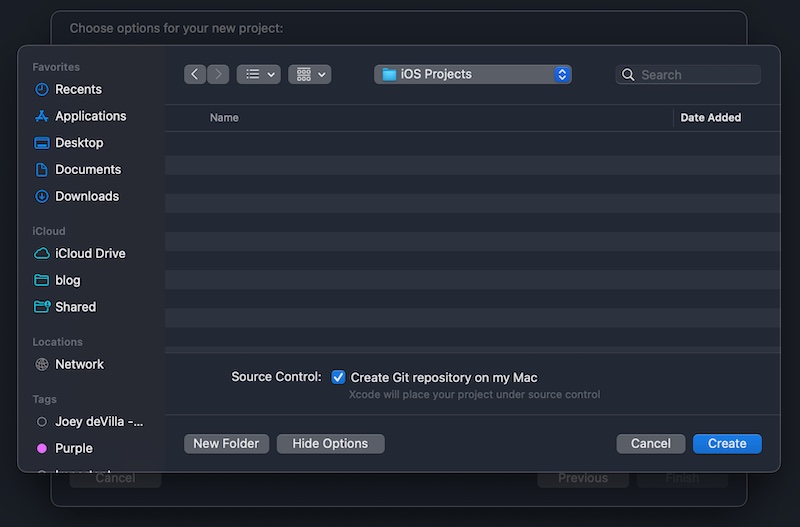
Select a place to save the project, then click Create.
Xcode now has all the information it needs to build a basic iOS app project. It will build this project and then present the full Xcode interface, as shown below:
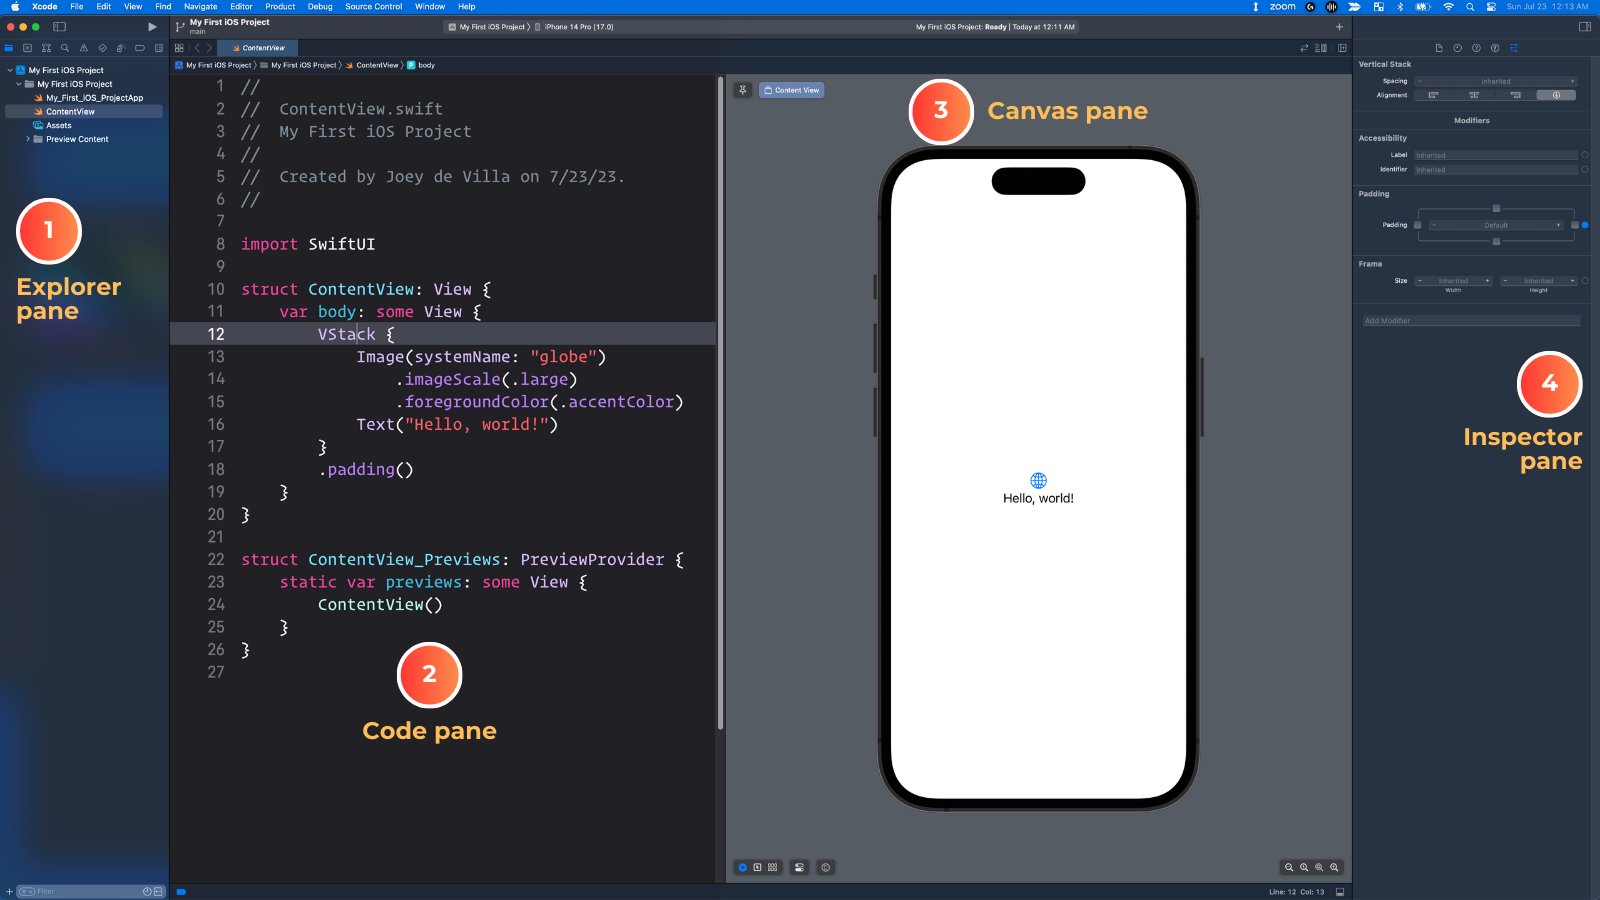
The Xcode window has four general areas, which I’ve numbered in the screenshot above:
- The Explorer pane. The leftmost pane of the Xcode window contains a set of Explorers, which is a set of menus that let you look at different aspects of your project. The one you’ll probably use most is the Project Explorer, which lists the project’s files and allows you to select the file you want to view or edit.
- The Code pane. This is where you’ll read, enter, and edit code. You’ll use this pane a lot.
- The Canvas pane. This pane lets you preview what the user interface will look like in real time, as you enter code that defines the it.
- The Inspector pane. The rightmost pane lets you get details about any code or user interface element that you currently have selected.
As I said earlier, when you create a new Xcode project, Xcode builds in enough code for a very bare-bones application.
Run the project
Take a look at that application in action — click the Run button (located near the top of the screen; it looks like a ▶️ or “play” button)…
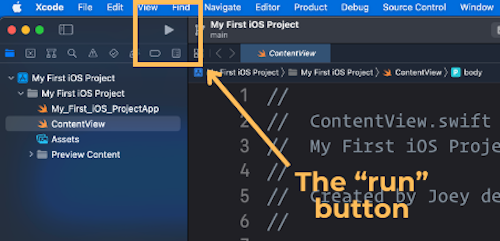
…and Xcode will launch the iOS simulator, which imitates an iOS device. Give it a few seconds to launch, and then you’ll see this:
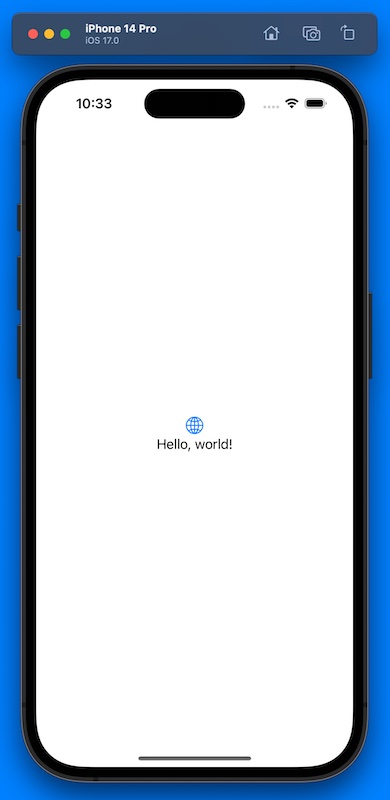
The app doesn’t do anything other than display a 🌐 icon and the text “Hello, world!” In this exercise, we’ll take this starter app and make it do a little more, adding user interface elements along the way.
The ContentView file
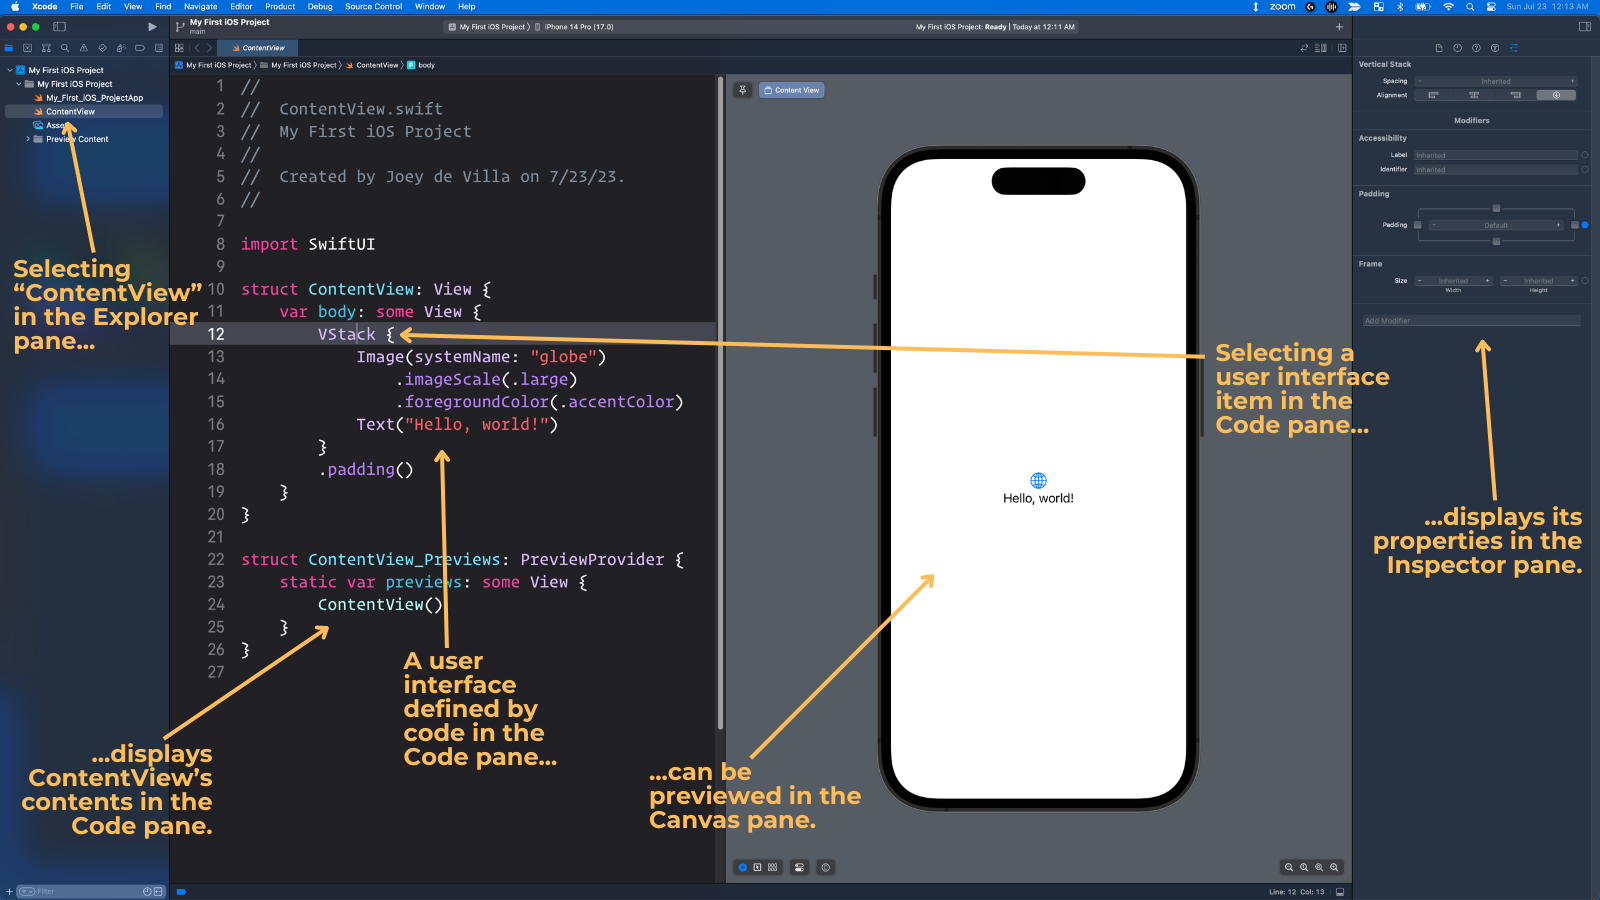
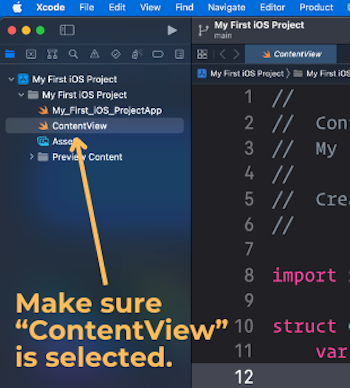
Let’s take a closer look at the code. First, look at the Explorer pane and make sure that ContentView is selected:
ContentView is a file, and the code inside it defines the app’s one and only screen looks and works.
Here’s the code inside ContentView:
struct ContentView: View {
    var body: some View {
        VStack {
            Image(systemName: "globe")
                .imageScale(.large)
                .foregroundColor(.accentColor)
            Text("Hello, world!")
        }
        .padding()
    }
}

struct ContentView_Previews: PreviewProvider {
    static var previews: some View {
        ContentView()
    }
}
Structs
You’ll see that the code is divided into two blocks, each beginning with a keyword: struct, which is short for “structure.” If you’re familiar with object-oriented programming languages like Python or JavaScript, you should think of Swift’s structs as being like classes: they’re “blueprints” for objects, and can have properties and methods.
There are two structs in the ContentView file:
ContentView, which defines what appears on the screen when you run the app.ContentView_Previews, which displaysContentViewin the Canvas pane, allows you to see whatContentViewwill look like while you’re coding the app.
For now, let’s just look at ContentView.
The ContentView struct
When you create a new iOS app project in Xcode, Xcode creates a “starter” project for an app with a single screen. Xcode gives this screen a default name: ContentView.
The name ContentView is arbitrary. You could rename it MainScreen or HelloWorldDisplay, and it would still work. Many developers change the name of ContentView immediately after they start a new iOS app project, but for this exercise, we’ll just stick with the name.
Let’s take a look at the first line of ContentView:
struct ContentView: View {- The
struct ContentViewpart of the line declaresContentViewas astruct. - The
: Viewpart says thatContentViewadopts or conforms to theViewprotocol:- If you’ve programmed in C#, Go, Java, PHP, or Python 3.8 and later, think of a Swift protocol as being similar to an interface.
- If you’re not familiar with interfaces but have programmed in an object-oriented programming language like JavaScript or Python prior to version 3.8, think of protocols as a loose form of inheritance.
You can think of the line struct ContentView: View { as saying “This is a struct named ContentView, which includes the properties and methods of a View object.”
Now let’s look at what’s inside ContentView:
var body: some View {
    VStack {
        Image(systemName: "globe")
            .imageScale(.large)
            .foregroundColor(.accentColor)
        Text("Welcome to the app!")
    }
    .padding()
}
Pay particular attention to that first line:
var body: some View {ContentView contains just one thing: a variable. That’s it!
- The
var bodypart of the line declaresbodyas a variable. - The
: some Viewpart says thatbodycontains some kind of object that adopts theViewprotocol.
You can think of the line var body: some View { as saying “This is a var named body, which contains some kind of View object.”
The View protocol
The term “view” has a specific meaning in non-web GUI programming. It’s used to refer to any of the following:
- A user interface element such as static text, a text field, a button, a switch, an image, and so on, or
- A container for other user interface elements.
Here’s the code for ContentView and the resulting screen that shows the connections between the code and the views it creates:
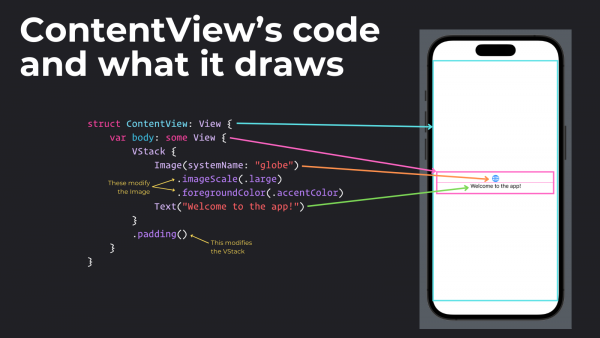
ContentViewis a plainView. It functions as the app’s one and only screen, and it contains that screen’s views.- Inside the
ContentViewis aVStack, which is a kind of View whose name is short for “vertical stack.” LikeContentView,VStackis a view that contains other views, but the views it contains are arranged in…you guessed it: a vertical stack or column. - Inside the
VStackare two other views whose purposes you can get from their names:Image: This view displays images.- Text: This view displays static text — the kind that the user can’t edit.
All of these things listed above adopt the View protocol, which means:
- They are either a user interface element or a container for user interface elements, and
- They include the properties and methods of a
Viewobject.
Let’s talk about that second point: that in order to adopt the View protocol (or more loosely, to be a kind of View), a struct includes the properties and methods of a View object.
There’s only one required property an object needs to adopt the View protocol: it just needs to have a variable named body, whose type is some View. body is a property that contains some kind of user interface element or a container for user interface elements.
In the case of ContentView, which adopts the View protocol, its body property contains a VStack. That VStack contains an Image view and a Text view.
The Text view
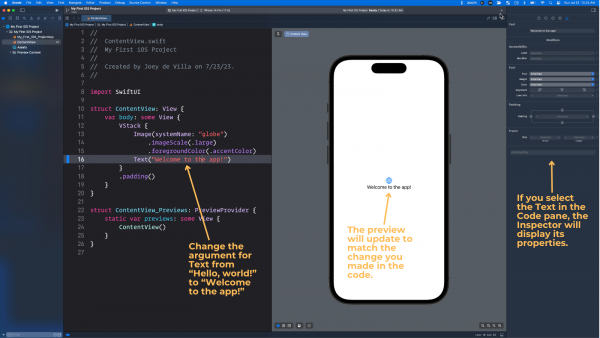
Let’s play around with the Text view first. Find the line inside ContentView that looks like this:
Text("Hello, world!")And change it to this:
Text("Welcome to the app!")You should see the preview in the Canvas pane update to match the change you made:
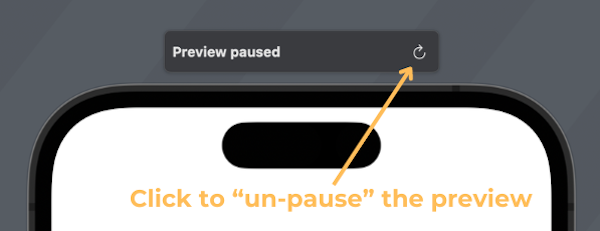
If for some reason the preview didn’t update, look for the text “Preview paused” at the top of the preview and click the “refresh” icon to “un-pause” it:
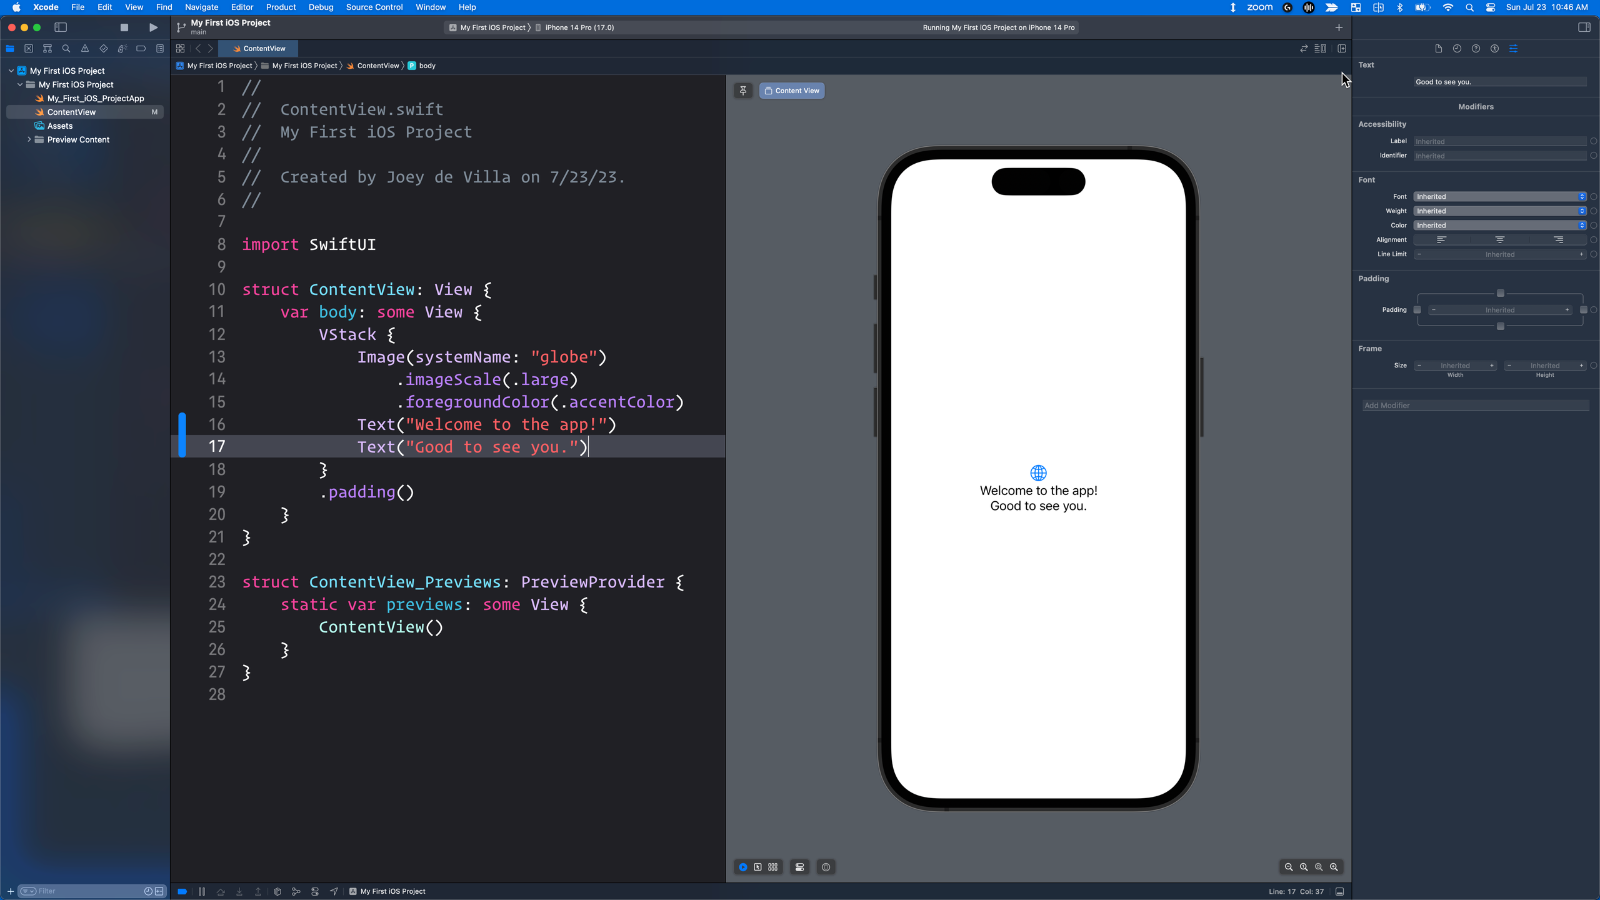
Add a new line after the Text:
Text("Good to see you.")This should add a new Text view to ContentView, and Xcode’s preview should update to reflect the change:
Run the app. The preview will pause and the Simulator will start up and launch the app, which will look like this:
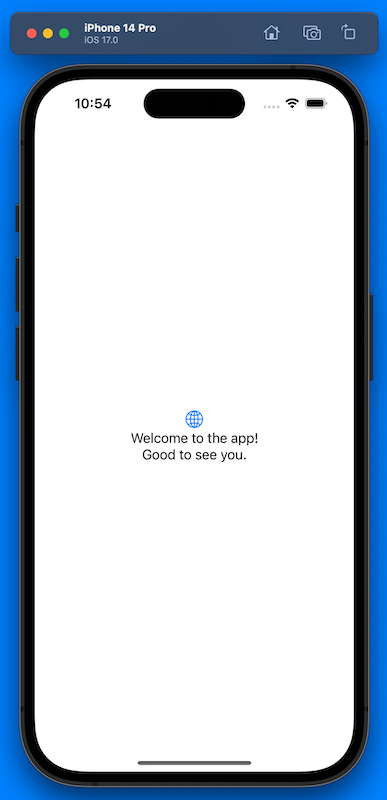
Notice that running the app in the Simulator pauses the preview. Running the app in the Simulator or making big changes to the code causes the preview to pause, but you can always restart it by either:
- Clicking on the “refresh” icon at the top of the preview, or
- Using the keyboard shortcut command + option + p
Text view modifiers
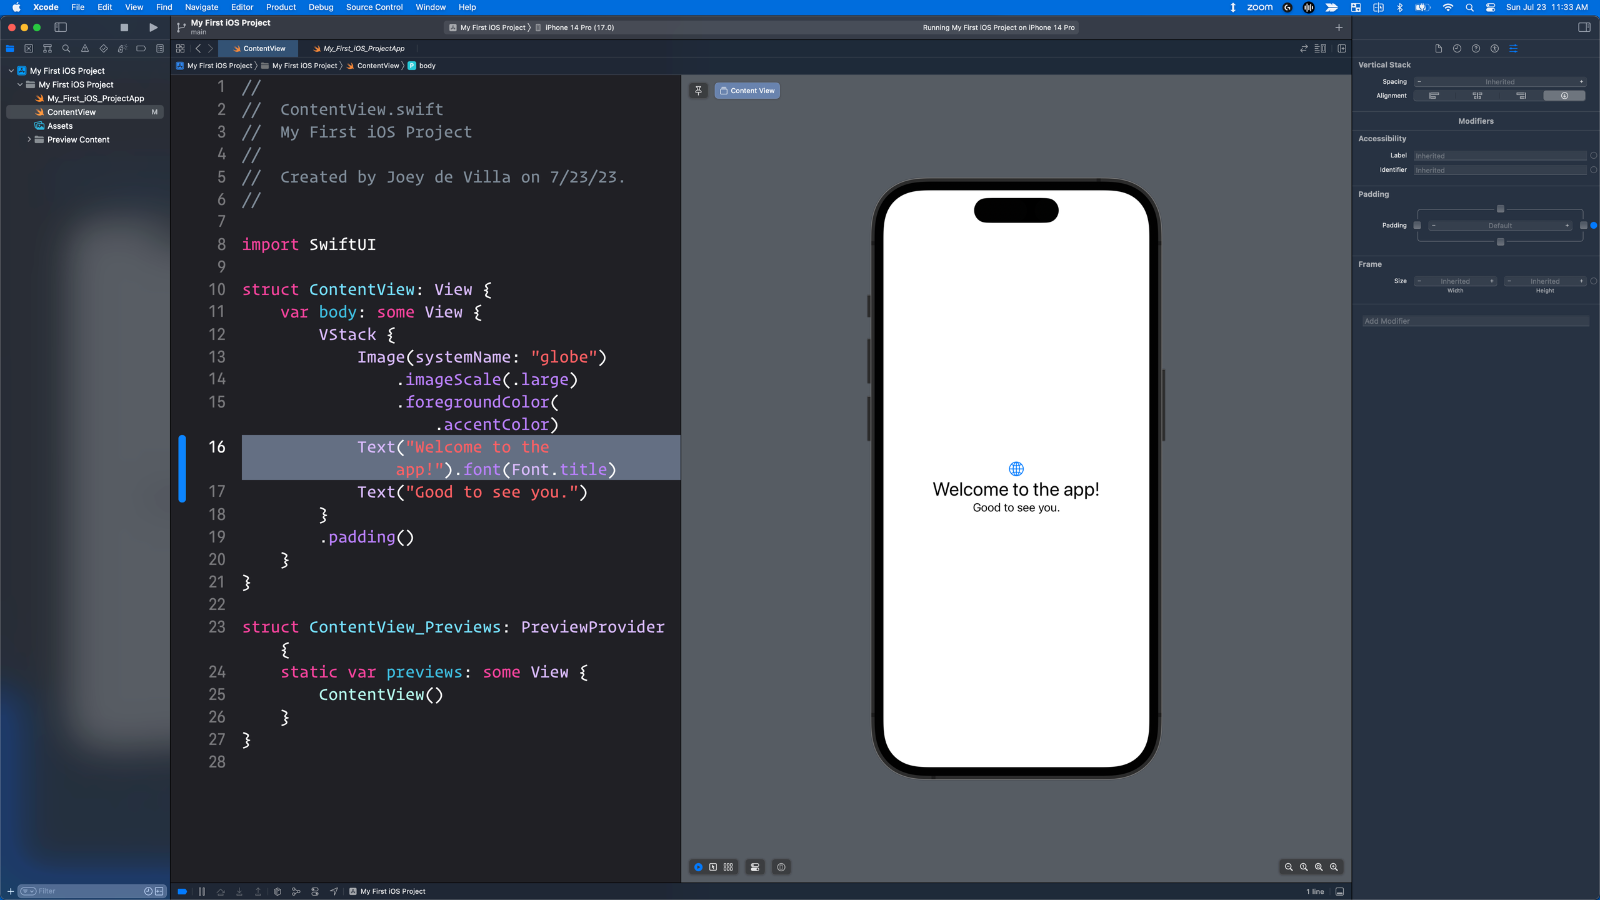
Let’s make the “Welcome to the app!” message on the screen larger — it should be the size of a title. Do this by changing the line that creates that Text view to the following:
Text("Welcome to the app!").font(Font.title)Run the app or restart the preview — it should look like this:
I’ll cover more in Monday’s session, but feel free to experiment!