Categories
Uncategorized

Telecom history lessons: RIP Joseph Lechleider, and HP’s history of telecom in 3 minutes

RIP Joseph Lechleider, who came up with the idea behind ADSL

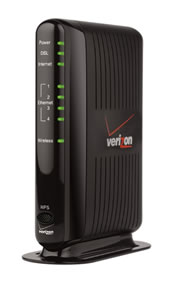
If you have one of these — often called a “DSL modem”, but it’s more likely to be a DSL router — in your home or office…

dsl modem

…then you have this engineer to thank:

joseph lechleider

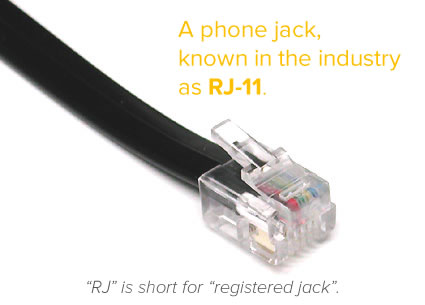
This is Joseph Lechleider, who used to be an engineer at Bellcore, Bell Telephone’s research wing formed after it was broken up into the “Baby Bells”. In the late 1980s, he came up with a clever solution to a problem that came with trying to send high-speed electronic signals over ordinary copper wire and into this familiar connection:

rj-11

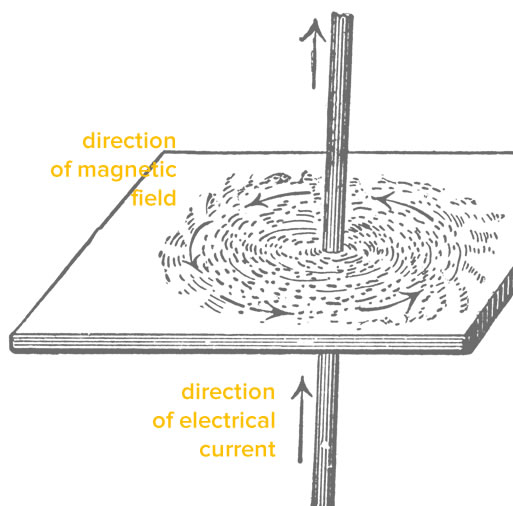
Electricity and magnetism are bound together in interesting ways, and this connection turns up when you send a current through a wire. The current induces a magnetic field around the wire:

current and magnetic field in a wire

The tight connection between electricity and magnetism means that the reverse is true as well: put a wire into a magnetic field, and you’ll induce a current in it.

This behavior made it difficult to send high-speed signals through copper wires, which to this day often make up the “last mile” between your wireline carrier and you. The magnetic fields induced by sending signals at very high speeds create a lot of interference, which mangles the data being carried, which slows down the rate at which you receive actual usable data.

Lechleider’s solution to this problem was both simple and clever: why not make it so that downloading (getting information from the network to you) was faster than uploading (sending information from you to the network)? This arrangement reduced the interference between the upload and download channels and offered more than twice the bandwidth that transmitting and receiving at the same rate did. His idea got incorporated into what we now know as ADSL (the “A” is for asymmetric), a key part of DSL service

The “receive data much faster than you transmit it” solution is an engineer’s dream: it’s clever, and it’s cheap, because it doesn’t require much change to existing infrastructure. It meant that phone companies didn’t have to spend a lot of money to provide broadband service, and it’s how DSL became popular. As recently as the end of 2012, it was the primary means of access for almost 60% of the world’s wireline broadband subscribers.

Lechleider died at home in Philadelphia on April 18th from cancer of the esophagus. We didn’t want his contribution to telecommunications to go unnoticed.

For your work in changing wireline broadband — as well as the way we live, work, and play — we thank you, Mr. Lechleider.

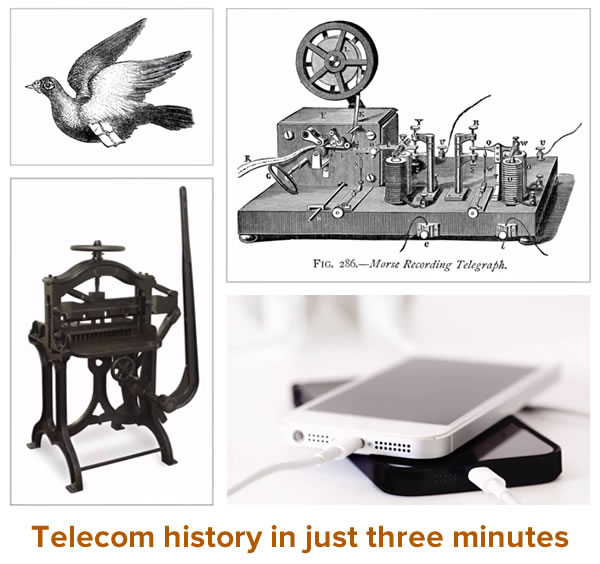
HP’s history of telecom in just three minutes

telecom history in just 3 minutes

this article also appears in the GSG blog

Categories
Uncategorized

iOS 8’s built-in virtual keyboards on the iPhone: A visual catalog

ios 8 keyboard

It’s been over two years since I published my visual catalog of iOS’ virtual keyboards on the iPhone, which covered iOS 6. At the time, it was the only place you could get a listing of the names of the iOS keyboards and see what they looked like. Even now, I think it’s still the only information source of its kind.

We’re now well into iOS 8’s run, and it’s likely that iOS 9 will be released sometime this year. Since there still isn’t a visual catalog of iOS 8’s built-in keyboards on the iPhone, and since I’m still of the “see a need, fill a need” ethos, I put one together. It starts with a table listing all the built-in keyboard types; you can click on the name to jump to pictures of all the views for the corresponding keyboard.

I hope you find it useful!

iOS 8’s built-in virtual keyboards

UIKeyboardType Based on Emoji entry? The official description, straight from Apple’s documentation
ASCIICapable Typewriter No Use a keyboard that displays standard ASCII characters.
DecimalPad Phone No Use a keyboard with numbers and a decimal point.
Default Typewriter Yes Use the default keyboard for the current input method.
EmailAddress Typewriter Yes Use a keyboard optimized for specifying email addresses. This type features the “@”, “.” and space characters prominently.
NamePhonePad Typewriter and phone Yes Use a keypad designed for entering a person’s name or phone number. This keyboard type does not support auto-capitalization.
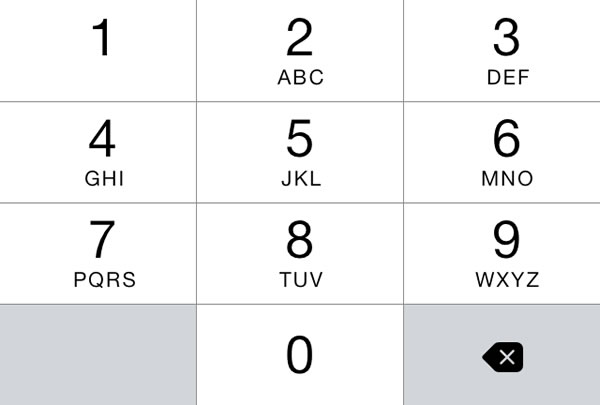
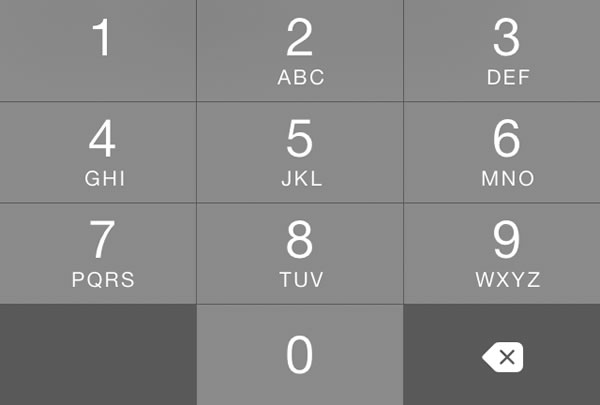
NumberPad Phone No Use a numeric keypad designed for PIN entry. This type features the numbers 0 through 9 prominently. This keyboard type does not support auto-capitalization.
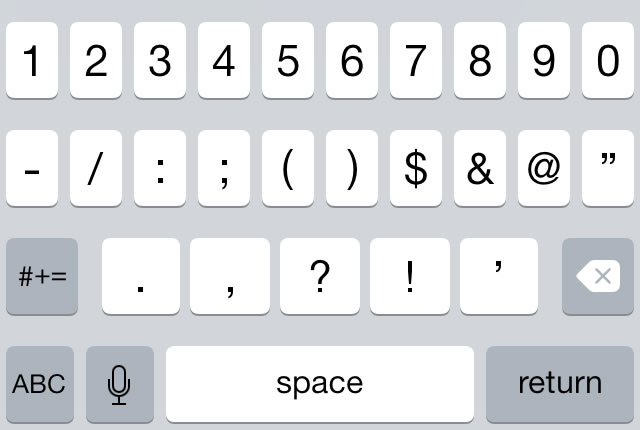
NumbersAndPunctuation Typewriter No Use the numbers and punctuation keyboard.
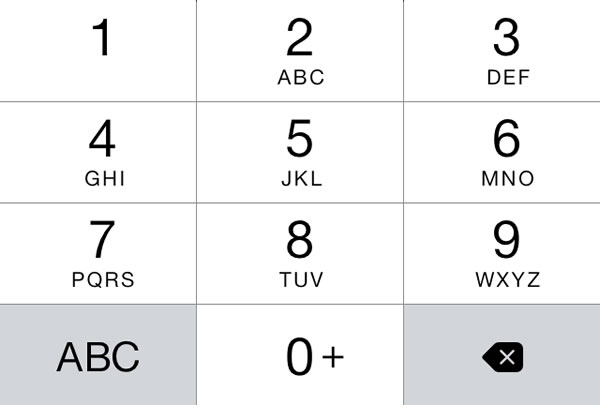
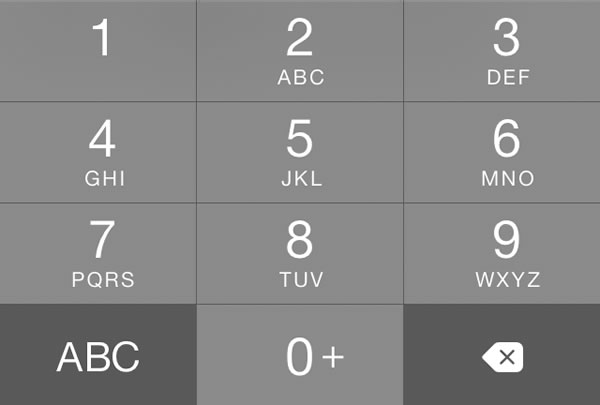
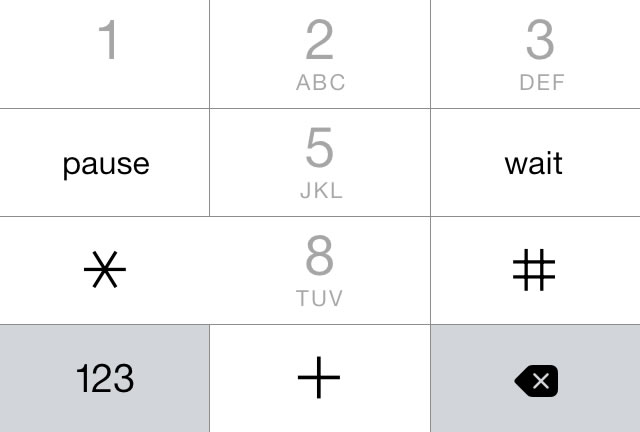
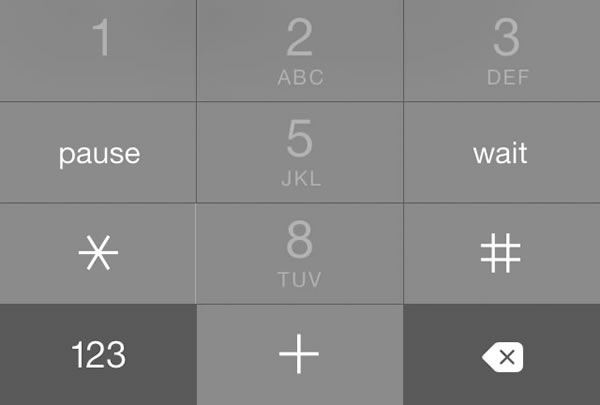
PhonePad Phone No Use a keypad designed for entering telephone numbers. This type features the numbers 0 through 9 and the “*” and “#” characters prominently. This keyboard type does not support auto-capitalization.
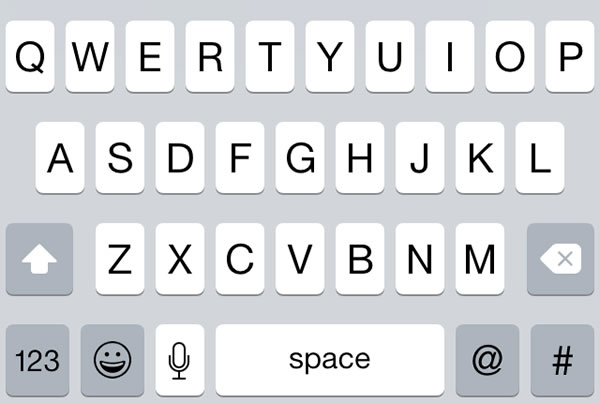
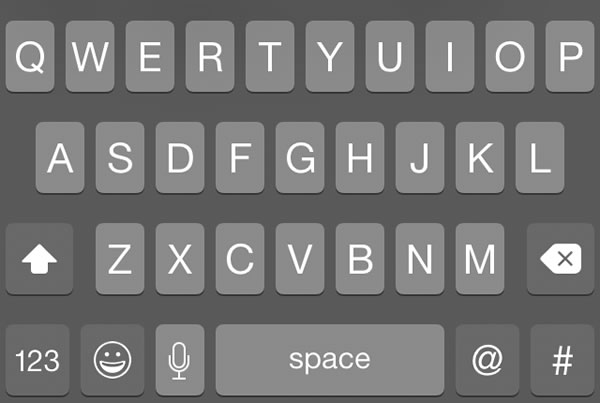
Twitter Typewriter Yes Use a keyboard optimized for twitter text entry, with easy access to the @ and # characters.
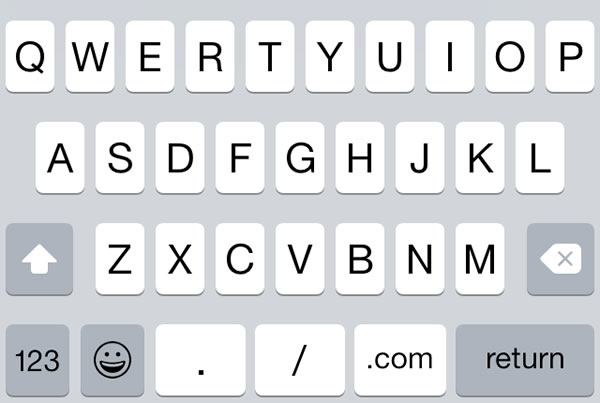
URL Typewriter Yes Use a keyboard optimized for URL entry. This type features “.”, “/”, and “.com” prominently.
WebSearch Typewriter Yes Use a keyboard optimized for web search terms and URL entry. This type features the space and “.” characters prominently.

iOS 8 features a total of 11 built-in virtual keyboards, all of which are variations on two basic types: the typewriter keyboard and the phone keypad, both pictured below:
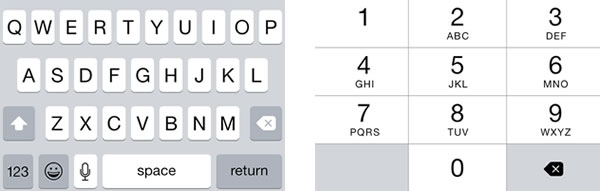
typewriter and phonepad - light

Typically, the keyboard isn’t shown until the user taps on a text field or text view. You can specify the type of keyboard for a text field or text view visually in Interface Builder…
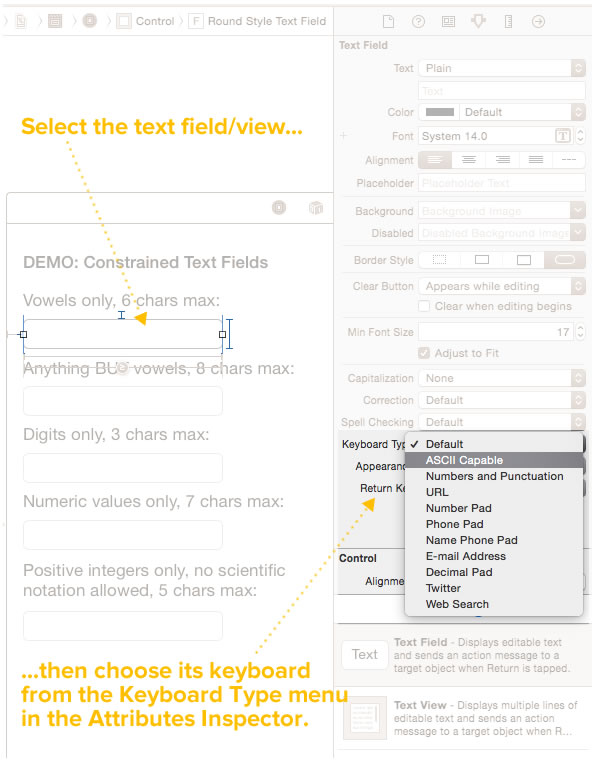
choosing keyboards in interface builder

…or you can do so in code using the text field or text view’s keyboardType property and values from the UIKeyboardType enum:

vowelsOnlyTextField.keyboardType = UIKeyboardType.ASCIICapable
noVowelsTextField.keyboardType = UIKeyboardType.Default
digitsOnlyTextField.keyboardType = UIKeyboardType.NumberPad
numericOnlyTextField.keyboardType = UIKeyboardType.NumbersAndPunctuation
positiveIntegersOnlyTextField.keyboardType = UIKeyboardType.DecimalPad

If you don’t specify a keyboard type for a text field or text view, the typewriter-based Default keyboard is used.

Thanks to their growing popularity (first in Japan, and then the rest of the world), many of these keyboards feature a way to enter emoji, which have been available on iOS since version 5, which was released in mid-2011:
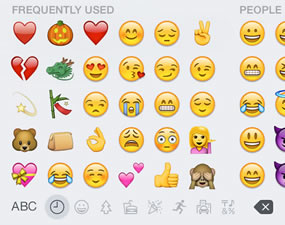
emoji-light

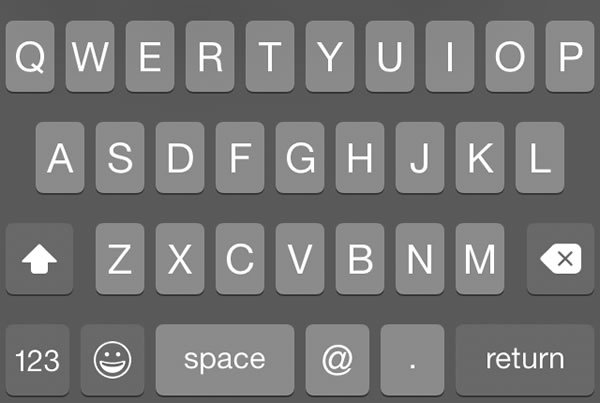
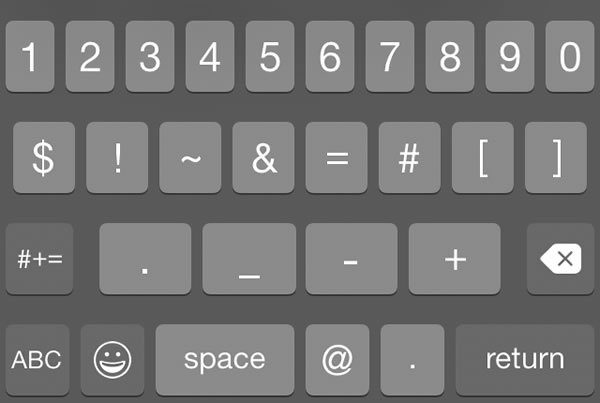
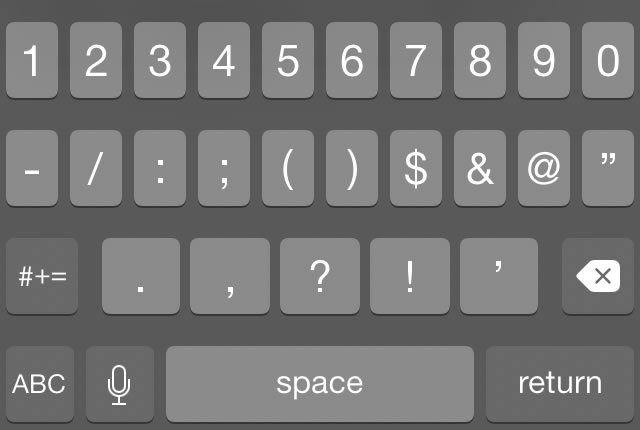
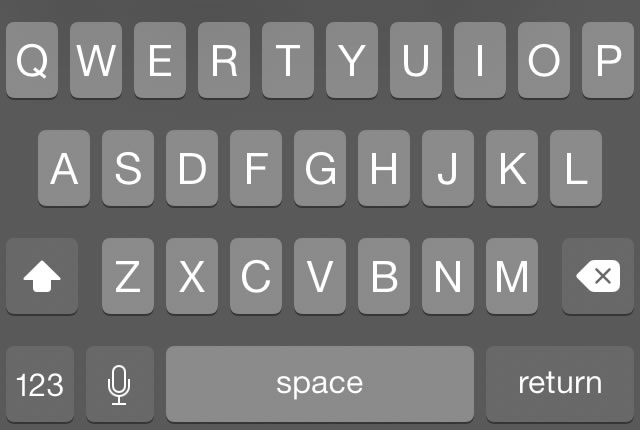
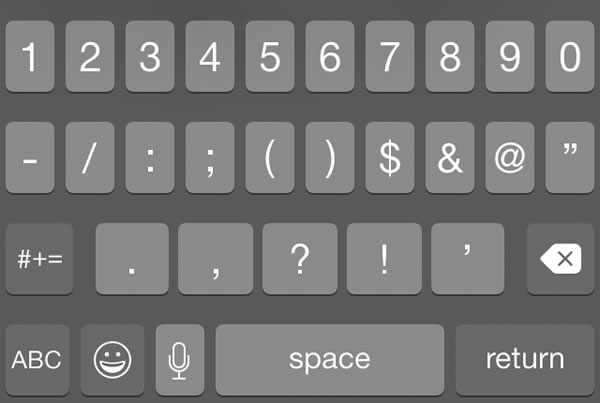
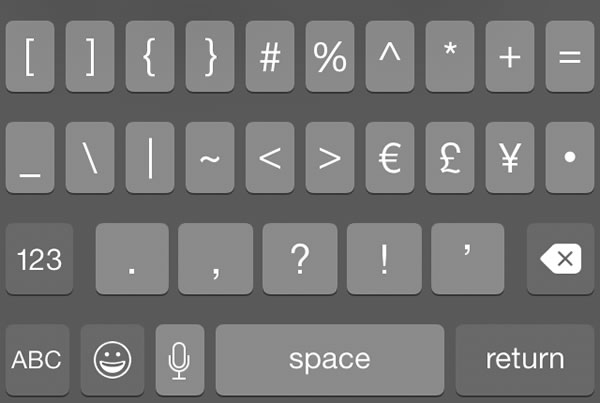
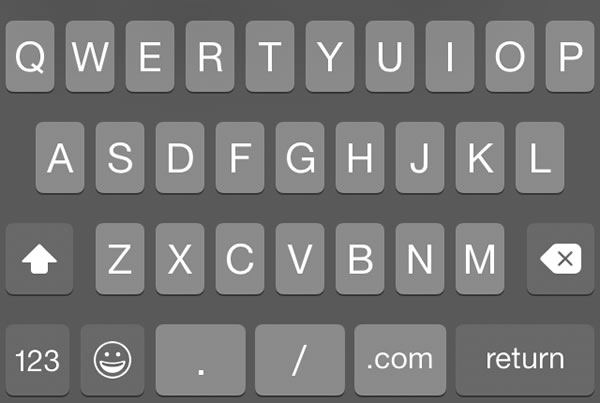
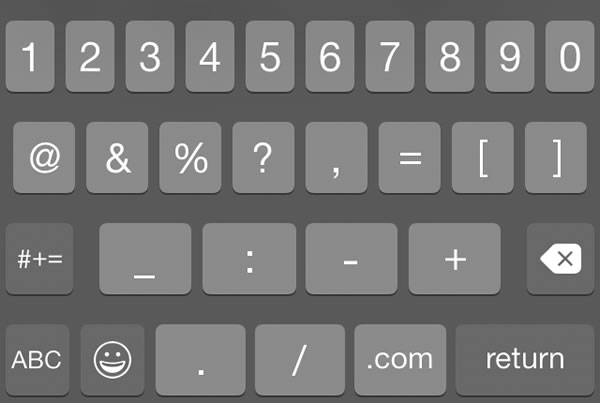
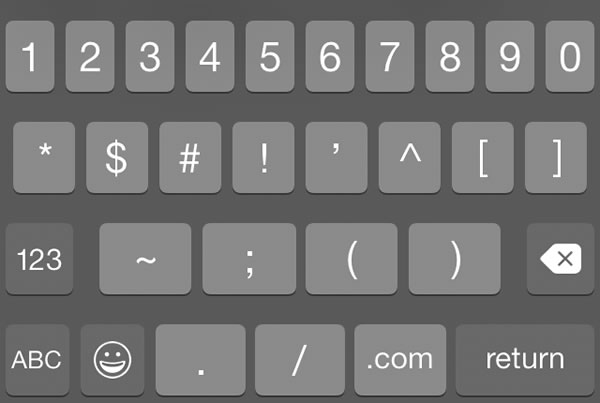
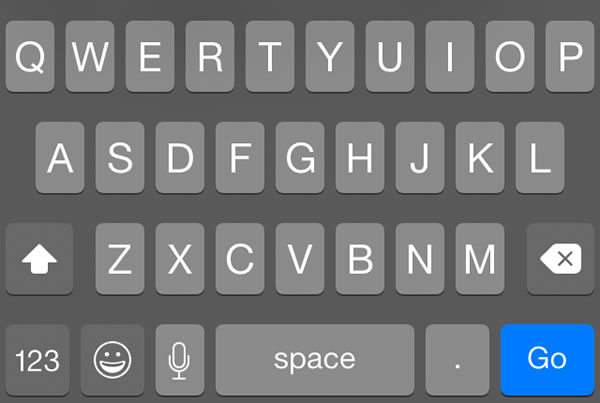
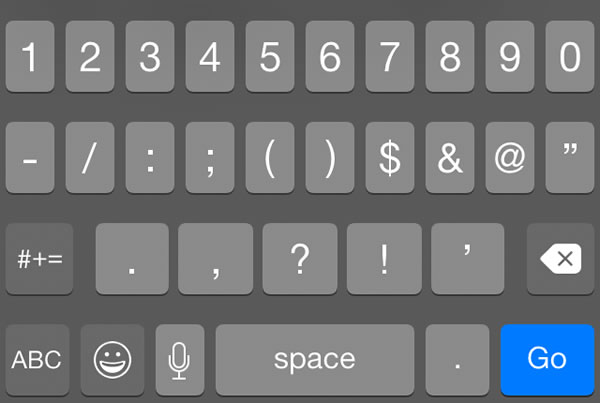
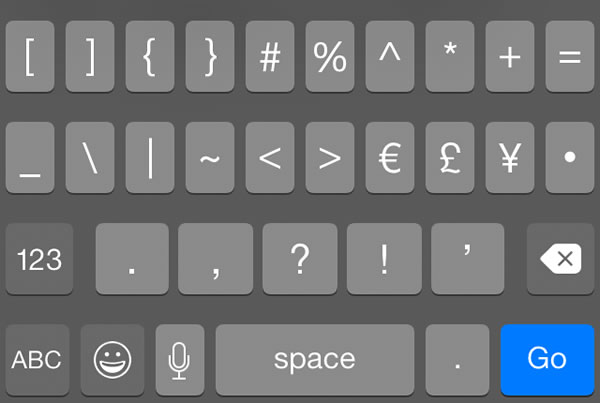
All of iOS’ virtual keyboards come in both a light and dark appearance, with the light version being the default:
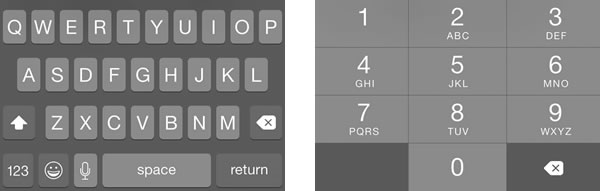
typewriter and phonepad - dark

As with the keyboard type, you can choose this appearance either visually in Interface Builder (via the Appearance menu) and in code using the text field or text view’s keyboardAppearance property and values from the UIKeyboardAppearance enum.

I haven’t been able to find anything in the Human Interface Guidelines on when the light and dark keyboards should or shouldn’t be used, so let your common sense be your guide, keeping in mind this fact about common sense:

Click the image to enjoy Deadpool’s wisdom at full size.

UIKeyboardType.ASCIICapable

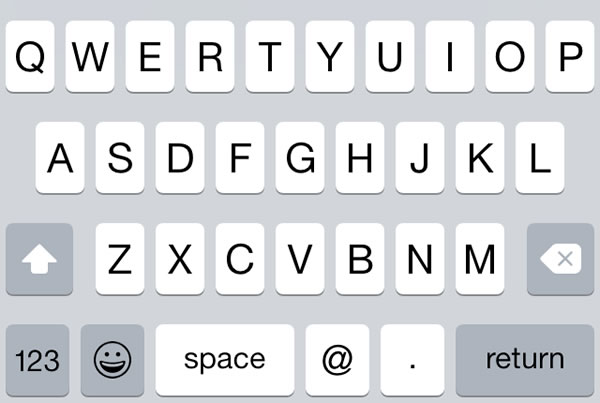
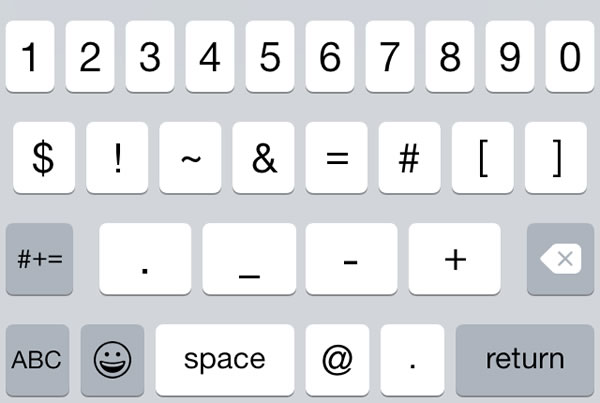
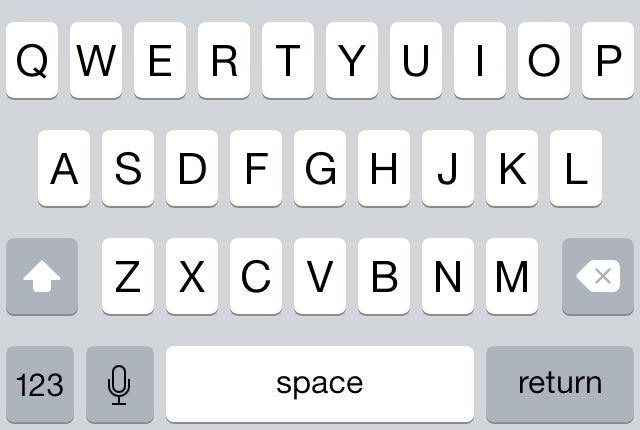
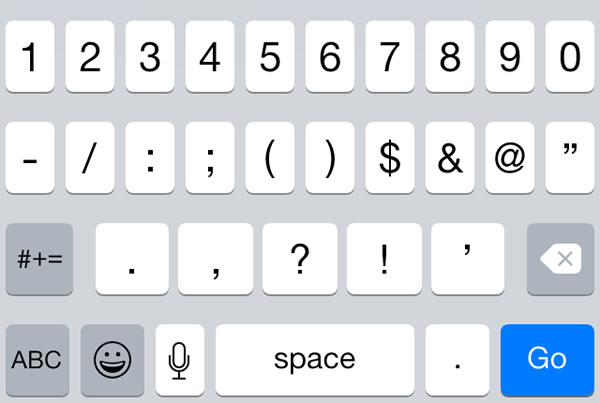
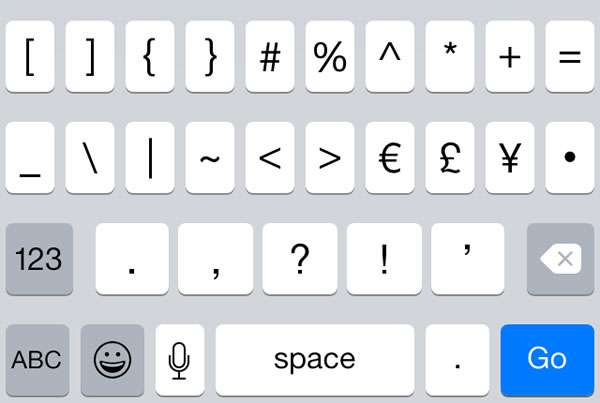
This used to be the default keyboard; now it’s the “no-nonsense alphanumeric keyboard”. It lets you enter letters, numbers, punctuation, and symbols, and nothing else. Use this keyboard if you need the user to enter something that’s completely or primarily letters and don’t want them to enter emoji and especially for data entry in business, productivity, scientific, health, and other “serious” apps.

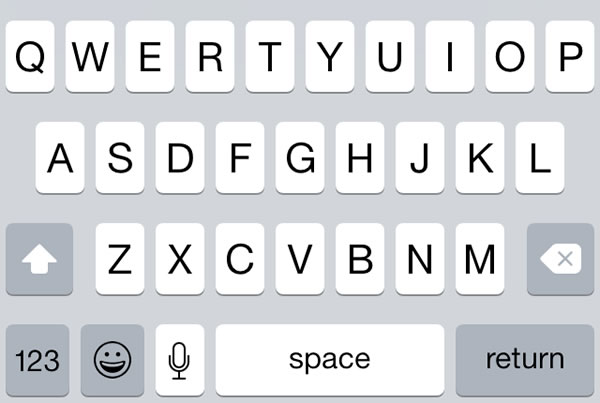
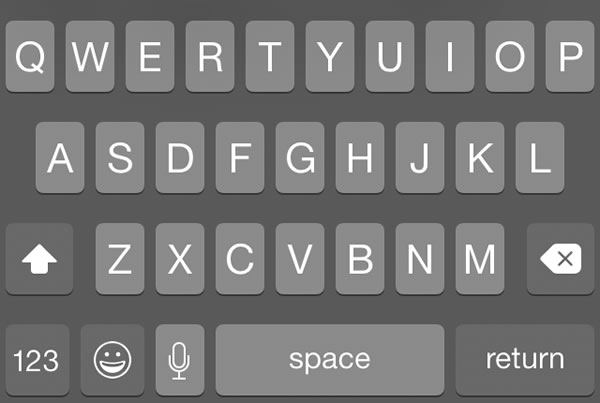
Primary view (accessed via the ABC key):
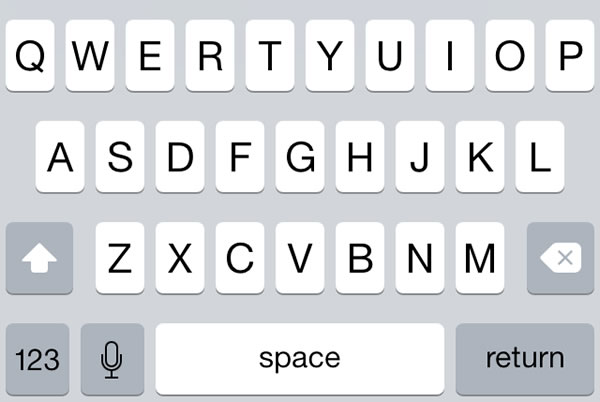
ascii-1-light ascii-1-dark

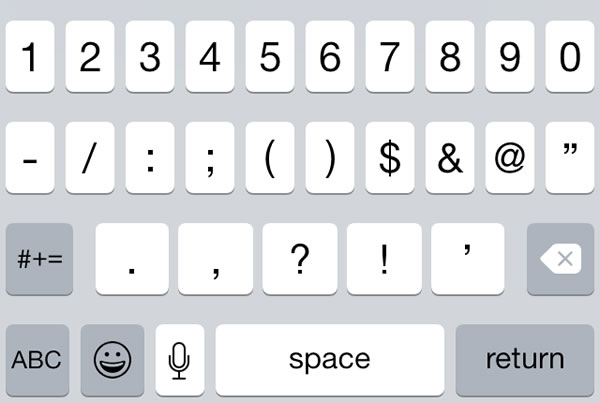
Alternate view 1 (accessed via the 123 key):

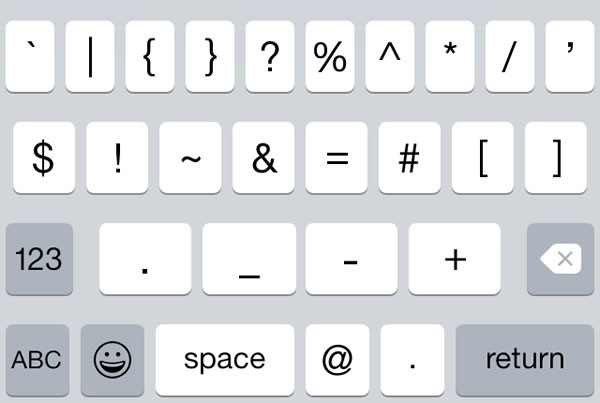
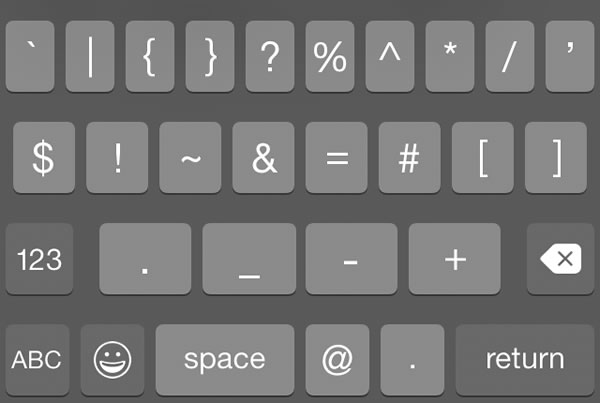
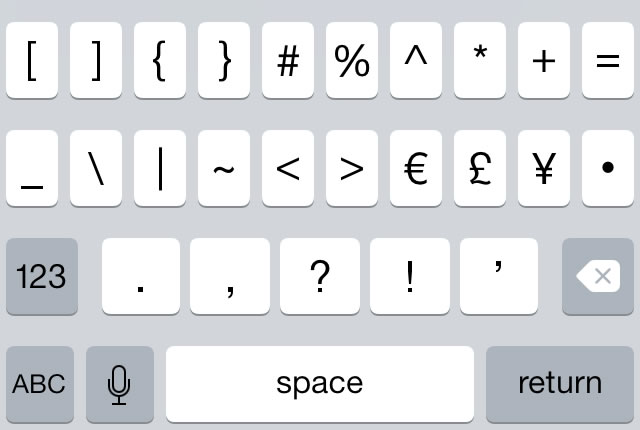
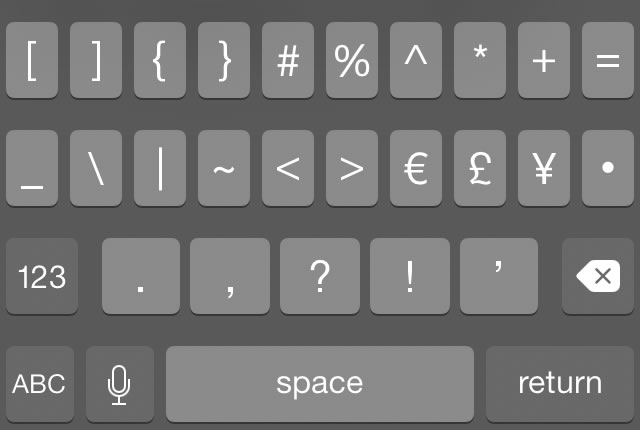
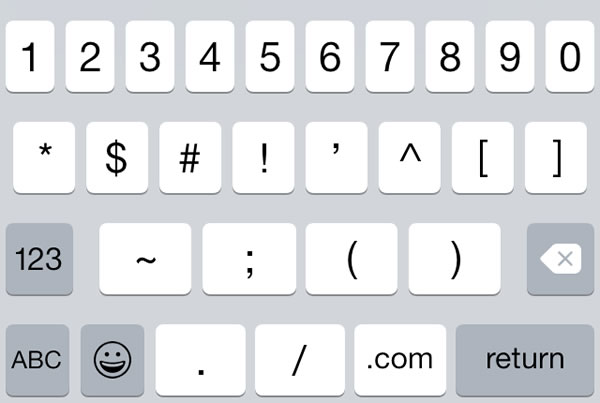
ascii-2-light ascii-2-dark

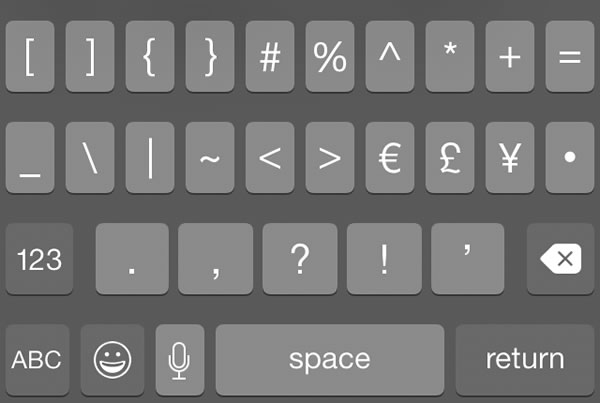
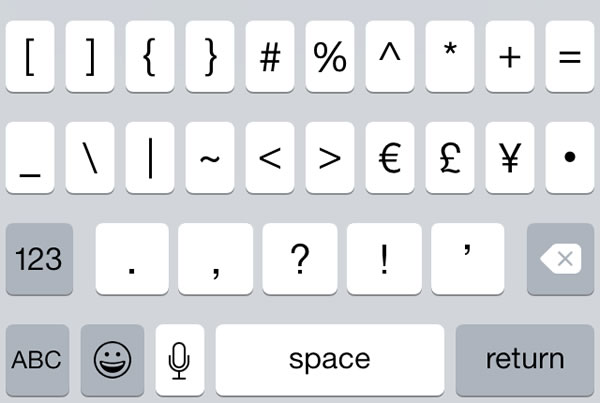
Alternate view 2 (accessed via the #+= key):

ascii-3-light ascii-3-dark

UIKeyboardType.DecimalPad

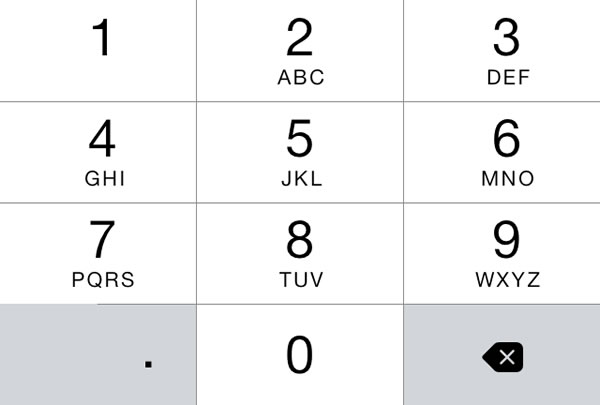
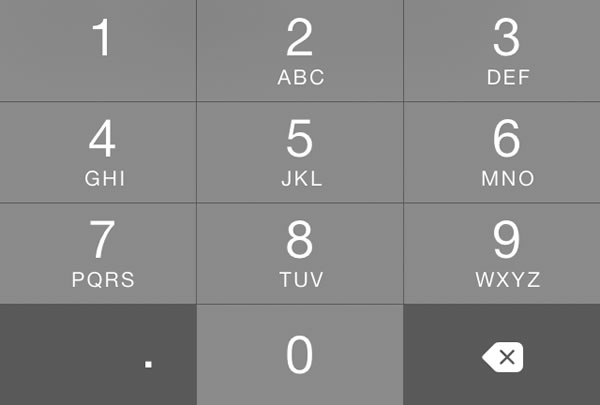
Use this keyboard if you want the user to enter either whole or fractional numbers. This keyboard provides the decimal separator appropriate for the user’s locale; the screenshots below show my locale settings, English/US. Note that there’s no return key of any sort on this keyboard.

decimalpad-light decimalpad-dark

UIKeyboardType.Default

If you don’t specify the keyboard type, you get this one, which lets the user enter letters, numbers, punctuation and symbol characters, and emoji. This is the most general-purpose keyboard in iOS.

Primary view (accessed via the ABC key):
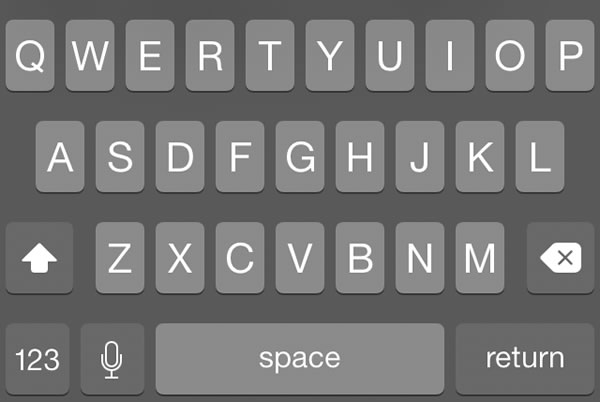
default-1-light default-1-dark

Alternate view 1 (accessed via the 123 key):
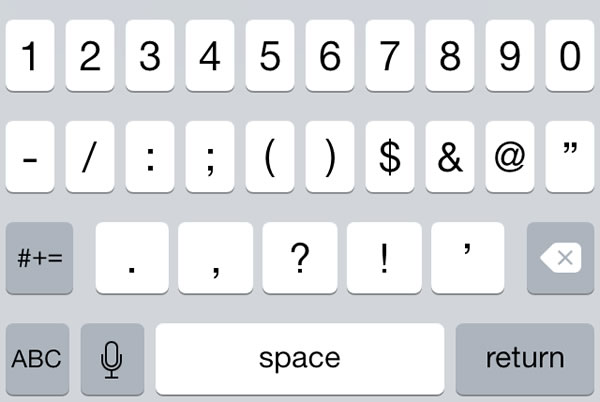
default-2-light default-2-dark

Alternate view 2 (accessed via the #+= key):

default-3-light default-3-dark

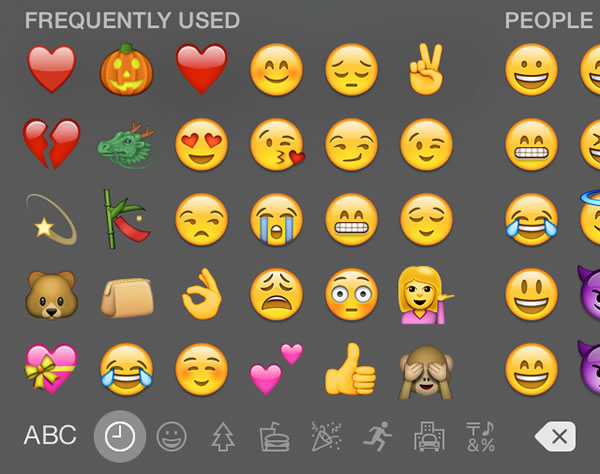
Alternate view 3 (accessed via the the 😀 key):

emoji-light emoji-dark

UIKeyboardType.EmailAddress

If you want the user to provide an email address, this is the preferred keyboard.

Primary view (accessed via the ABC key):

email-1-light email-1-dark

Alternate view 1 (accessed via the 123 key):
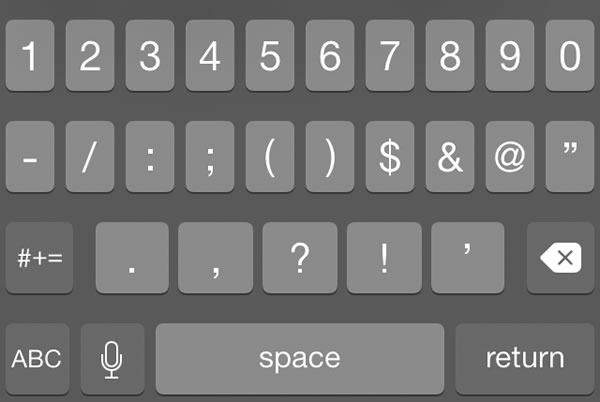
email-2-light email-2-dark

Alternate view 2 (accessed via the #+= key):
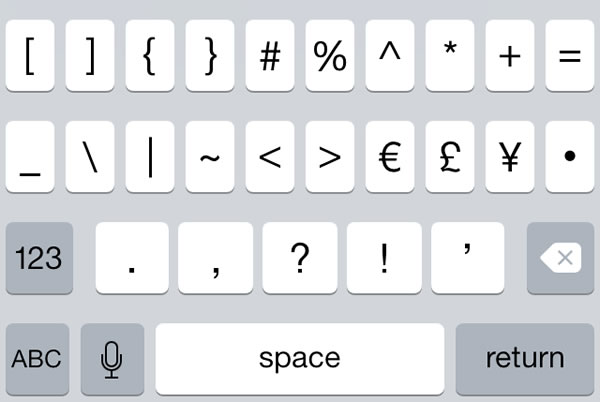
email-3-light email-3-dark

Alternate view 3 (accessed via the the 😀 key):

emoji-light emoji-dark

UIKeyboardType.NamePhonePad

For fields where you want the user to enter data without punctuation — typically names or integers — use the NamePhonePad keyboard. It features typewriter-style input for entering letters, and phone-style input for entering numbers.

Primary view (accessed via the ABC key):

namephone-1-light namephone-1-dark

Alternate view 1 (accessed via the 123 key):

namephone-2-light namephone-2-dark

Alternate view 2 (accessed via the the 😀 key):

emoji-light emoji-dark

UIKeyboardType.NumberPad

This is amother numeric entry keyboard. It lets the user enter digits, but not the decimal separator.

Note that there’s no return key of any sort on this keyboard.

Primary view:

numberpad-light numberpad-dark

UIKeyboardType.NumbersAndPunctuation

Think of this as the ASCIICapable keyboard, but with an emphasis on numeric entry. Like the ASCIICapable keyboard, it lets you enter letters, numbers, punctuation, and symbols, and nothing else.

Use this keyboard if you need the user to enter something that’s primarily numeric but may also include letters, symbols and punctuation, but not emoji. You’ll find it especially useful for numeric data entry in business, productivity, scientific, health, and other “serious” apps. You should also use this keyboard when you want the user to enter numbers in scientific notation.

Primary view (accessed via the 123 key):

numbersandpunc-1-light numbersandpunc-1-dark

Alternate view 1 (accessed via the ABC key):

numbersandpunc-2-light numbersandpunc-2-dark

Alternate view 2 (accessed via the #+= key):
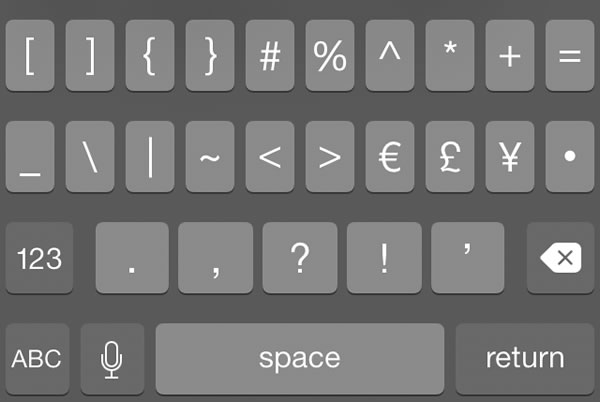
numbersandpunc-3-light numbersandpunc-3-dark

UIKeyboardType.PhonePad

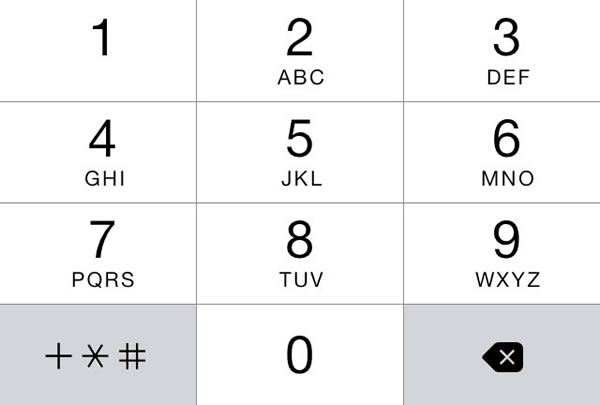
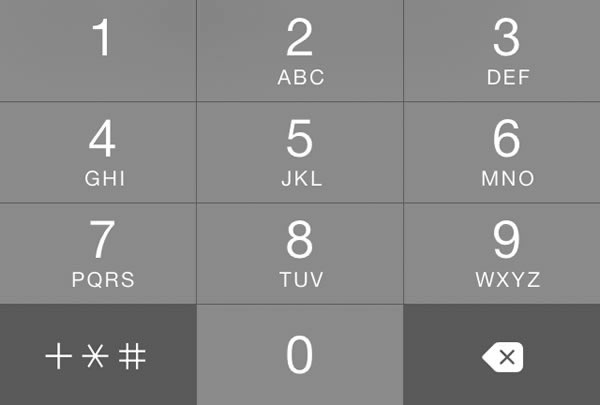
If you want the user to enter a phone number or a touch-tone sequence, this is the preferred keyboard.

Primary view (accessed via the 123 key):

phonepad-1-light phonepad-1-dark

Alternate view 2 (accessed via the +*# key):

phonepad-2-light phonepad-2-dark

UIKeyboardType.Twitter

If you want the user to enter a tweet, this is the preferred keyboard.

Primary view (accessed via the ABC key):
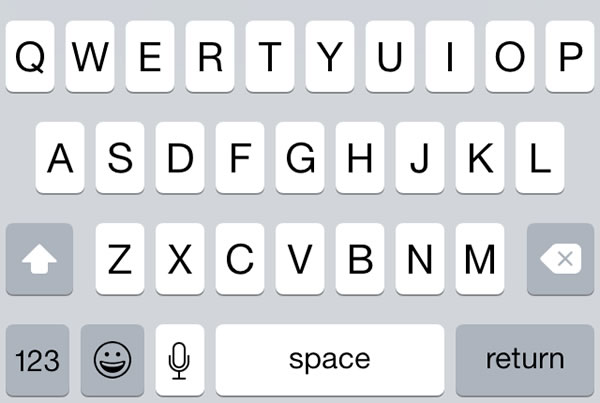
twitter-1-light twitter-1-dark

Alternate view 1 (accessed via the 123 key):

twitter-2-light twitter-2-dark

Alternate view 2 (accessed via the #+= key):

twitter-3-light twitter-3-dark

Alternate view 3 (accessed via the the 😀 key):

emoji-light emoji-dark

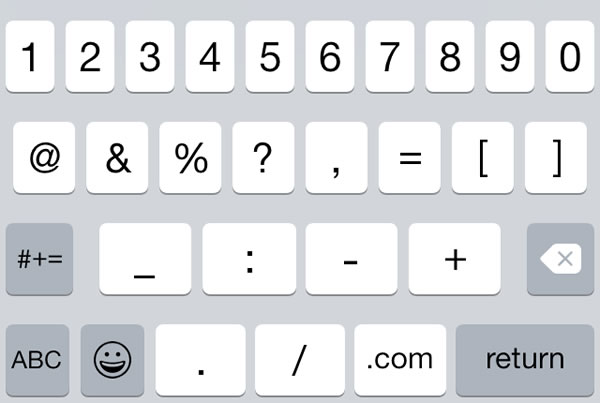
UIKeyboardType.URL

If you want the user to enter a URL, this is the preferred keyboard.

Primary view (accessed via the ABC key):
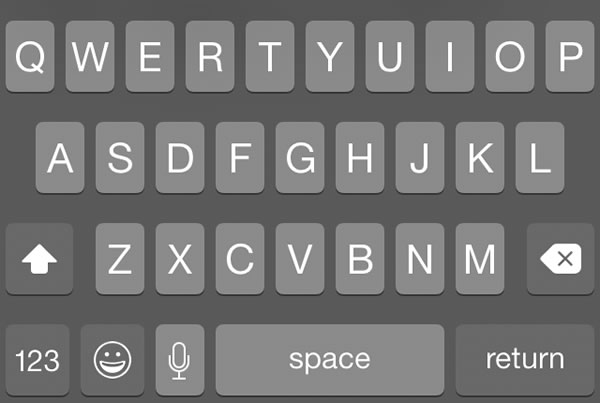
url-1-light url-1-dark

Alternate view 1 (accessed via the 123 key):
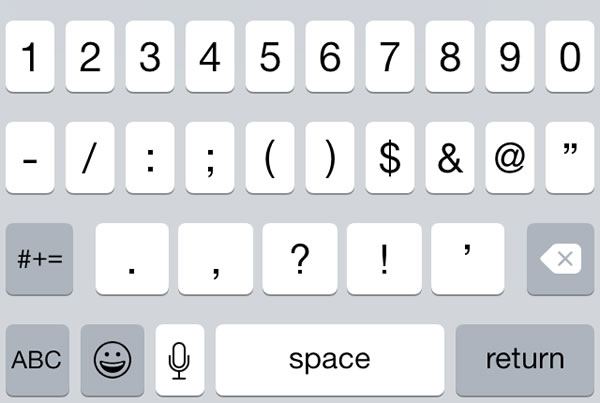
url-2-light url-2-dark

Alternate view 2 (accessed via the #+= key):

url-3-light url-3-dark

Alternate view 3 (accessed via the the 😀 key):

emoji-light emoji-dark

UIKeyboardType.WebSearch

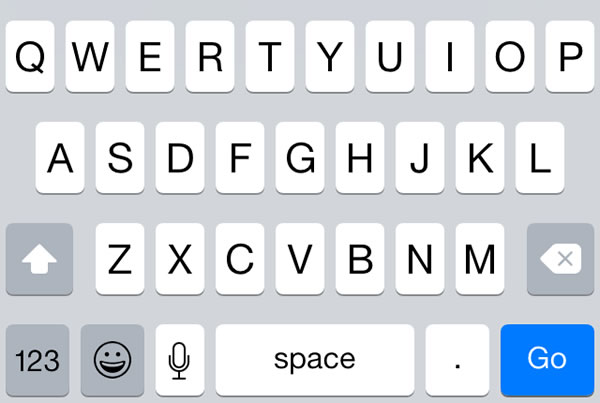
This keyboard is very similar to the Default keyboard, with two notable differences:

  • There’s a . key in the bottom row
  • The return key is blue, and by default is labelled Go.

It’s meant for entering both URLs and web search terms, but it’s equally useful for any kind search or even typed commands.

Primary view (accessed via the ABC key):

websearch-1-light websearch-1-dark

Alternate view 1 (accessed via the 123 key):
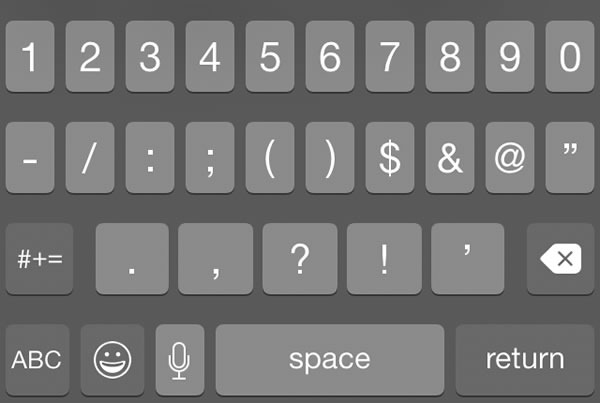
websearch-2-light websearch-2-dark

Alternate view 2 (accessed via the #+= key):
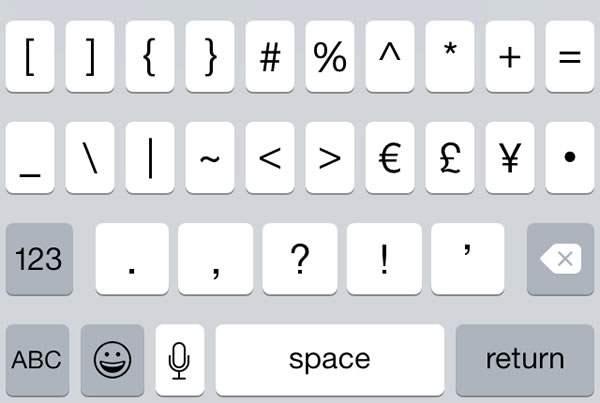
websearch-3-light websearch-3-dark

Alternate view 3 (accessed via the the 😀 key):
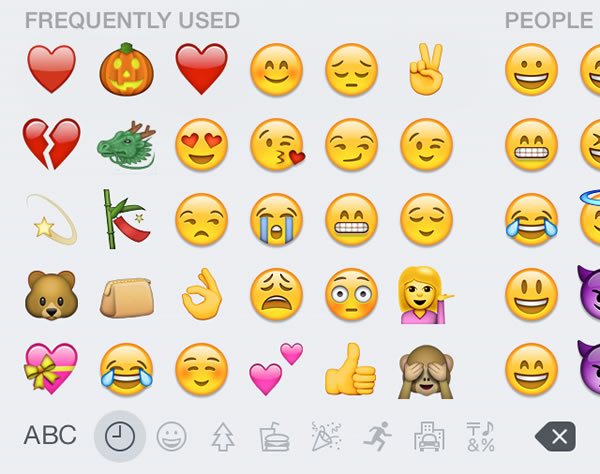
emoji-light emoji-dark

Categories
Uncategorized

“Research journal, day 12: The locals have accepted me as one of their own.”

fitting in

Found via AcidCow. Click the photo to see the source.

Categories
Uncategorized

Drunk Tulsa roommates break beer bottles, stab each other in “iPhone vs. Android” debate

stabby scene

Tulsa-based KTUL’s news team reports that two roommates are in the hospital after a drunken “Which is better, iPhone or Android?” argument escalated into a fight with improvised knives.

Both men smashed their beer bottles action movie-style and stabbed each other. One of them even smashed his bottle on the back of the other’s head (which to my mind sounds like the kind of cheap move a “Fandroid” would pull*).

* I’m kidding, Android fans. I myself own a Moto G (2nd generation). Please don’t stab me.

Some thoughts I had after reading the article:

  • I always thought that smashing a bottle and using it as an improvised weapon was something that happened only in the movies and TV.
  • As a former Windows Phone evangelist, I can’t help but feel a sharp pang of jealousy. Windows Phone will never, ever engender this kind of stabby loyalty. I’d bet that even BlackBerry has a few fans who’d happily shank someone in defense of their phone. (I’m also reminded of this clever Windows Phone ad.)
  • love the last line of the news story: “Police did not respond when our photographer asked which phone is better.”

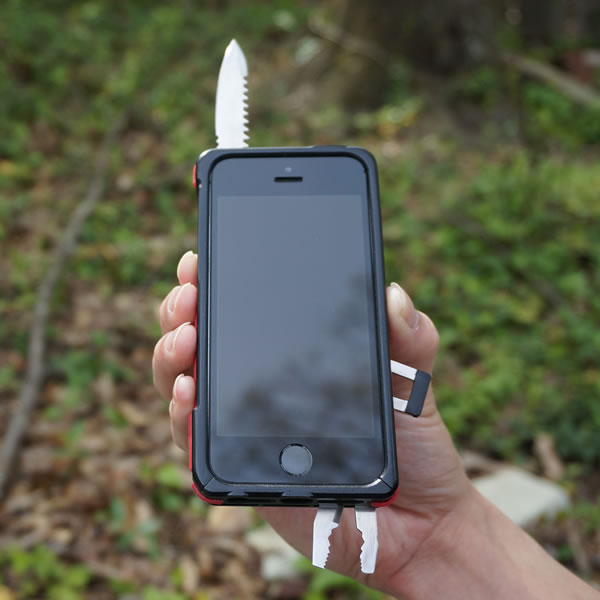
If you’re the kind of person whose identity is so tied up with a smartphone platform that you can’t have an argument about your favorite one without getting into a murderous brawl, you might want to invest in a case with an integrated blade, like the TaskOne G3, pictured below:

iphone knife case

Thanks to Ethan Henry for the find!

Categories
Uncategorized

BusinessTown: Richard Scarry for the Fast Company / BusinessWeek / TechCrunch set

If you enjoyed Richard Scarry’s “Busytown” books as a kid…

busytown

…and if you work in an environment where phrases like “highly intangible”, “deeply-disruptive”, “data-driven”, and “where’s the value-add?” are the norm, where “lessons” got verbed into “learnings” and “spending” got nouned into “spend”, and everything you do is “agile”, you might enjoy BusinessTown, which takes the Ricard Scarry aesthetic and runs it through the Fast Company/Bloomberg Businessweek/TechCrunch blender:

businesstown

Thanks to Leigh Honeywell for the find!

Categories
Uncategorized

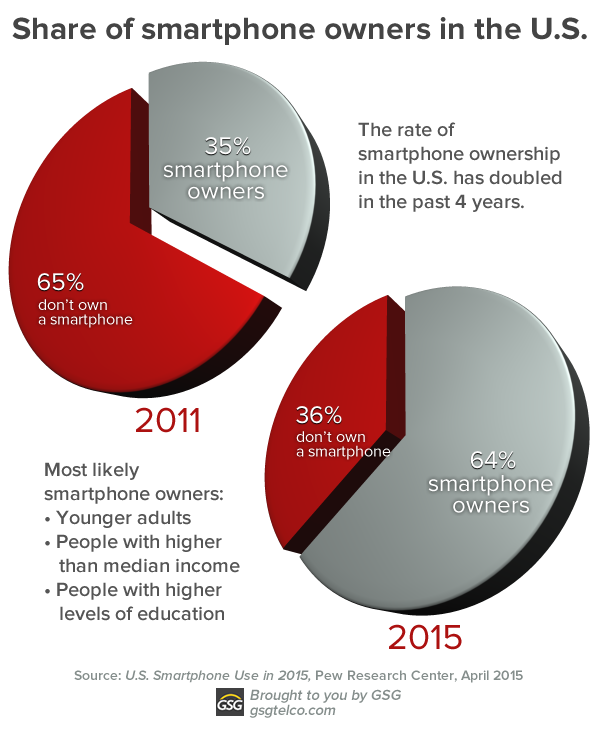
Interesting data from the Pew Research Center’s “US Smartphone Use in 2015” report

share of smartphone users in us

If you need information on smartphone use in America, look no further than the Pew Research Center’s U.S. Smartphone Use in 2015 report. It’s a very thorough, 60-page document based on data from polls and surveys conducted in the October and November 2014. Using a technique called “experience sampling” — in which participants completed two surveys a day over a week — Pew were able to create “a unique and intimate portrait of smartphone usage” in the U.S..

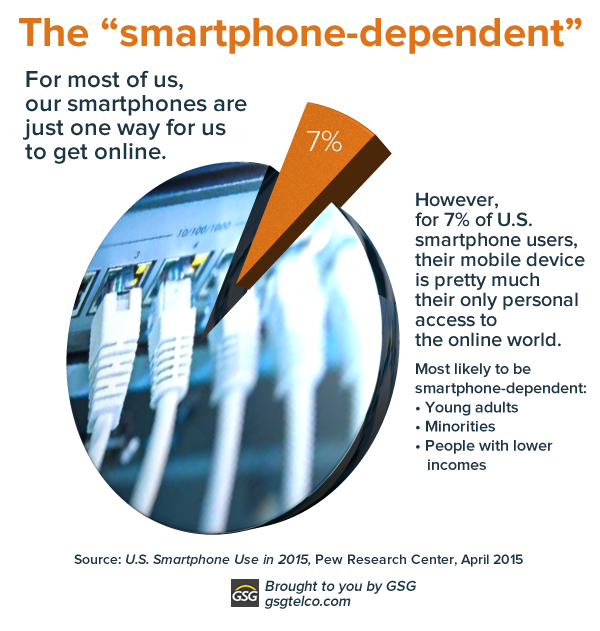
the smartphone-dependent

Some notable items in the report:

  • Nearly two-thirds of Americans own a smartphone. This is double the rate of ownership from just four years ago.
  • There’s a small but significant portion of the population that’s “smartphone-dependent”:  their smartphone is their primary, and sometimes, their only way to the online world. 7% of American smartphone users don’t have a broadband internet access as home, nor do they have easy access to the internet from sources other than their smartphone. About 1 in 5 Americans rely on smartphones to some degree to go online, because their online access options are few.
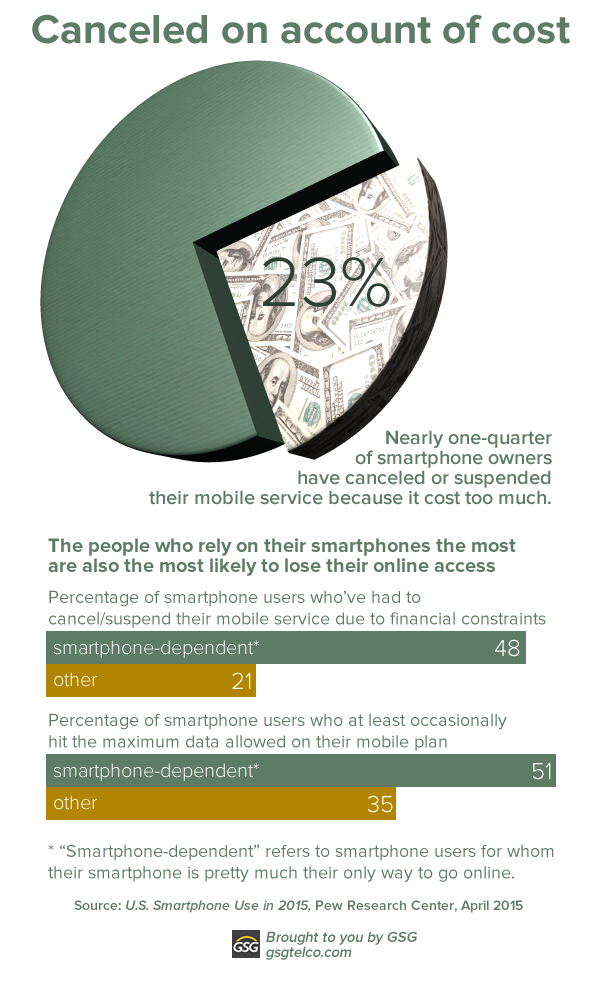
  • Smartphone ownership is often most tenuous for those who rely on them the most. About half of the smartphone-dependent have had to cancel or suspend their mobile service because it cost too much. The smartphone-dependent are also far more likely to hit their data plan maximum than other users.

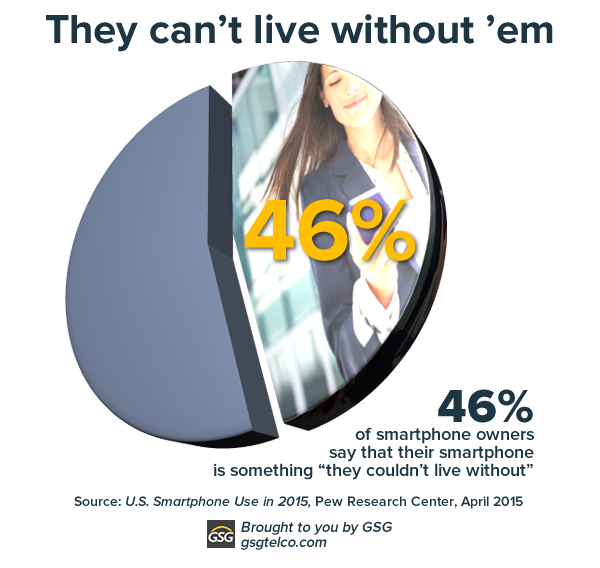
cant live without em

If you need to know the state of smartphone use in the U.S. today, be sure to download Pew’s report [1.6 MB PDF]. We’ve taken some of the key points of this report and turned them into the infographics in this article, which you’re free to use in your presentations — all we ask is that you say that you got them from GSG.

canceled on account of cost

this article also appears in the GSG blog

Categories
Current Events Tampa Bay Uncategorized

While I was away (or: Getting married and getting my 2011 MacBook fixed)

Things have been quiet lately here on Global Nerdy. I have a couple of good excuses. Here’s the first one:

Photo: Anitra Pavka and Joey deVilla at their wedding.

Anitra and me, shortly after getting married. Click the photo to see more.

On Saturday, March 7th, the lovely lady for whom I moved from Toronto to Tampa and I got married. We had our ceremony on St. Pete Beach followed by a brunch reception on the penthouse ballroom of the Grand Plaza Hotel, a stunning room that looks like it would’ve made a great hideout for Sean Connery-era Bond villain. As you might expect, this big life event took priority over a great many things, including blogging.

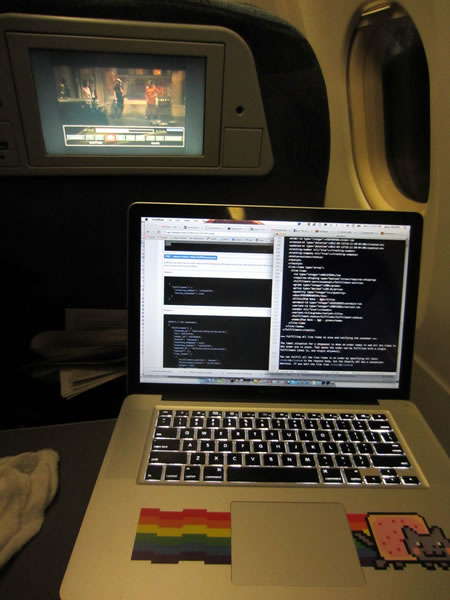
Photo: Joey deVilla's MacBook Pro (early 2011 15-inch model), as seen from his vantage point in an Air Canada window seat. In the background, a movie plays on the seat-back in-flight entertainment system.

“El Guapo”, my trusty early 2011 15″ MacBook Pro, circa 2012.

My other excuse is technological: “El Guapo”, my trusty early 2011 15″ MacBook Pro, was beginning to show some glitchy behavior just before my wedding. (Maybe it had some reservations about leaving the bachelor computing lifestyle.) At first, it started running hotter than usual, and its fans would often be going full bore. Then came the random restarts. Finally, it would fail to boot up. It would start up fine…

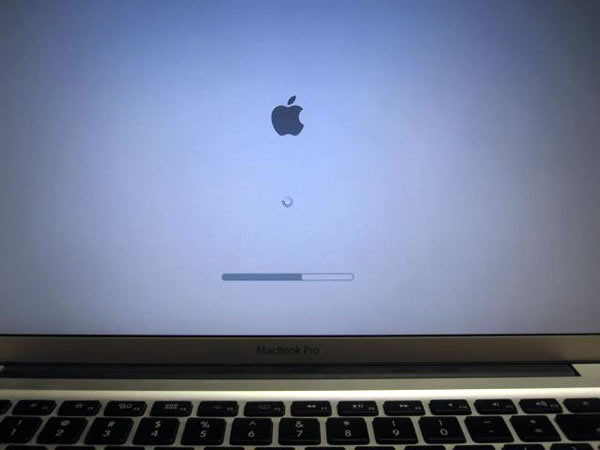
Photo: MacBook Pro screen, showing the OS X Yosemite progress bar a little past the halfway mark.

Photo taken from the Stack Exchange Forum Ask Different. Click to see the source.

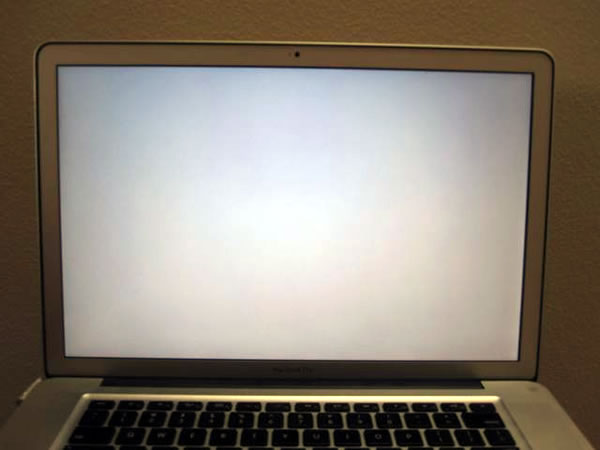
…but after the progress bar filled up — a process that seemed to take a little longer than usual — it would display a blank gray screen like the one shown below:

Photo: MacBook Pro showing a bank gray screen.

Photo taken from the Stack Exchange Forum Ask Different. Click to see the source.

At this point, the computer would either hang there or spontaneously reboot, which would lead back to the blank gray screen.

The first resort: Resetting the NVRAM, a.k.a. the PRAM

Long-time Mac users know that when a Mac starts exhibiting wonky behavior, resetting the PRAM — that’s short for Parameter RAM — often does the trick. Those same long-time Mac users are also the ones who still call it PRAM; Apple’s moved on from that old name and now calls it NVRAM, which stands for Non-Volatile RAM. No matter what you call it, NVRAM/PRAM is a small store of persistent, writable memory that contains a number of system settings and configurations, including:

  • Which disk is your startup disk
  • Networking and port configurations
  • User input settings such as autokey delay and rate, mouse speed, the blink rate of the “text insert point” cursor, how quickly you have to double-click for it to register as a double-click, and so on…
  • All manner of memory settings, including virtual memory, disk cache, and RAM disk

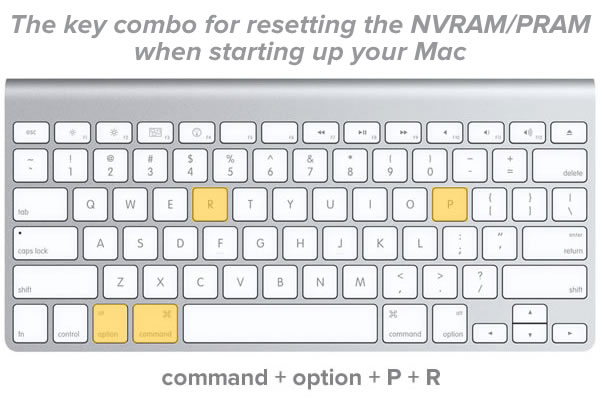
When your Mac starts acting strangely, it’s often the case that the configuration data inside your NVRAM somehow got corrupted. Luckily, there’s a simple but not-very-obvious way to reset your NVRAM, and it’s all based on a combination of keys that you need to press simultaneously when your Mac boots up. This trick goes back to the days when it was still called PRAM, which explains the keys you have to press:

Headline: The key combo for resetting the PRAM on your Mac when you power up / Photo: Mac keyboard with "command", "option", "P", and "R" keys highlighted.

The steps are simple:

  1. Shut down your Mac. Don’t just log out or put it to sleep, shut it all the way down.
  2. Press the power button to turn your Mac on. Get ready to pounce on the keyboard.
  3. Hold down these keys simultaneously: command, option, P, and R. Make sure that you’re holding down this combination of keys before the gray screen appears. You have to be quick.
  4. Your Mac will reboot. Wait for the startup sound, then let go of the keys and let the machine boot as usual.

While this trick has served me well in the past, it didn’t work in this case. It was time for the next trick: resetting the SMC.

The second resort: Resetting the SMC

The SMC — short for System Management Controller — doesn’t have as long a history as the PRAM, as it was introduced with Intel-based Macs (prior to that. Macs were based on Motorola CPUs). The SMC controls a number of interesting hardware goodies, including indicator lights, the display and keyboard backlights, the cooling fans, power, and more.

The steps for resetting the SMC vary depending on the model of Mac. For my particular machine (once again, it’s an early 2011 15″ MacBook Pro), here are the steps:

  1. Shut down your Mac. Don’t just log out or put it to sleep, shut it all the way down.
  2. Unplug the power cord and all peripherals.
  3. Press and hold the power button for 5 seconds.
  4. Release the power button.
  5. Reconnect the power cord.
  6. Press the power button and let the machine boot as usual.

I’m told this trick fixes a lot of hardware weirdness, but not for me. It was time to take it to the shop, but before I could do that, I wanted to back up some files.

Target disk mode: turning your Mac into a drive that other Macs can use

Target disk mode allows a Mac to function as a drive that other Macs can access. My plan was to hook up the following to my wife’s perfectly-functioning Mac:

  • My Mac, with a Thunderbolt cable, and
  • An external hard drive, with a USB cable.

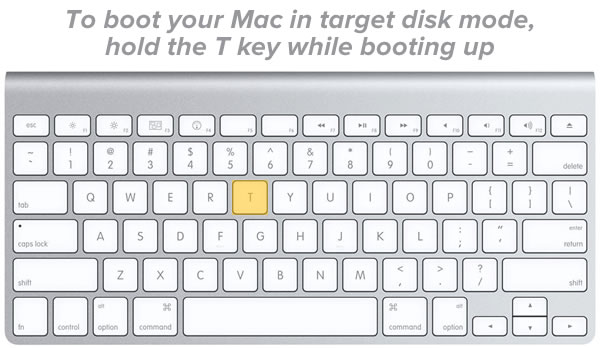
My plan: to boot my Mac into target disk mode, after which I would copy the files I wanted from my Mac to the external hard drive. I crossed my fingers and booted my Mac into target disk mode using the magic key:

Headline: To boot your Mac in target disk mode, hold the T key while booting up / Photo: Mac keyboard with the "T" key highlighted.

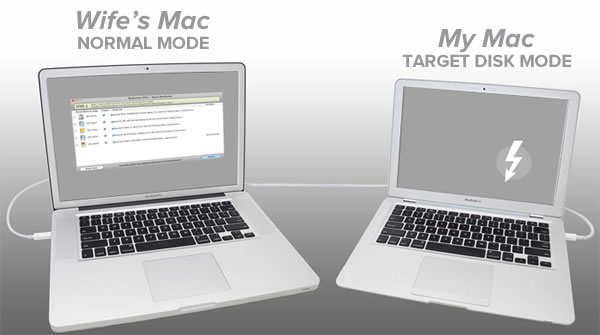
Luckily for me, my Mac was working just well enough to boot into target disk mode. You’ll know when a Mac is in this mode by what it shows on its display: a screensaver-like display of a Thunderbolt or FireWire icon that pops up on random locations on the screen. I used a Thunderbolt cable to connect my Mac to my wife’s (it feels a little odd typing wife rather than girlfriend), and the setup looked something like this:

Headline: Wife's Mac - Normal Mode --- My Mac - Target Disk Mode / Image: Two MacBooks connected via ThunderBolt cable, with one Mac showing a window on its screen and the other Mac showing the Thunderbolt icon on its screen.

With my files backed up so that I could work on them with my backup machine, a Windows/Ubuntu box, it was time to take it to the shop.

Good news, bad news, and a NetBoot at the shop

Photo: The storefront of the PeachMac at Citrus Park Mall in Tampa.

The closest authorized Apple dealer and repair shop to me in the PeachMac at Citrus Park Mall. A number of people I know from the Suncoast iOS Meetup group consider it their go-to store for Macs and Macessories, and they’ve generally done right by me as well. I took my machine to the service desk, where they plugged an ethernet cable into it and performed a netboot in order to run their diagnostics application:

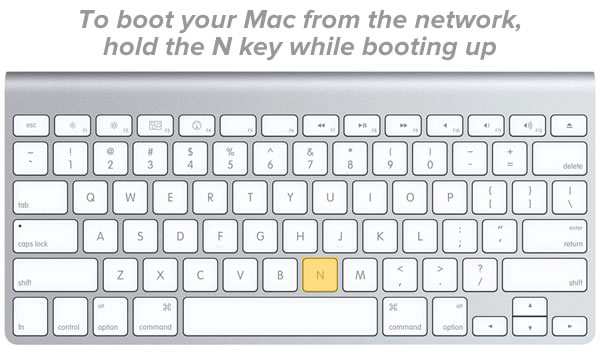
Headline: To boot your Mac from the network, hold the N key while booting up / Photo: Mac keyboard with the "N" key highlighted.

Everything except the graphics card checked out fine. “Yeah, I figured that was the problem — it’s been happening with a lot of 2011 MacBooks.”

“What’s been happening with a lot of 2011 MacBooks?” I asked.

The AMD graphics cards on that line of MacBooks, especially the early 2011 models, have been crapping out. In the beginning, Apple just said that you should zap your PRAM, reset the SMC, or even reinstall the OS. That works — for a little while. Then the graphics card just dies again, and your machine’s hanging in mid-boot with nothing but a gray screen. The real fix is a replacement motherboard.”

“And how much is that going to cost?” I was already wondering if I’d have to drop some cash for a new machine. I was hoping to put off that kind of purchase until next year.

“You’re in luck. Apple’s not calling it a recall, but they’ve got a ‘Repair Extension Program’, and you’ll get a brand new mobo for free…but in your case, there’s a hitch.”

Now what? I thought.

“It’s the replacement battery you put in. In order to qualify for this repair, your machine can’t have any non-standard parts in it. We can’t fix it as it is right now, but if you were to go home and put the original battery back in and bring it back here, we wouldn’t know about it, nudge nudge wink wink.”

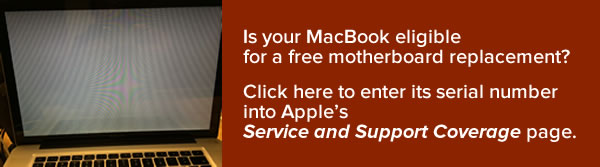
Banner: Is your MacBook eligible for a free motherboard replacement? Click here to enter its serial number into Apple's Service and Support Coverage page.

I had a new problem: I’d already recycled the old battery, as it barely held a charge and was just taking up space in my home office as an inert, useless block.

Replacing the battery

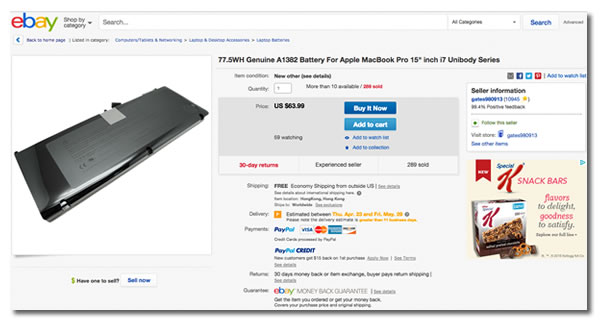
Screen capture: eBay page for an Apple A1382 laptop battery

Click the screen shot to visit the eBay page.

eBay to the rescue! I found a dealer selling A1382 batteries — the kind that early 2011 15″ MacBook Pros take — for much cheaper than even the replacement battery I bought through OWC. I didn’t need this battery to be any good; I just needed it to be a genuine Apple one in order to qualify for the free repair.

The battery on the 2011-era MacBooks is technically replaceable, but Apple make it a little difficult by holding it in place with tri-lobe screws, which look like Philips screws, but with one less “wing”:

Photo: Two tri-lobe screws.

Your local hardware store doesn’t typically stock tri-lobe screwdrivers, but they can be ordered online, and the non-Apple replacement battery I got from OWC comes with all the screwdrivers you need to install it. Luckily for me, I’d decided to keep them, which made this operation possible:

Back in action

With a standard Apple battery back in its belly, I brought my MacBook back to PeachMac. They ran the diagnostics again, and this time, the support guy — not the same guy I talked to during my earlier visit — pointed out that I should discharge my battery from time to time. “Don’t leave it plugged in all the time,” he said, not knowing that I’d had the battery for all of one day.

“We’ll call you when we’ve finished swapping out the motherboard,” he said. “It’s pretty quick to do. The slow part is getting it shipped to us.”

With my main machine in the shop, I pressed my backup machine — a Lenovo T430, the quintessential TPS Reports writing machine — into active duty. It has an annoying habit of dropping wifi connections, even with the latest drivers installed.

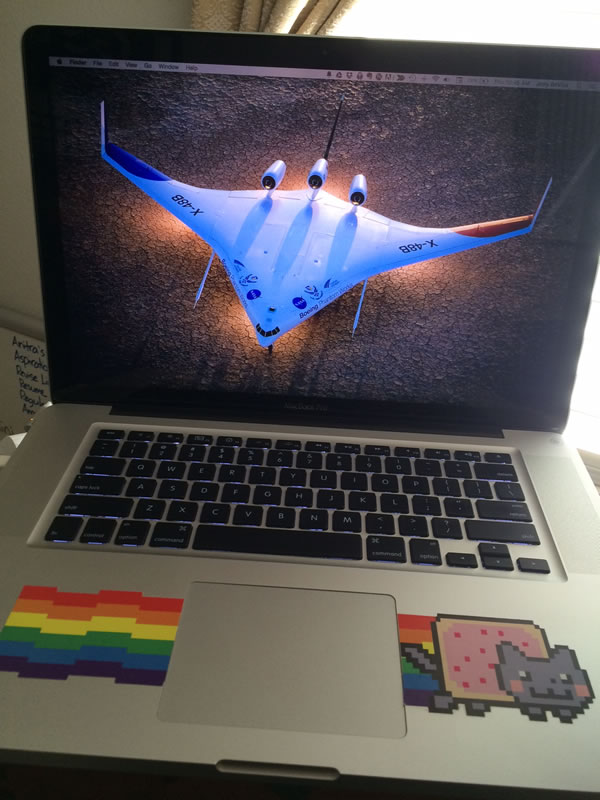
Photo: Joey deVilla's MacBook Pro, complete with 'Nyan Cat' sticker on the palm rest.

“El Guapo”, my trusty early 2011 15″ MacBook Pro, at the time of this writing (April 2, 2015).

They got the job done in a couple of business days. The new motherboard looks newer, as the markings on the chips don’t look as faded by the heat of regular operation, but the real sign is that it takes a little extra force to insert cables into the USB and Thunderbolt jacks; it feels like breaking in a new pair of shoes. The PeachMac guys even replaced a couple of the rubber feet that had gone missing from the bottom of the machine over the years, as well as one of the screws I lost while upgrading my RAM a little while back, all free of charge.

With my preferred machine back in action, I’ll be able to get back to writing iOS apps, as well as iOS development tutorials here on Global Nerdy. Keep watching this space!