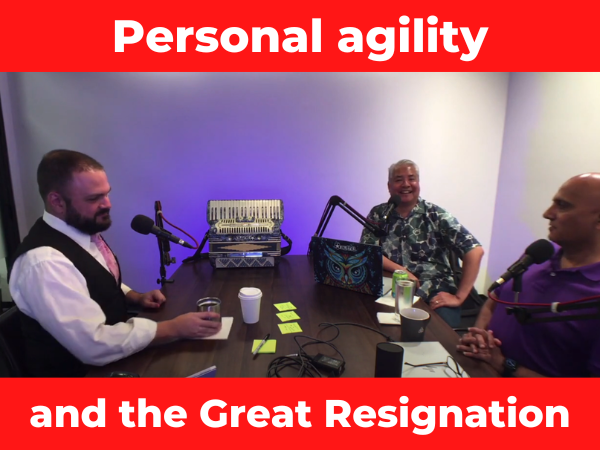
You should be a regular listener/viewer of the Arguing Agile podcast, a YouTube show hosted by Tampa Bay techies Brian Orlando and Om Patel that features local techies talking about software development, agility, and everything in between, completely unscripted and unrehearsed — just real conversations about real tech work. In the past year, they’ve published 66 episodes, the latest of which features…me!
In this episode, titled Personal Agility and the Great Resignation, we talk about doing work in the brave new world of post-2020 and discuss things such as:
- 0:00 Intro
- 0:24 Topic Intro
- 0:59 Reasons for In-Person Gathering
- Working remotely still requires some in-person gathering, because as they saying goes, sometimes, “you have to be there.”
- 4:19 Team Bonding, Positive Vibes
- The power of team-building ceremonies and exercises, and why they have to be meaningful and not just “doing team stuff for team stuff’s sake.”
- In the past couple of months, I’ve had my first chances to meet with my team at Auth0 (Developer Marketing) after working with them for a year and a half — first at a small summit in Salt Lake City, and last week in London.
- 8:40 Work, Life, & Sustainability
- Earlier in your life, it’s much easier to work ultra-hard in the quest to advance your career, but you can’t do it for an extended period. This is the exact thing that generates mid-life crises, and physical and mental health issues.
- Brian: “Jack Welch said a lot of stuff.”
- 15:50 Interviews: Vetting Companies
- During a job interview, you shouldn’t be the only one being interviewed. You should also be interviewing them!
- How can you tell if a manager is a “Rick” looking for another “Morty” to add to his “Morty Army?”
- I talk about a Chris Voss technique where you look at the reactions on the face of the person who isn’t speaking to get the truth.
- 19:55 Segue on Microsoft
- We talk about my time at Microsoft where I was a Windows Phone Champion, Albert Shum’s design for its “Metro” UI, and Microsoft’s thinking during the Ballmer era: “The mobile platform is the desktop platform, but lamer.”
- I was at a gathering of P2P people at Microsoft in 2001 that was attended by Tim O’Reilly and Dave Winer, where we were told that “IE6 will be the last browser, because the future is applets.”
- A story from my time at Cory Doctorow’s startup where how I show how hard it is to predict the future.
- 25:51 Learning
- A story from how I landed my job at Auth0, where I had to learn about an unfamiliar platform very quickly.
- The importance of communication when working remotely and keeping Conway’s Law in mind.
- Strip away the technology, and a teacher from hundreds of years ago would still recognize a present-day classroom and the lecture format.
- We share stories about learning by doing, with Om talking about his daughter at med school and me talking about a story about the Logo programming language, where children learned beyond what they were being taught.
- 31:12 Time to Think
- Protecting “quiet time” and “building introspective into a retrospective.”
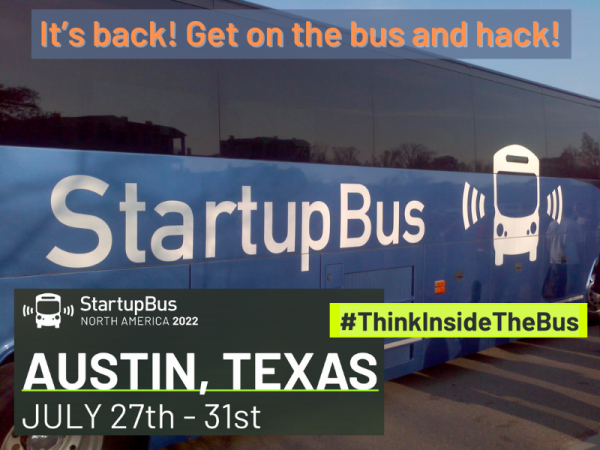
- A quick mention of StartupBus, where I’ll be a conductor this year.
- 37:34 Evolution of Technology & Skills
- Our first computers: I had an Apple //e and Om had a Spectrum ZX, two serious Generation X machines.
- I learned how to program at a computer store that tolerated my hanging out: Batteries Included, in Toronto.
- Learning new languages: Python and Lingo, and picking up new languages to get the job done. This may be the first time on the podcast series where the languages Lisp and Prolog get mentioned.
- A question that Brian asks during interviews: “Tell me about a time in the last 18 months where you did something to update your skills.”
- 44:55 Solving Problems
- Software isn’t a what, it’s a how. If you make software for an industry or field, you’re not in the software industry, but the industry or field that you’re making the software for.
- 47:51 Personal Agility
- Between the pandemic and the current economic situation, you need to develop personal agility to survive and thrive in the current job market.
- A number of people who participated in the Great Resignation left their jobs without having another job to jump to.
- About not participating in what Scott Galloway calls “the menace economy”: “I want to earn fair profit for my effort, but I don’t want to do it by stepping on somebody’s neck.”
- 53:24 Monkeys, a Banana, and a Ladder
- When talking about organizational culture, you’ll eventually come across the “Five Monkeys Experiment,” which we discuss.
- How office architecture mirrors office organization, culture, and hierarchy — and how remote work systems’ architecture will do the same.
- The new generation of workers will probably have to be more adaptable than any previous generation.
- 1:02:18 Returning to the Office
- The majority of a developer’s day requires focus time, and that isn’t often achievable at the office.
- The true hurdle may not be technology or office space, but organization discipline.
- It’s quite possible to kill time unproductively at the office — we’ve all seen this.
- “If you signed a ten-year [office space] lease in 2018, you’re probably really anxious to get people back in there.”
- “Butts in office chairs” is the new “lines of code” metric.
- 1:08:43 The Future
- There’s so much traditional culture force behind the way work is done. Ebenezer Scrooge’s accounting office in A Christmas Carol isn’t all that different from its modern-day counterpart.
- Om: “I like to see a sitcom called The Home Office.”
- 1:13:00 Wrap-Up