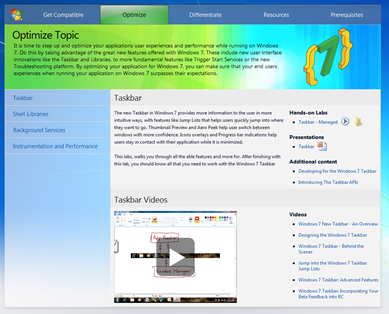
Over at Canadian Developer Connection, my friend and co-evangelist John Bristowe has an article on Develeoper Resources for Getting Started with Windows 7 RTM.

Over at Canadian Developer Connection, my friend and co-evangelist John Bristowe has an article on Develeoper Resources for Getting Started with Windows 7 RTM.

When I read that Twitter and Facebook were attacked for the sake of targeting one guy, my first thought was “Who is this guy, Jason Bourne?”
This article also appears in Canadian Developer Connection.
If you have a TechNet subscription, you’re in luck – you can download the official ISO files for the RTM version of Windows 7, both 32- and 64-bit!
You can grab it right now at: https://technet.microsoft.com/en-ca/subscriptions/securedownloads/default.aspx
My co-worker Rick Claus, Senior IT Pro Evangelist with Microsoft Canada reports that he’s got it up and running on a couple of his boxes and he’s pretty impressed.
Some things to mull over while you’re waiting for the ISOs to download:
This article also appears in Coffee and Code.
 Today’s edition of the Wall Street Journal has an article about the Tragedy of the Commons being played out at coffee shops in New York: No More Perks: Coffee Shops Pull the Plug on Laptop Users.
This excerpt captures the general gist of the article:
Amid the economic downturn, there are fewer places in New York to plug in computers. As idle workers fill coffee-shop tables — nursing a single cup, if that, and surfing the Web for hours — and as shop owners struggle to stay in business, a decade-old love affair between coffee shops and laptop-wielding customers is fading. In some places, customers just get cold looks, but in a growing number of small coffee shops, firm restrictions on laptop use have been imposed and electric outlets have been locked. The laptop backlash may predate the recession, but the recession clearly has accelerated it.
"You don’t want to discourage it, it’s a wonderful tradition," says Naidre’s [a coffee shop in Brooklyn] owner Janice Pullicino, 53 years old. A former partner in a computer-graphics business, Ms. Pullicino insists she loves technology and hates to limit its use. But when she realized that people with laptops were taking up seats and driving away the more lucrative lunch crowd, she put up the sign. Last fall, she covered up some of the outlets, describing that as a "cost-cutting measure" to save electricity.
The conflict between cafe owners and laptop users is nothing new. Back in 2005, the New York Times ran an article titled Some Cafe Owners Pull the Plug on Lingering Wi-Fi Users, and the complaints on both sides don’t sound all that different from those made in the Wall Street Journal article.
The difference, it would appear, is the recession. Rising unemployment means more people hanging out in cafes with their laptops, and the downturn is making cafe owners nervous about “squatters” who use up space and electricity while contributing little back in return. One cafe owner in the article talked about how some ultra-parsimonious customers were bringing in their own food; others brought their own teabags and made use of the free hot water offered at the cafe.
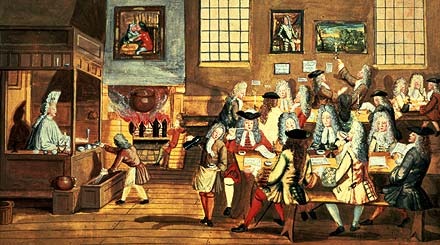
It may seem that cafe-as-workplace is a new phenomenon, but that’s not so. They’ve been places where customers have done work since their debut in the 1650s. Here’s how the Norton Anthology of English Literature describes the early coffeehouses of London:
The first London coffeehouse opened in 1652. Though Charles II later tried to suppress them as "places where the disaffected met, and spread scandalous reports concerning the conduct of His Majesty and his Ministers," the public flocked to them. By 1739 there were 551 coffeehouses in London, including meeting places for Tories and Whigs, people of fashion and haberdashers, wits and clergymen, merchants and lawyers, booksellers and authors, stockjobbers and artists, doctors and undertakers — and politicians of every kind. According to one French visitor, the Abbé Prévost, coffeehouses, "where you have the right to read all the papers for and against the government," were the "seats of English liberty."
The Economist also wrote about coffeehouses in an article comparing them to the internet:
The coffee-houses that sprang up across Europe, starting around 1650, functioned as information exchanges for writers, politicians, businessmen and scientists. Like today’s websites, weblogs and discussion boards, coffee-houses were lively and often unreliable sources of information that typically specialised in a particular topic or political viewpoint. They were outlets for a stream of newsletters, pamphlets, advertising free-sheets and broadsides. Depending on the interests of their customers, some coffee-houses displayed commodity prices, share prices and shipping lists, whereas others provided foreign newsletters filled with coffee-house gossip from abroad.
Rumours, news and gossip were also carried between coffee-houses by their patrons, and sometimes runners would flit from one coffee-house to another within a particular city to report major events such as the outbreak of a war or the death of a head of state. Coffee-houses were centres of scientific education, literary and philosophical speculation, commercial innovation and, sometimes, political fermentation. Collectively, Europe’s interconnected web of coffee-houses formed the internet of the Enlightenment era.
Then, as now, they functioned as what sociologists like to call “Third Places”: places that are neither home (the “First Place”) nor work (the “Second Place”), but a place that functions a community gathering place where broader, and often more creative social interactions happen. Cafes, community centres, churches, pubs in the U.K., town squares, open-air basketball courts, the parking lots of 7-11s and hackerspaces like Toronto’s HacklabTO are all third places.
Perhaps it’s the North American approach. People lingered in cafes before the laptop era, and before the rise of coffee chains like Starbucks, which are as ubiquitous as hamburger chains. Benjamin Hoff wrote about both in The Tao of Pooh:
In China, there is the Teahouse. In France, there is the Sidewalk Cafe. Practically every civilized country in the world has some sort of equivalent–a place where people can go to eat, relax, and talk things over without worrying about what time it is, and without having to leave as soon as the food is eaten. In China, for example, the Teahouse is a real social institution. Throughout the day, families, neighbors, and friends drop in for tea and light food. They stay as long as they like. Discussions may last for hours. It would be a bit strange to call the Teahouse the nonexclusive neighborhood social club; such terms are too Western. But that can roughly describe part of the function, at least from our rather compartmentalized point of view. "You’re important. Relax and enjoy yourself." That’s the message of the Teahouse.
What’s the message of the Hamburger Stand? Quite obviously, it’s: "You don’t count; hurry up."
(The hamburger stand message isn’t limited to hamburger stands anymore, and it’s not simply implied either: many branches of Tim Hortons actually have signs announcing a twenty-minute limit on seating.)
If cafes are going to discourage laptop use, are they also going to discourage other kinds of work or lingering? Students have used cafes as places to do homework or hold study groups long before laptops, and there’s also the time-honoured tradition of enjoying a book with a cup of coffee at the local coffeehouse. Or is the laptop (symbolic of work) and the act of plugging into an outlet (a symbol that some might interpret as being a leech) the only mark of a good-for-nothing customer?
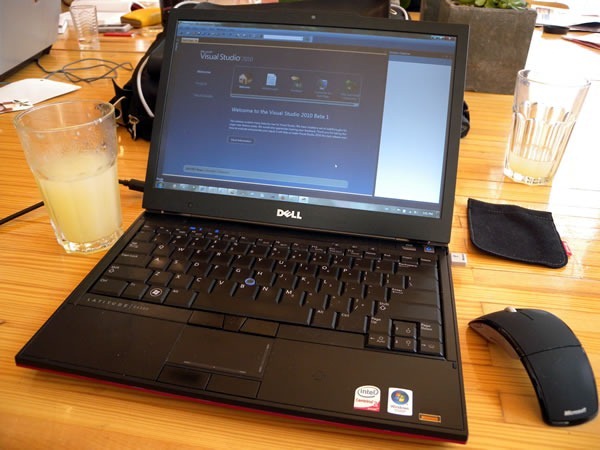
The first thing to remember is not think of it as the cafe owners declaring war on their customers. Cafe owners are in business to make a living, and they do this by selling their wares. If you’re going to hang out at a cafe for a long time, “pay the rent”! They offer their seats and tables in the understanding that you’ll buy something. My rule of thumb is to buy something regularly while you’re there – at least a large cup of coffee every hour.
Cafes that serve lunch or dinner and have large “rushes” should consider disallowing laptop use during those periods. It’s an approach that Panera, a sandwich-and-coffee chain that caters to the freelance and mobile worker crowd, uses. They very clearly state the rules on signs on the table, and from what I can tell, it works.
Know your cafe. Just as different restaurants and bars expect different kinds of clientele and behaviour, so do different places that sell coffee. Some places are perfunctory coffee dispensers, where they expect you to get your coffee and then get the hell out. Others encourage conversation, or are date-y places. The trick for the mobile worker is to find a place that encourages (or at least doesn’t shoo away) laptops. Cafes in neighbourhoods near startups and other “creative class” workplaces tend to be most tolerant. as are places that cater to students.
Know the people at the cafe. Working out of a cafe is so much better when you have a relationship with the owners and employees. It fosters understanding and makes it more likely that you won’t get the boot. You might even make some new friends. Hey, you might even start a relationship, but speaking from personal experience, I must tell you that it’s not without its risks.
Finally, remember that it’s possible to write customer-ready software at a cafe. I wrote good chunks of some of my best software at a cafe, as did the guys from Delicious Monster.
 Over at Canadian Developer Connection, the blog I’m actually paid to write for, I’m asking readers – presumably Canadian software developers who write code for Microsoft’s platforms – if they write code in Visual Basic. I’ve posted code in C# and (Iron)Ruby, plan to post code in (Iron)Python, F# and JavaScript, but none in Visual Basic.
Since you make an ass out of umption when you make an assumption, I thought’s I’d ask if the Canadian Developer Connection readership coded in VB, and thus far, the answers run the gamut from “no” to “only if I have to”.
This article also appears in Canadian Developer Connection.

The trouble with a lot of example code covering exceptions is that the examples are often cases in which you shouldn’t be using an exception in the first place. Consider the classic known as “Someone’s trying to divide by zero” – here’s the C# version:
// C#

try
{
    result = dividend / divisor;
}
catch (DivideByZeroException ex)
{
    Console.WriteLine("Idiot.");
}
and here’s the Ruby version:
// Ruby (works in IronRuby too!)

begin
    result = dividend / divisor
rescue ZeroDivisionError
    puts "Idiot."
end

// You have to hand it to Ruby for picking great keywords for
// exception handling. While C# borrowed Java's "try / catch / finally",
// Ruby went with the more macho "begin / rescue / ensure".
// As Yoda himself would say: "Do or do not. There is no try."
The better approach would be to do a little defensive programming and make sure that divisor is non-zero before performing the division operation. So why do tutorials on exception handling almost always bring out the “Someone’s trying to divide by zero” example?
There are two reasons:
The truly exceptional exceptions — I/O errors, timeouts and other things that cause exceptions are a little harder to set up and take more code to handle. Hence the divide-by-zero example; it illustrates try and catch (or rescue in a Ruby block) in a way even the newest newbie can understand.
The problem is that many tutorial authors don’t get any deeper than simply explaining the keywords with simple examples, leading people to misuse exceptions, either as a substitute for checking for preconditions or as an unstructured form of flow control in the style of the much-maligned goto (which in many cases is considered harmful).
Like goto, exceptions are unstructured jumps, which make your program’s flow more complex. Unlike goto, exceptions are computationally “expensive” because of all the extra work involved in setting up and backtracking program flow that comes with a thrown exception.
A good guideline to follow is that exceptions are for exceptional cases. Stuff that you can’t easily predict. You can tell if a division operation is going to result in an undefined result – just look at the divisor! Harder to predict are things like whether a server access will time out or if the hard drive will decide that the moment you’re reading a file is the best possible time to corrupt it. Those hard-to-foresee, believed-to-be-rare, exceptional cases are really what exceptions are meant to handle.
Think of exceptions is as being like the airbags in your car. The idea is that they’re a last resort; they’re no substitute for defensive driving. (Like airbags, they’re also expensive to reset.)
Lee Dumond goes into further detail on the topic of defensive programming as being like defensive driving in an article titled Defensive Programming, or Why Exception Handling Is Like Car Insurance. He cites the “Someone’s trying to divide by zero” example, provides a list of defensive programming strategies that you should consider before coding up that exception handler and talks about those exceptional cases when you will have to use an exception. Check it out!
For more comics like this, see www.slowwave.com.