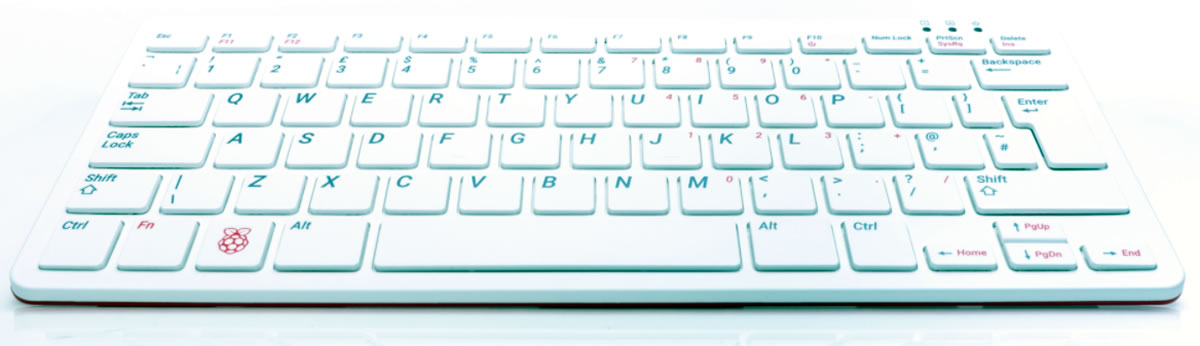
The Raspberry Pi 400 — a Raspberry Pi 4 board with 4GB RAM built into a compact keyboard — was announced just today, and the base unit (just the computer built into the compact keyboard) retails for $70!
The computer
The Raspberry Pi 400 is a slightly updated model from last year’s Raspberry Pi 4, and has these specs:
| Feature | Notes |
| Processor | 1.8 GHz ARM Cortex-A72 CPU (A little faster than the Raspberry Pi 4’s 1.5 GHz CPU) |
| RAM | 4 GB |
| Networking |
|
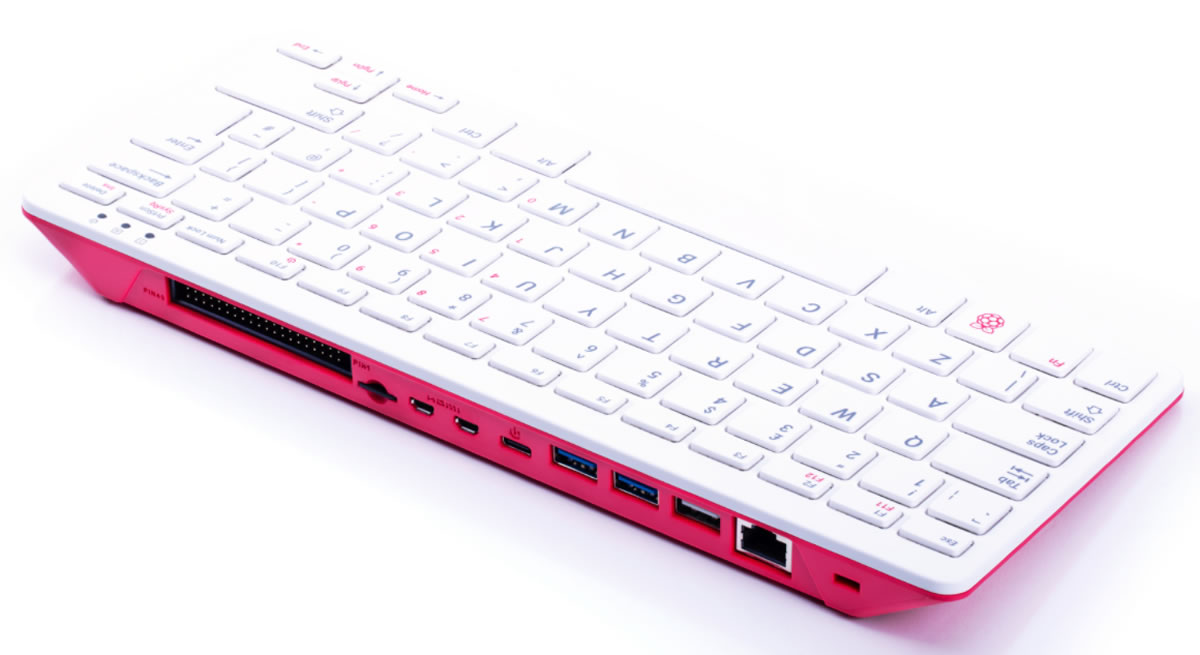
| Video | 2 micro HDMI ports that can each drive 4K/60 Hz video |
| USB |
|
| Power | Provided via adapter and USB-C |
| Additional ports | 40-pin GPIO interface |
The complete kit
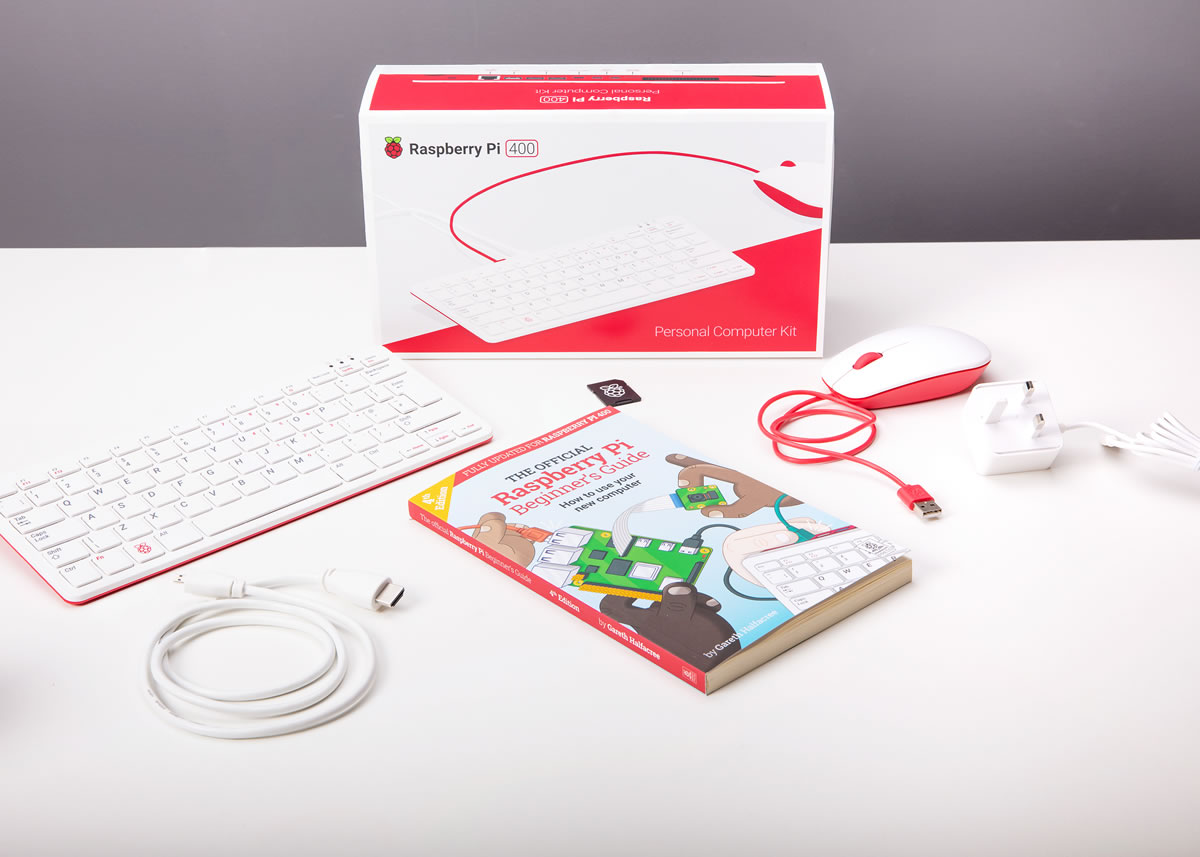
For an extra $30, you can get the kit, which is the complete “ready to go out of the box” package. It starts with the Raspberry Pi 400 computer-in-a-keyboard unit described above, and it adds:
- The official USB mouse
- The official USB-C power supply
- An SD card with Raspberry Pi OS pre-installed
- A micro HDMI to HDMI cable
- The Official Raspberry Pi Beginner’s Guide
The kind of computer that hasn’t been seen since the 1980s
Let’s quickly take stock of what you get with just the Raspberry Pi 400, never mind the kit:
- A fully-equipped computer with a decent processor, decent RAM, wifi/wired/Bluetooth networking with 2 fast USB ports to spare once you’ve plugged a mouse into the slower one.
- A computer that you can do hardware experiments with, thanks to its GPIO pins, and an abundance of hobbyist-focused expansion kits.
- A computer that you can plug into your TV.
- A computer that costs $100.
There hasn’t been a computer like this since the machines pictured below came out…
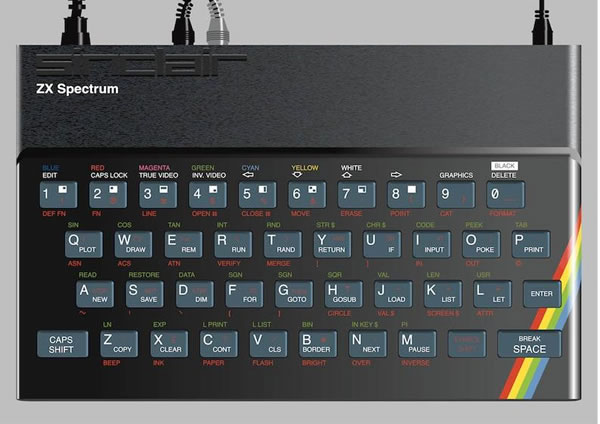
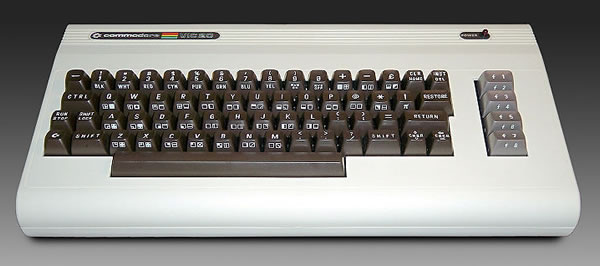
…and those machines couldn’t hold a candle to the proper desktops of that era.
On the other hand, you’ll find that the Raspberry Pi 400 can easily keep up with the sort of computer that gets issued for standard office work. You could easily use it to do schoolwork or office work, and it’s actually a decent Linux software development machine and retro-style gaming console, too! And with its expansion capabilities, it’s an excellent machine for IoT and sensor projects.
This is the sort of machine that children of the 1980s and early 1990s learned on, many of whom are today’s techies…
…and this machine will probably be the machine that a lot of children of the 2020s will cut their programming teeth on, and who’ll be the techies of the 2040s and 2050s.
Given a choice between a Chromebook and a Raspberry Pi 400, I’d take the Pi, because I can do a lot more with it. In fact, I might be able to do a lot of my new job with it (which is something I might try soon, just to see what happens).
By the bye, keep an eye on this blog for a new feature: Cobra Pi, which covers programming on the Raspberry Pi, and whose motto is: “Code hard! Fail fast! No latency!”
It’ll cover all sorts of cool programming tips, tricks, and techniques on the Raspberry Pi, including JavaScript, Python, and even C and ARM assembly language!