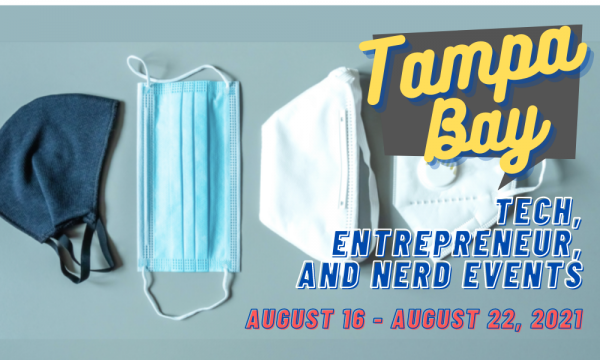
Here’s your weekly list of tech, entrepreneur, and nerd events — plus a little area tech news — for Tampa Bay and surrounding areas for the week of Monday, August 23 through Sunday, August 29, 2021.
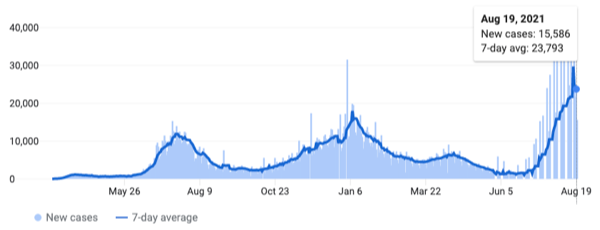
Due to the recent steep climb in the number of COVID cases, I’m limiting the events listed to online ones for the time being.
This is a weekly service from Tampa Bay’s tech blog, Global Nerdy! For the past four years, I’ve been compiling a list of tech, entrepreneur, and nerd events happening in Tampa Bay and surrounding areas. There’s a lot going on in our scene here in “The Other Bay Area, on the Other West Coast”!
As far as event types go, this list casts a rather wide net. It includes events that would be of interest to techies, nerds, and entrepreneurs. It includes (but isn’t limited to) events that fall under the category of:
- Programming, DevOps, systems administration, and testing
- Tech project management / agile processes
- Video, board, and role-playing games
- Book, philosophy, and discussion clubs
- Tech, business, and entrepreneur networking events
- Toastmasters (because nerds really need to up their presentation game)
- Sci-fi, fantasy, and other genre fandoms
- Anything I deem geeky
I’m moving this list to Fridays so that you’ve got more time to plan for the upcoming week. Let me know if this change works for you (or if it doesn’t)!
By “Tampa Bay and surrounding areas”, this list covers events that originate or are aimed at the area within 100 miles of the Port of Tampa. At the very least, that includes the cities of Tampa, St. Petersburg, and Clearwater, but as far north as Ocala, as far south as Fort Myers, and includes Orlando and its surrounding cities.
This week’s events
Monday, August 23
- Christian Professionals Network Tampa Bay — Live Online Networking- Monday @ 11:30 AM to 12:30 PM EDT
- Entrepreneurs & Business Owners of Sarasota & Bradenton — Virtual Networking Lunch Monday & Wednesday @ 11:30 AM to 1:00 PM EDT
- Entrepreneurs Empower Empire — Official Meeting- Linkedin Business Strategies @ 11:30 AM to 1:30 PM EDT
- Wesley Chapel, Trinity, New Tampa Business Professionals — Lutz, Wesley Chapel, New Tampa Virtual Networking Lunch @ 11:30 AM to 1:00 PM EDT
- Toastmasters District 48 — Tampa Toastmasters Club 1810!! @ 6:30 PM to 8:30 PM EDT
- Toastmasters District 48 — Cool, Confident & Politically Imperfect Toastmasters @ 6:45 PM to 8:00 PM EDT
- Nerd Night Out — NB Online Anime Watch Party @ 7:00 PM to 10:00 PM UTC
- Toastmasters District 48 — Stirling Toastmasters Club #7461614 @ 7:00 PM to 8:30 PM EDT
- Tampa Bay Women in Tech — Monday Night Pulse Check @ 7:00 PM to 8:30 PM EDT
Tuesday, August 24
- Young Professionals of Tampa Bay Networking Group — Carrolwood Networking Breakfast Tuesday & Thudsday @ 7:30 AM to 9:00 AM EDT
- Toastmasters District 48 — Venice Area Toastmasters Club #5486 @ 7:30 AM to 9:00 AM EDT
- Bootstrappers Breakfast® – Tampa Bay Area — East Coast Bootstrappers Breakfast® @ 8:30 AM to 10:00 AM EDT
- Tampa Bay Tech Career Advice Forum — Creating a Professional Brand @ 10:00 AM to 11:30 AM EDT
- Keystone Mastermind Alliance – KMA Network — Weekly Connect & Accountability – ZOOM at NOON @ 12:00 PM to 1:30 PM EDT
- Toastmasters District 48 — St. Petersburg Toastmasters Club #2284 @ 6:30 PM to 8:30 PM EDT
- Toastmasters District 48 — Brandon Toastmasters Club @ 7:00 PM to 8:30 PM UTC
- Toastmasters District 48 — Dunedin Toastmasters Club #2166 @ 7:00 PM to 8:30 PM UTC
- Shut Up & Write!® Tampa — Online Event: Shut Up & Write on Zoom @ 7:45 PM to 9:15 PM EDT
- Thinkful Tampa | Careers in Tech — Thinkful Webinar | Data Science: Tools Of The Trade @ 9:00 PM to 11:00 PM EDT
Wednesday, August 25
- North Tampa Networking Group — Business networking @ 9:00 AM to 10:00 AM EDT
- 1 Million Cups Orlando @ 9:00 AM
- 1 Million Cups St. Pete @ 9:00 AM
- 1 Million Cups Tampa — MENNITI / Mrs. Fiesta @ 9:00 AM
- Success Strategies for Business Owners — Summer Technology Tune-up – GMAIL August Series @ 12:00 PM to 1:00 PM EDT
- Central Florida Options Group — Monthly Meetup- Online @ 6:00 PM to 7:30 PM EDT
- Around The World: International Book Club – Metrowest — PAKISTAN/IRAQ: The Bad Muslim Discount – Syed M. Masood @ 6:00 PM to 8:00 PM UTC
- Florida Association of Veteran Owned Businesses — Orlando AUGUST After Hours @ 6:00 PM to 8:00 PM UTC
- Code Katas — Virtual – Monthly Code Kata sponsored by Proforma @ 6:30 PM to 8:30 PM
- Tampa Writers Alliance — Tampa Writers Alliance Critique Group @ 6:30 PM to 8:30 PM EDT
- GDG SunCoast — Android Study Jams @ 7:00 PM to 8:00 PM
- Port Charlotte Writers Group — August 25th Port Charlotte Writers Group Zoom meeting (Corrected Title) @ 7:00 PM to 9:00 PM EDT
Thursday, August 26
- Orlando Social Media Enthusiasts — FREE WEBINAR: 5 Proven Ways to Boost Sales with Social Media @ 1:00 PM to 2:00 PM EDT
- Tampa Social Media Enthusiasts — FREE WEBINAR: 5 Proven Ways to Boost Sales with Social Media @ 1:00 PM to 2:00 PM EDT
- StartUp Xchange — Product Discovery Coffee Chat/Monthly Video Conference @ 2:30 PM to 4:00 PM EDT
- Pinellas Tech Network — Do This, Not That: The Low-Down on Artificial Intelligence @ 6:00 PM to 7:00 PM EDT
- Tampa Cybersecurity Meetup | Flatiron School — Women Talk Tech Panel @ 7:30 PM to 9:00 PM EDT
- Learn Cybersecurity Tampa | Flatiron School — Women Talk Tech Panel @ 7:30 PM to 9:00 PM EDT
- North Florida Stock Investing Education — StockUp: Reflections of a Lifelong Better Investor @ 8:30 PM to 10:00 PM EDT
- MOMS Club of Clearwater North — Book Club @ 8:30 PM to 10:30 PM UTC
Friday, August 27
- Homebrew Hillsborough — August 2021 VIRTUAL Homebrew Hillsborough: HCC InLab @ 8:30 AM to 10:30 AM EDT
- Tampa Bay Tech Career Advice Forum — Overcoming Ageism in Your Job Search @ 10:00 AM to 11:30 AM EDT
- Black Expressions Book Club (BEBC) — Black Leopard, Red Wolf Discussion @ 7:00 PM to 10:00 PM UTC
Saturday, August 28
Sunday, August 29
Do you have any events or announcements that you’d like to see on this list?
Let me know at joey@joeydevilla.com!
Join the mailing list!
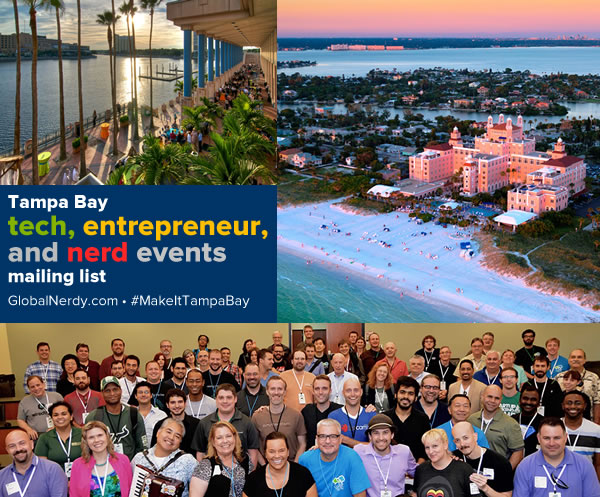
If you’d like to get this list in your email inbox every week, enter your email address below. You’ll only be emailed once a week, and the email will contain this list, plus links to any interesting news, upcoming events, and tech articles. Join the Tampa Bay Tech Events list and always be informed of what’s coming up in Tampa Bay!