Every week, I compile a list of events for developers, technologists, nerds, and tech entrepreneurs in and around the Tampa Bay area. There’s a lot going on this week — check out these events!
Monday, January 29
- Eat, Drink, Cryptocurrency @ Barbara S. Ponce Public Library, 6:30 PM to 8:00 PM
- Social Justice Tech Meetup — Think, Talk, Do Time @ The HIVE (3rd floor, John F. Germany Library), 6:30 PM to 8:00 PM
- R-Ladies Sarasota — Introduction to R @ 6:30 PM to 8:30 PM
- Cool ‘n Confident Toastmasters @ SPC – St. Petersburg/Gibbs Campus, 6:30 PM to 7:45 PM
- MR101: Intro to Drones (Multi-Rotors) @ Tampa Hackerspace, 7:00 PM to 9:00 PM
- YouTube Support Group — Generate more profits from your customers! @ St. Petersburg College, 7:00 PM to 9:00 PM
- Tampa Education & Technology Meetup — Learn Microsoft Office – Word, Creating an APA paper @ Keiser University – Tampa Campus, 7:00 PM to 9:00 PM
- Nerdbrew Trivia — Pints & Pixels + STREET FIGHTER TOURNAMENT! @ Brew Bus, 7:00 PM to 11:00 PM
Tuesday, January 30
- Westshore Toastmasters @ FIVE Labs, 12:00 PM to 1:00 PM
- Facebook Advertising Training for Small Business – Tampa @ Florida Executive Realty, 4:00 PM to 6:00 PM
- Front End Creatives — Design Systems: Building Component Libraries in Sketch @ Bisk Education, 4:30 PM to 6:30 PM
- Brandon Boardgamers — Tuesday Night Gaming @ Cool Stuff Games, 5:00 PM to 8:00 PM
- One More Customer, Tampa FL — Simple Practices and Habits Taking Your Business from Average to Amazing! @ Glory Days Grill, 5:30 PM to 7:00 PM
- Weekly Open Make Night @ Tampa Hackerspace, 6:00 PM to 10:00 PM
- St Petersburg Live Event for E-Business Owners & Online Marketing Newbies! @ Marriott Hotel, St. Petersburg, 6:00 PM to 8:00 PM
- Tampa iOS Meetup — Building database-backed iOS apps with Realm @ Sourcetoad, 6:30 PM to 8:30 PM
- Game Club Tampa Meetup — Tuesday Nite Roleplayers (RPGs) (LFP) @ Grand Arena of Mind Expansion, 6:30 PM to 9:30 PM
- New Port Richey WordPress — SEO in 2018 – Guidance for your WordPress site & Small Medium Business (SMB) @ Imagine-Invent-Create, 7:00 PM to 9:00 PM
- Girl Develop It Tampa Bay — Brews & Bytes @ 3 Daughters Brewing, 7:00 PM to 9:00 PM
- St. Pete Beers ‘n Board Games Meetup for Young Adults @ Flying Boat Brewing Company, 7:00 PM to 10:00 PM
- Star Wars: Destiny Organized Play @ Armada Games, 7:30 PM to 10:30 PM
Wednesday, January 31
- 1 Million Cups St. Pete — Podfest MultiMedia Expo and CrowdSync @ St. Petersburg Greenhouse, 9:00 AM
- 1 Million Cups Tampa — Solutions for Environment, Economy, and Democracy (SEED) and PROVEIT @ Mark Sharpe Entrepreneur Collaborative Center, 9:00 AM
- CTO School Tampa Bay — January CTO School: Elias Torres @ 5:00 PM to 7:00 PM
- January 2018 StartUp Xchange @ Pour Taproom, 5:00 PM to 7:00 PM
- Tampa Test Automation — Specflow+Selenium: Supporting Business Driven Testing @ AgileThought, 5:30 PM to 7:30 PM
- (Monthly) Azure User Group: Azure Data Lake, Azure Analyses Services and PowerBI @ Tribridge Inc, 6:00 PM to 8:00 PM
- Tampa Bay IIBA — New Year, New Opportunities: Social Hour @ Coppertail Brewing Co, 6:00 PM to 8:00 PM
- Orlando Internet Marketing Mastermind — Internet Business Masterclass 2017 in Tampa, FL @ Marriott Hotel, 1001 N Westshore Blvd, Tampa, 6:00 PM to 8:00 PM
- Grand Gamers of St. Petersburg Board Game Night @ Critical Hit Games, 6:00 PM to 11:30 PM
- Crypto Investors Club @ Panera Bread, 1908 4th Street North, Saint Petersburg, 6:30 PM to 9:00 PM
- Tampa Bay Bitcoin — Bitcoin/Cryptocurrency/Blockchain Meetup: News, Q&A, Networking, Social @ BlockSpaces, 7:00 PM to 10:00 PM
- Tampa Bitcoin and Crypto Wealth Mining — Bitcoin Mining – ICO – Crypto Trading @ Bitcoin Mining Investors, 7:00 PM to 8:30 PM
Thursday, February 1
- Tampa Bay Blockchain Developers Meetup — Open code @ Blockspaces, 5:00 PM to 9:00 PM
- Game Club Tampa Meetup — Play a home brew variant of pathfinder RPG (FULL) @ Grand Arena of Mind Expansion, 5:30 PM to 10:30 PM
- Brandon Boardgamers — Let’s Game on Thursdays @ Panera Bread, 3490 Lithia Pinecrest Road, Valrico, 5:30 PM to 9:30 PM
- The Tampa Bay Strobist and Photoshop Collective — Gear sale/exchange… @ 6:00 PM to 8:30 PM
- TBDUG (Tampa Bay Drupal User Group) Meeting @ Panera Bread, 2285 Ulmerton Road, Clearwater, 6:00 PM to 9:00 PM
- WordPress St. Petersburg — Databases, Migrations and SQL, OH My! Intro to WordPress Database and Migrations @ TEC Garage at SPC Downtown Campus @ 6:30 PM to 8:30 PM
- Largo Board Games Meetup — Hero Realms: Ruin Of Thandar Campaign 2 @ 7:00 PM to 9:00 PM
- Learn Cybersecurity Tampa — Capture The Flag @ SecureSet, 7:00 PM to 9:00 PM
- Nerdbrew Trivia — Boards & Booze! @ Peabody’s Billiards and Games, 7:00 PM to 11:00 PM
- Suncoast.js — Styled Components @ Bank of the Ozarks’ Innovation Lab, 7:00 PM to 9:00 PM
Friday, February 2
- Café con Tampa @ Oxford Exchange, 8:00 AM to 9:00 AM
- Lean Coffee for All Things Agile (St Petersburg) @ Panera Bread, 2285 Ulmerton Road, Clearwater, 7:30 AM to 8:30 AM
- Tampa Bay Young Professionals Group — First Friday, Block Party in Downtown St. Pete @ 6:00 PM to 9:00 PM
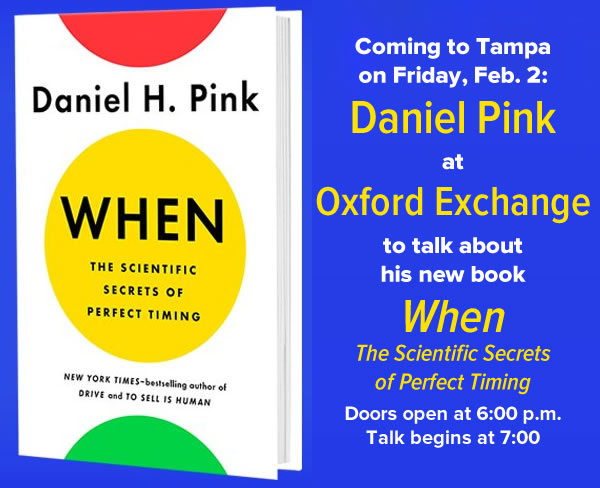
- Author Daniel Pink’s talk and signing for his new book, When: The Scientific Secrets of Perfect Timing @ Oxford Exchange, 6:00 PM
Saturday, February 3
- Chess Republic — Coffee & Chess: Tampa North @ 9:00 AM to 1:00 PM
- Learn to work and fire glass using a kiln (8 week class) @ Tampa Hackerspace, 10:00 AM to 2:00 PM
- Girl Develop It Tampa Bay — Intro to App Building with Salesforce @ The Symphony Agency, Saturday, February 3, 2018, 10:30 AM to Sunday, February 4, 2018, 5:30 PM
- Cigar City Multirotors — Meet, Greet and Fly! @ Hamilton Park, 10:30 AM to 1:30 PM
- Tampa Social Networking Meetup — Food & Craft Beer walking tours @ 1:00 PM to 4:00 PM
- Game Club Tampa Meetup — East Texas University: Sweet heart 243 @ Grand Arena of Mind Expansion, 5:00 PM to 11:00 PM
Sunday, February 4
- Tampa Drones Meetup — Open Fly Day – Fly what you have! @ Sheffield Disc Golf Park, 11:00 AM to 2:00 PM
- The Tampa Bay Strobist and Photoshop Collective — Great Gatsby 1920’s Themed Photo Shoot @ 12:00 PM to 3:00 PM
- Largo Board Games Meetup — Viticulture Essential Edition @ 1:00 PM to 4:00 PM
- Build Your First iPhone App! (Part 2 of 2) @ Tampa Hackerspace, 5:00 PM to 7:00 PM
- Lakeland Bitcoin Club Second Meeting @ Village Inn, 7:00 PM to 8:00 PM